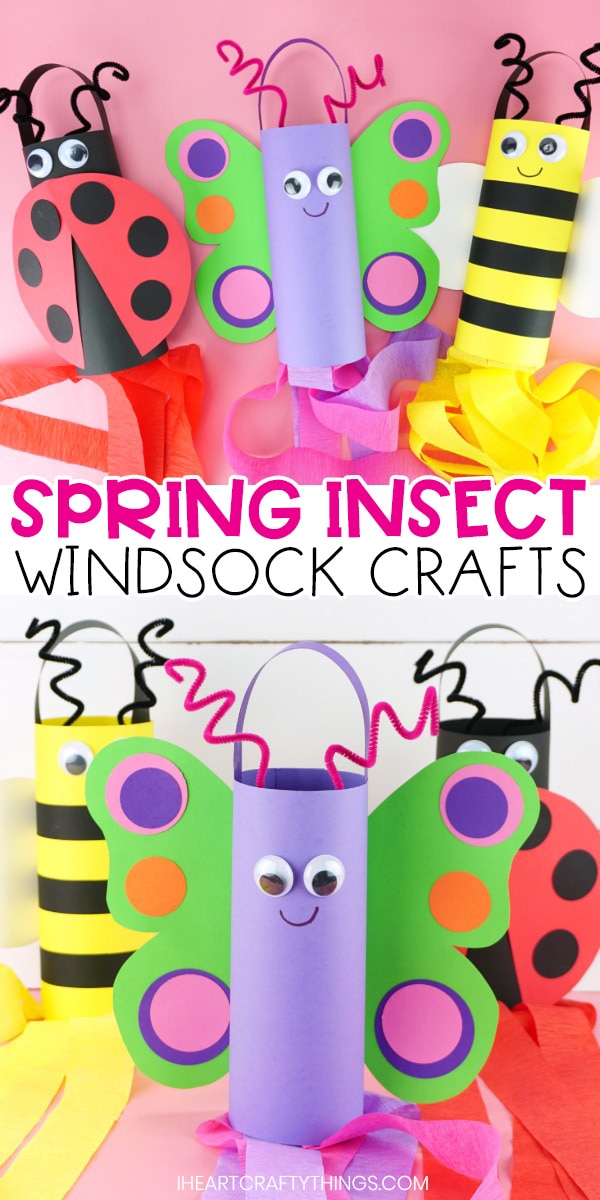
Buying our template pack will make creating your cute ladybug, butterfly and bee windsock crafts a breeze!
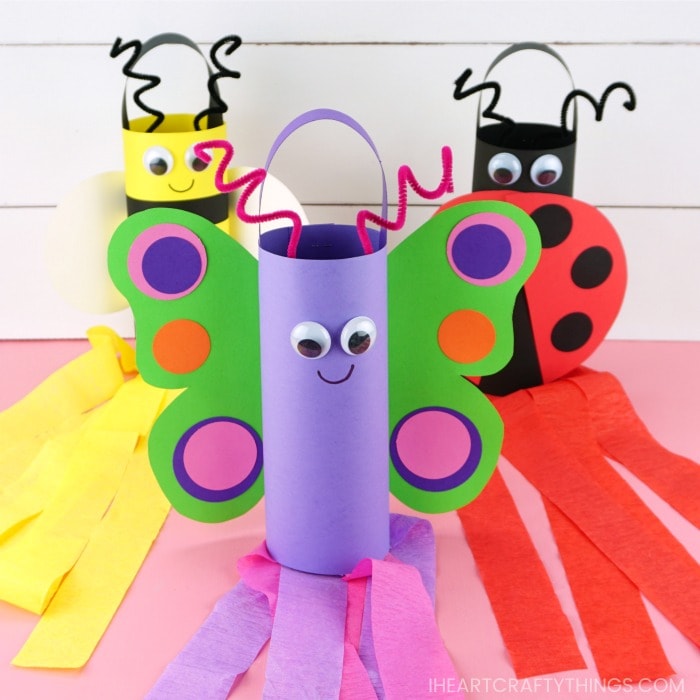
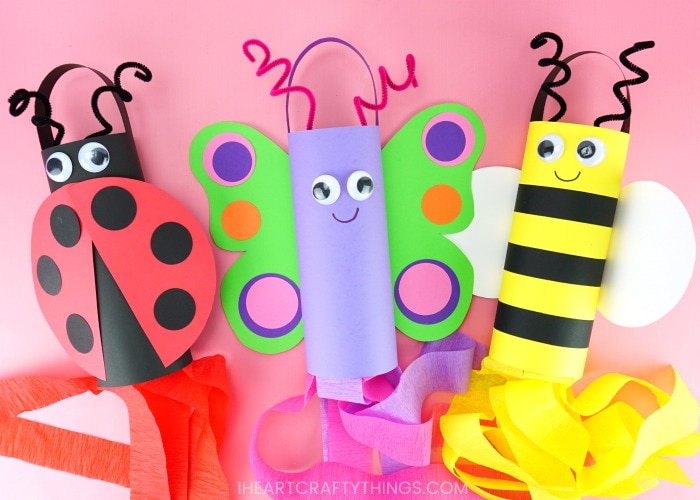
After learning about and observing some insects outdoors, bring the kids indoors to create these fun spring windsocks.
We have three different insects kids will love to create: A butterfly, ladybug and a bee.
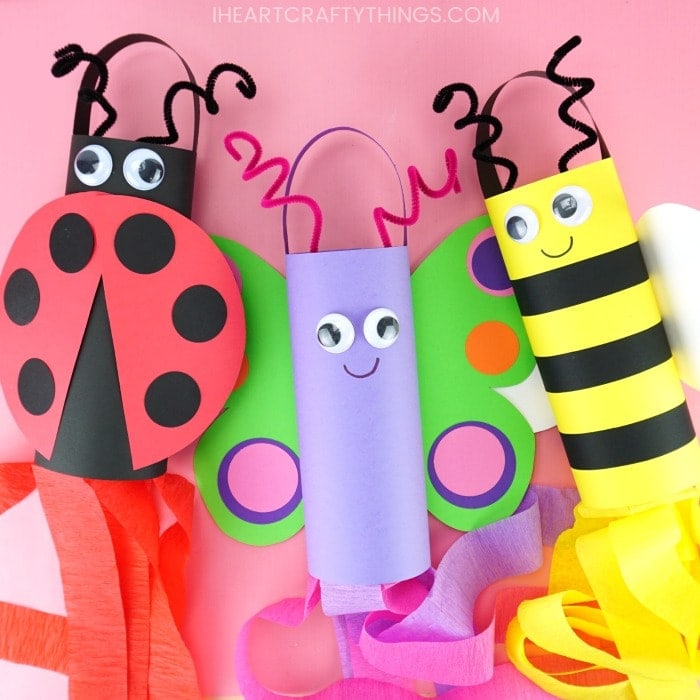
After making their craft, kids can watch the different characters twirl and dance around in the wind.
They would also look fantastic hung up on display in a classroom for spring decorations too.
Try saying that tongue twister 5 times really fast …hee hee!
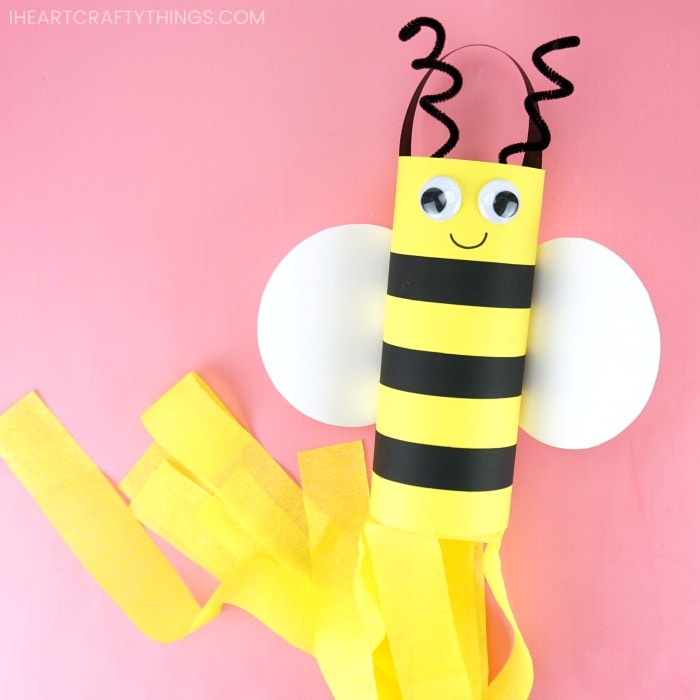
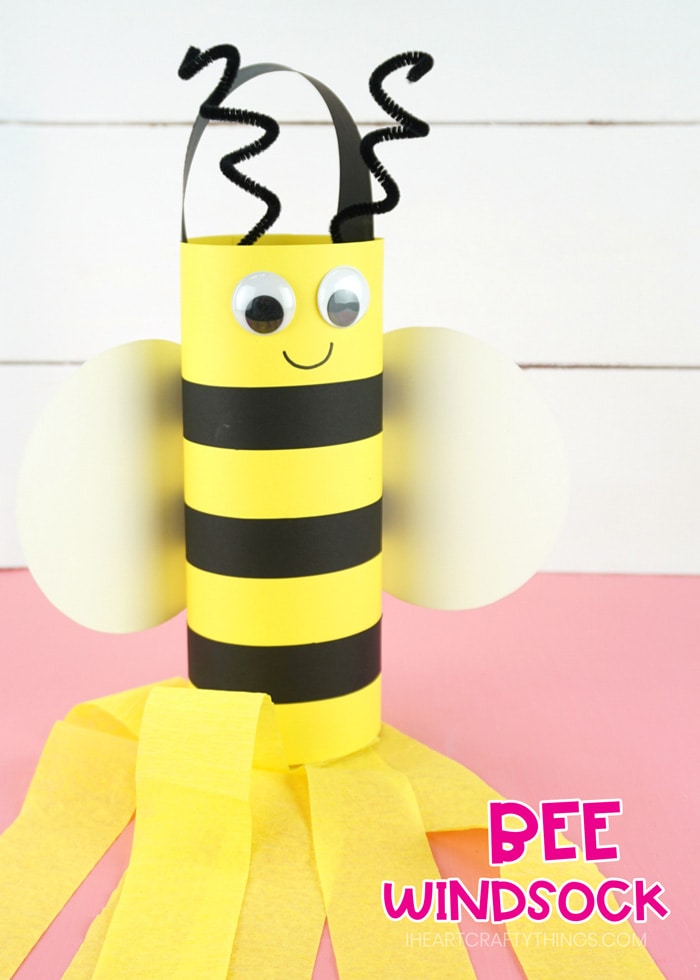
Kids will love making and watching as their bee windsock happily blows around in the wind this spring.
They will also look fabulous hanging up on display for the spring months at home or in the classroom.
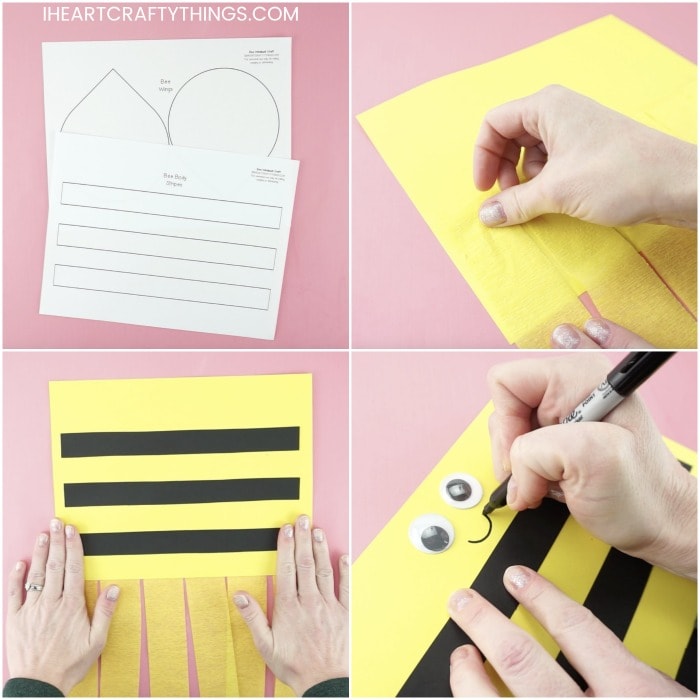
Print and cut out the bee wings and stripes from the template.
Glue them along the bottom one-third of a yellow piece of cardstock paper.
Glue black bee stripes and googly eyes, draw a smile
Turn the yellow cardstock paper over.
Glue each of the three black bee stripes on the front of your windsock.
Glue googly eyes at the top and middle of your bee windsock.
Then draw a smile on your bee with a black marker.
Attach antennae
Wrap two black pipe cleaners around your finger to curl the ends.
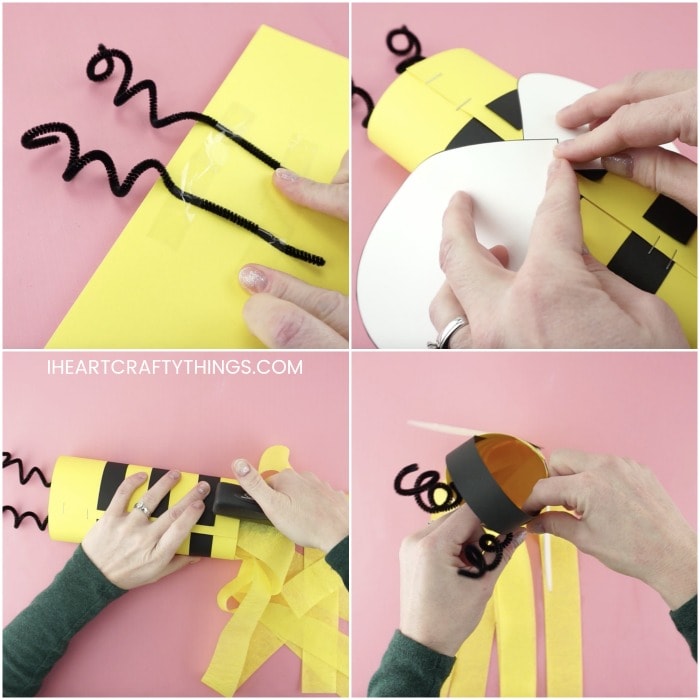
Turn your windsock face down and tape the antennae at the top of the yellow cardstock.
Place two staples at the top and bottom of the windsock to join the ends together.
Hold them in place until they are securely in place.
Create windsock handle
Use the bee stripe template again to cut a black paper strip handle.
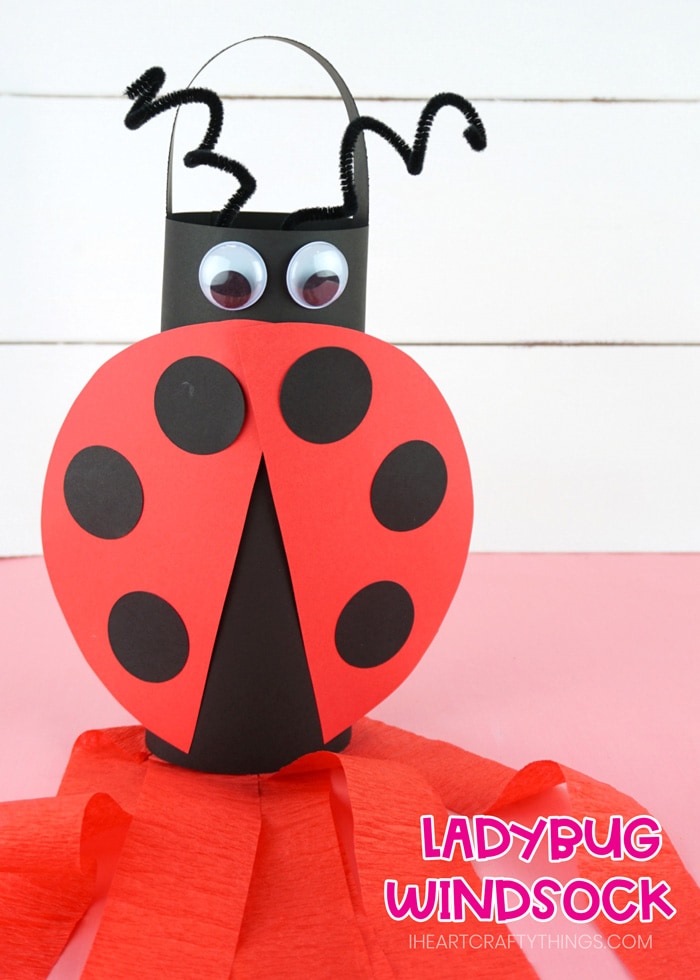
This cute ladybug makes a perfect compliment to our bee and butterfly windsocks.
Include making these adorable ladybug windsocks in your spring insect unit at school or home for loads of fun!
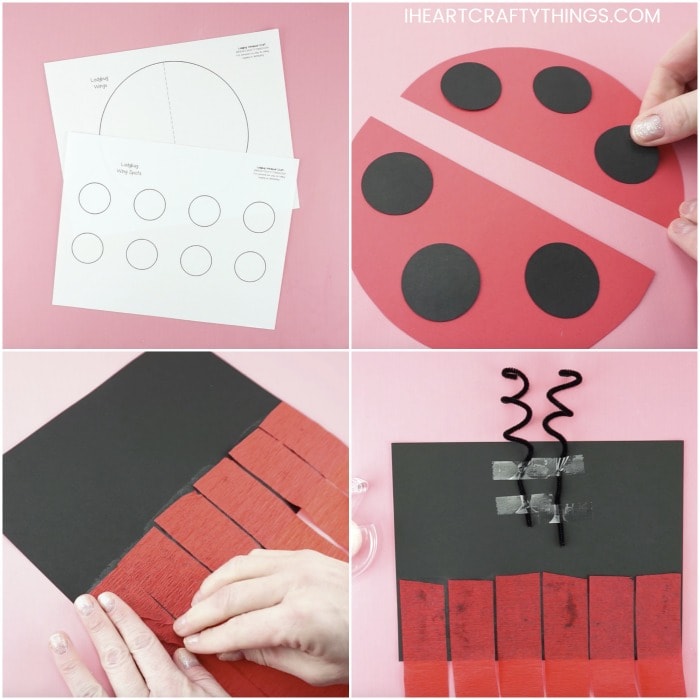
Print and cut out the ladybug wings and spots from the template.
Glue the black circle spots onto the ladybug wings.
Glue them along the bottom one-third of a black piece of cardstock paper.
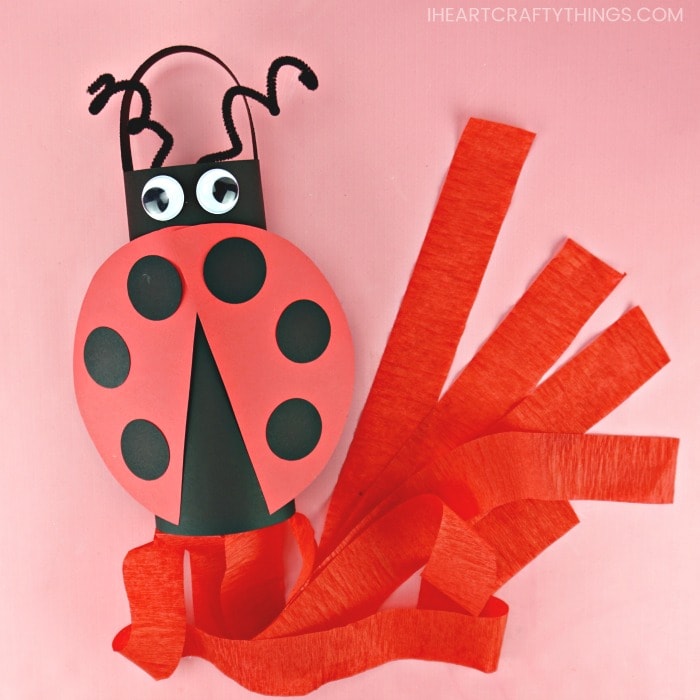
Create antennae
Wrap two black pipe cleaners around your finger to curl the ends.
Tape the antennae at the top of the black cardstock.
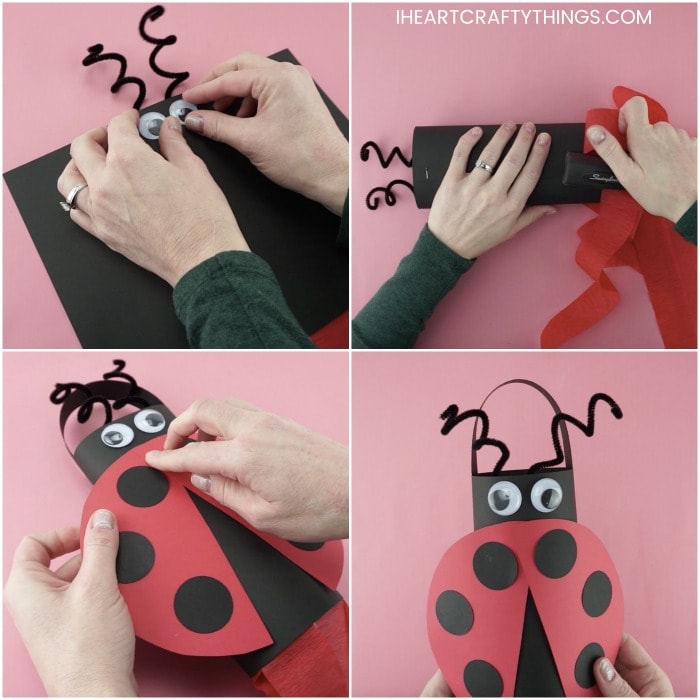
Glue eyes
Turn your ladybug windsock face up.
Glue googly eyes at the top of your ladybug.
Place two staples at the top and bottom of the windsock to join the ends together.
Hold them in place until they are securely in place.
Create windsock handle
Use the bee stripe template from the pack to cut a black paper strip handle.
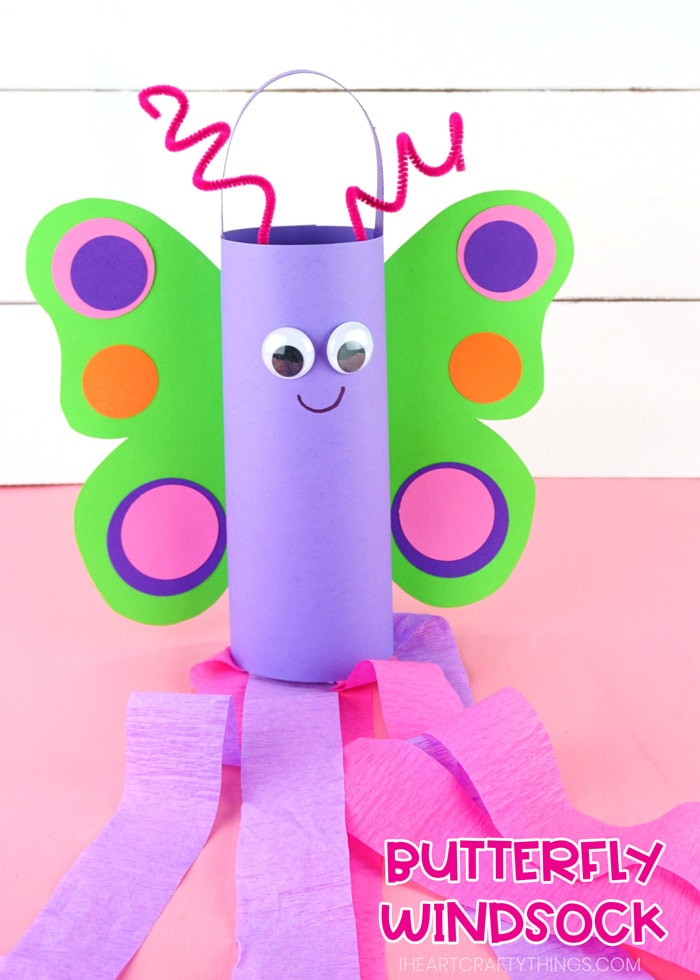
Bring the spring fun indoors by creating a pretty butterfly windsock.
Kids can use different colors for each of their butterflies to customize them and make each look perfectly unique.
Print and cut out the butterfly wings and circles from the template.
Glue the circles from the template onto each of the butterfly wings to add designs to them.
Glue them along the bottom one-third of a piece of cardstock paper.
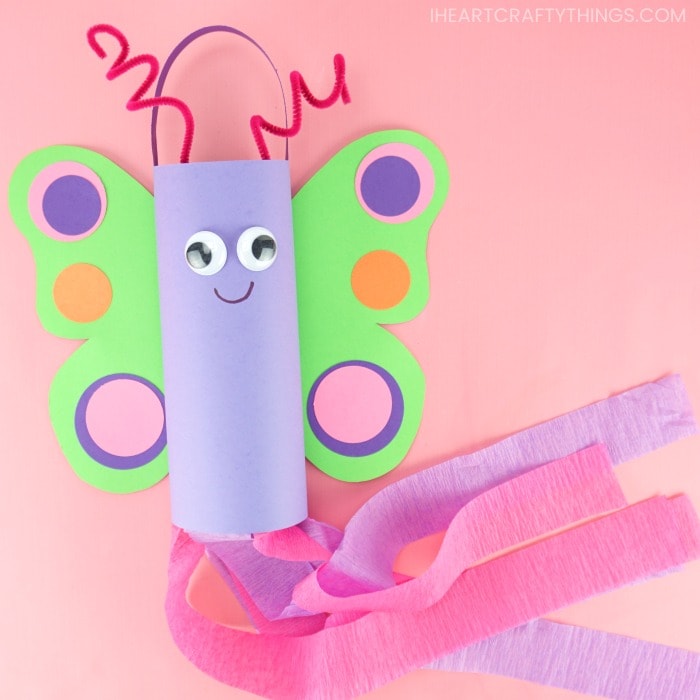
Wrap two pipe cleaners around your finger to curl the ends.
Tape the antennae at the top of the butterfly windsock.
Glue eyes, draw a smile
Turn your butterfly windsock face up.
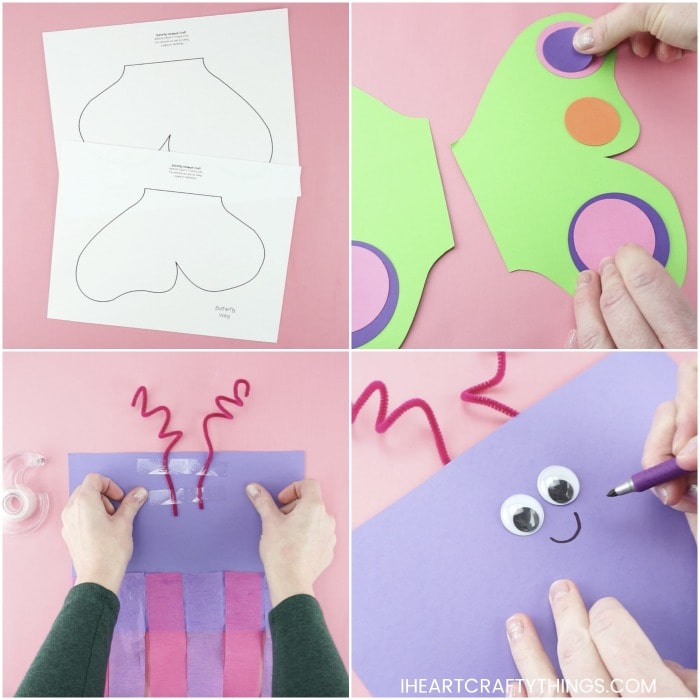
Glue googly eyes on your butterfly.
Then draw a smile on your butterfly with a marker
5.
Place two staples at the top and bottom of the windsock to join the ends together.
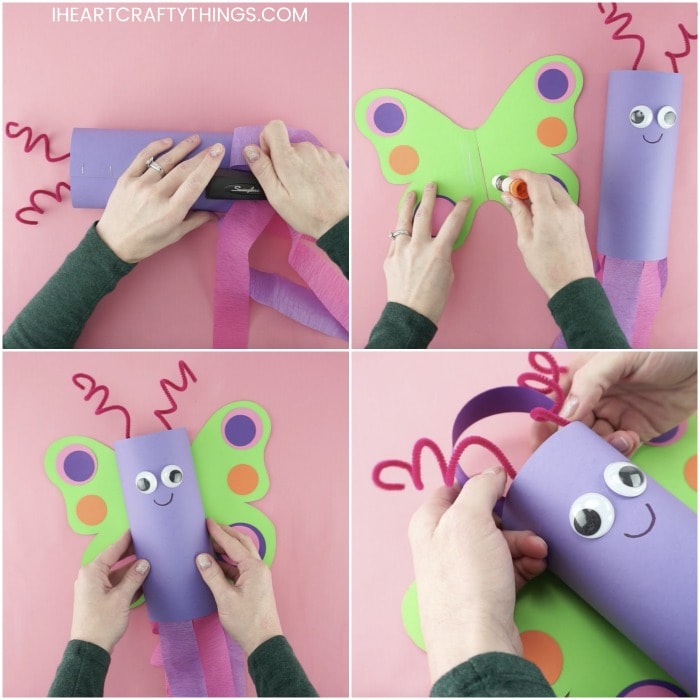
Glue windsock in the center of the wings
Place the two butterfly wings together.
Add a generous amount of glue on the ends of each wing.
Place your windsock in the center of the wings to adhere the wings to the back of the windsock.
Use the bee stripe template from the pack to cut a paper strip handle.