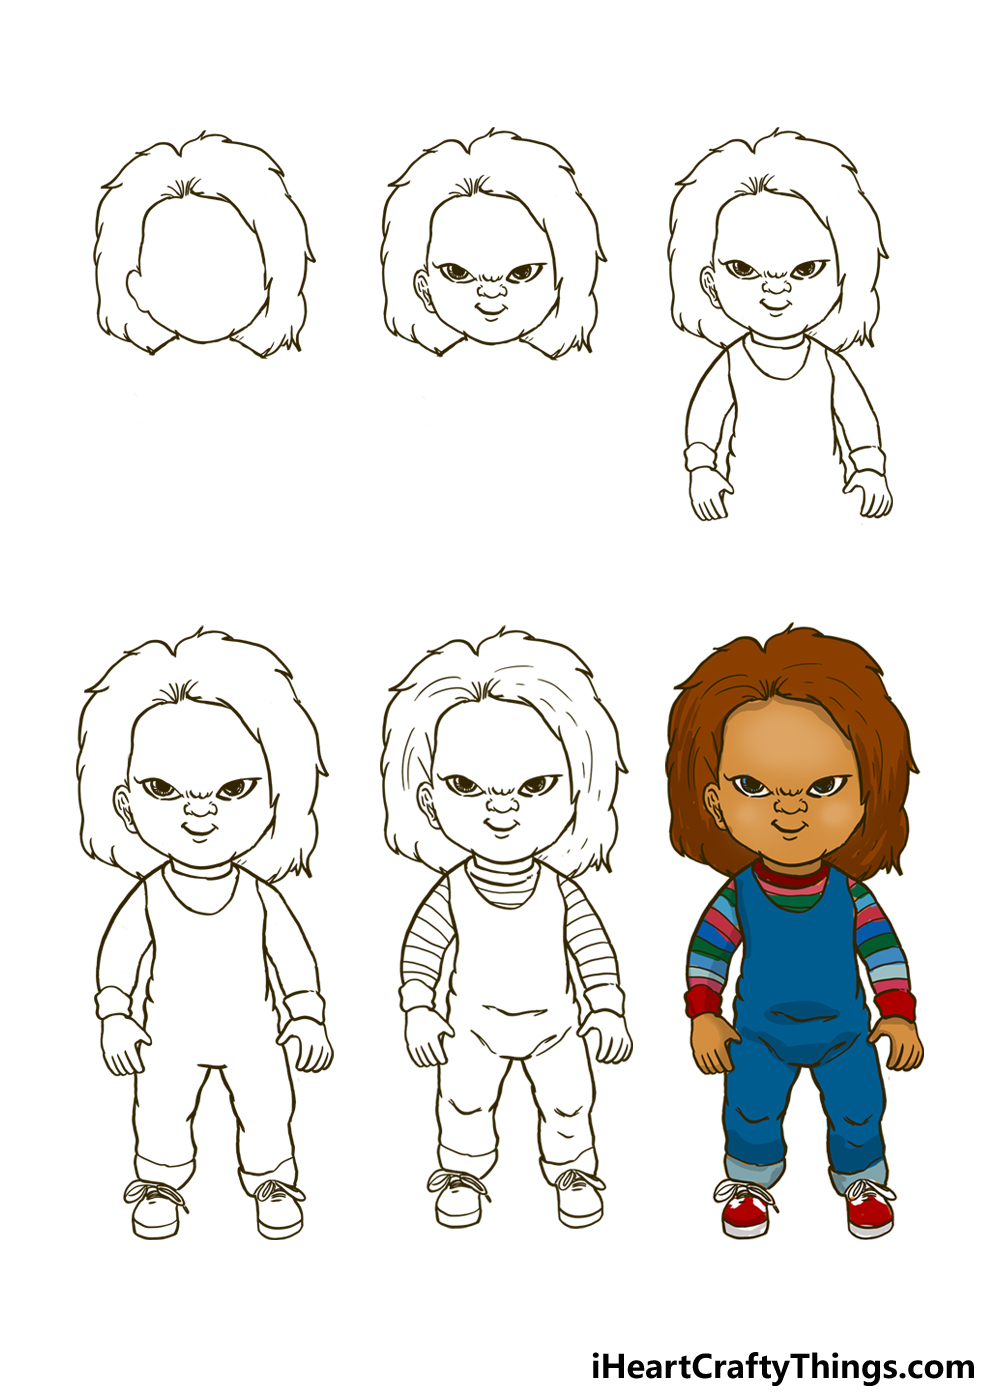
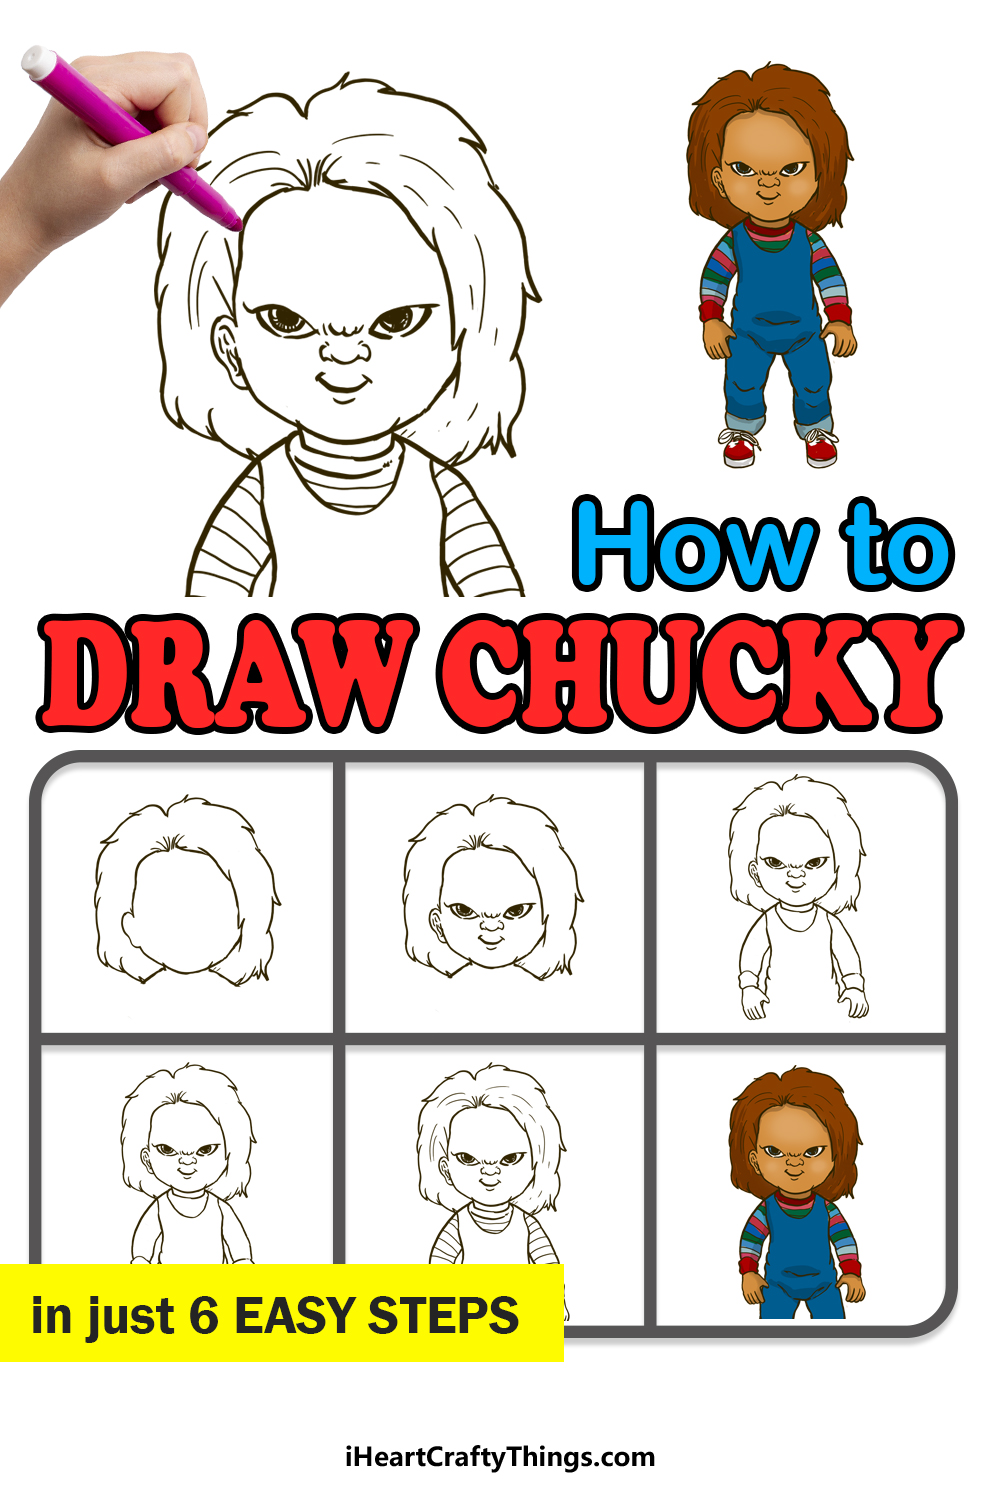
Chucky Drawing in just 6 Easy Steps!
This horror villain may be scary, but learning how to draw Chucky doesnt have to be!
This guide for kids will teach anyone how to draw a detailed version of this icon of terror.
In 1988, the world was introduced to Chucky in the film Childs Play.
unlike horror villains like Michael Myers or Jason Voorhees, Chucky was much smaller in stature.
An infamous killer takes control of a childs doll and goes on a rampage while controlling it.
This first film led to many sequels and even a TV series.
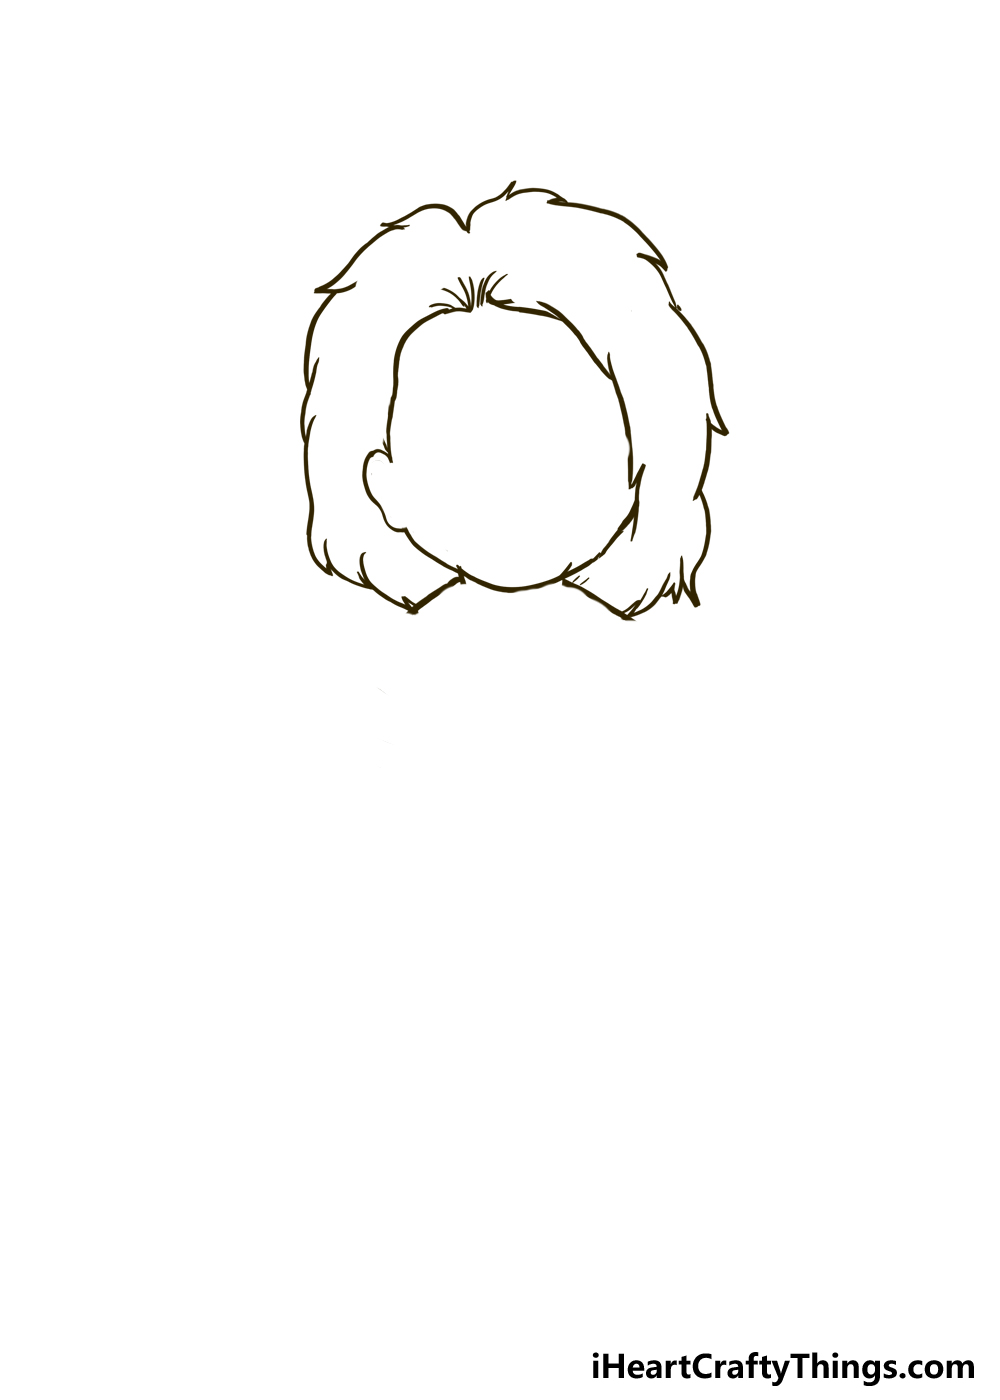
For now, we will begin with the outline for the face and hair of Chucky.
Using this pencil guide along with the reference image, carefully draw the face outline.
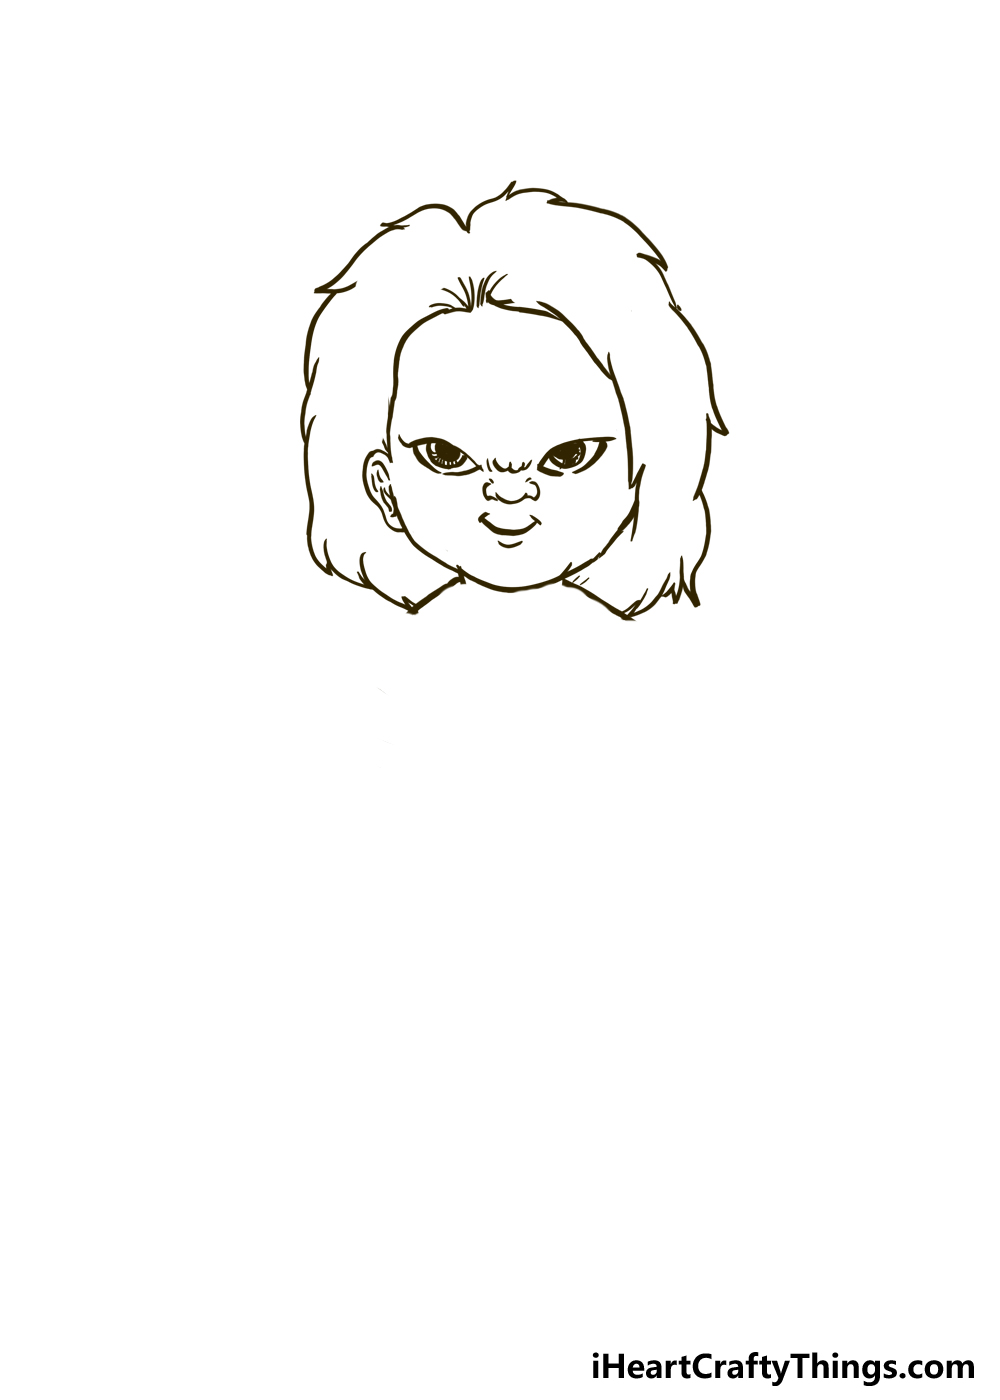
First, we will draw the eyes.
To do this, we will be placing his eyes a little bit lower than halfway down his face.
Inside the eyes, we will give him big, round pupils.
Finally, we will draw his mouth.
In this design, we have Chucky smiling, but its not a friendly smile.
Luckily, the prospect of drawing this smile is less intimidating than it looks.
Simply draw a curved line with a smaller one beneath it to portray his scary grin.
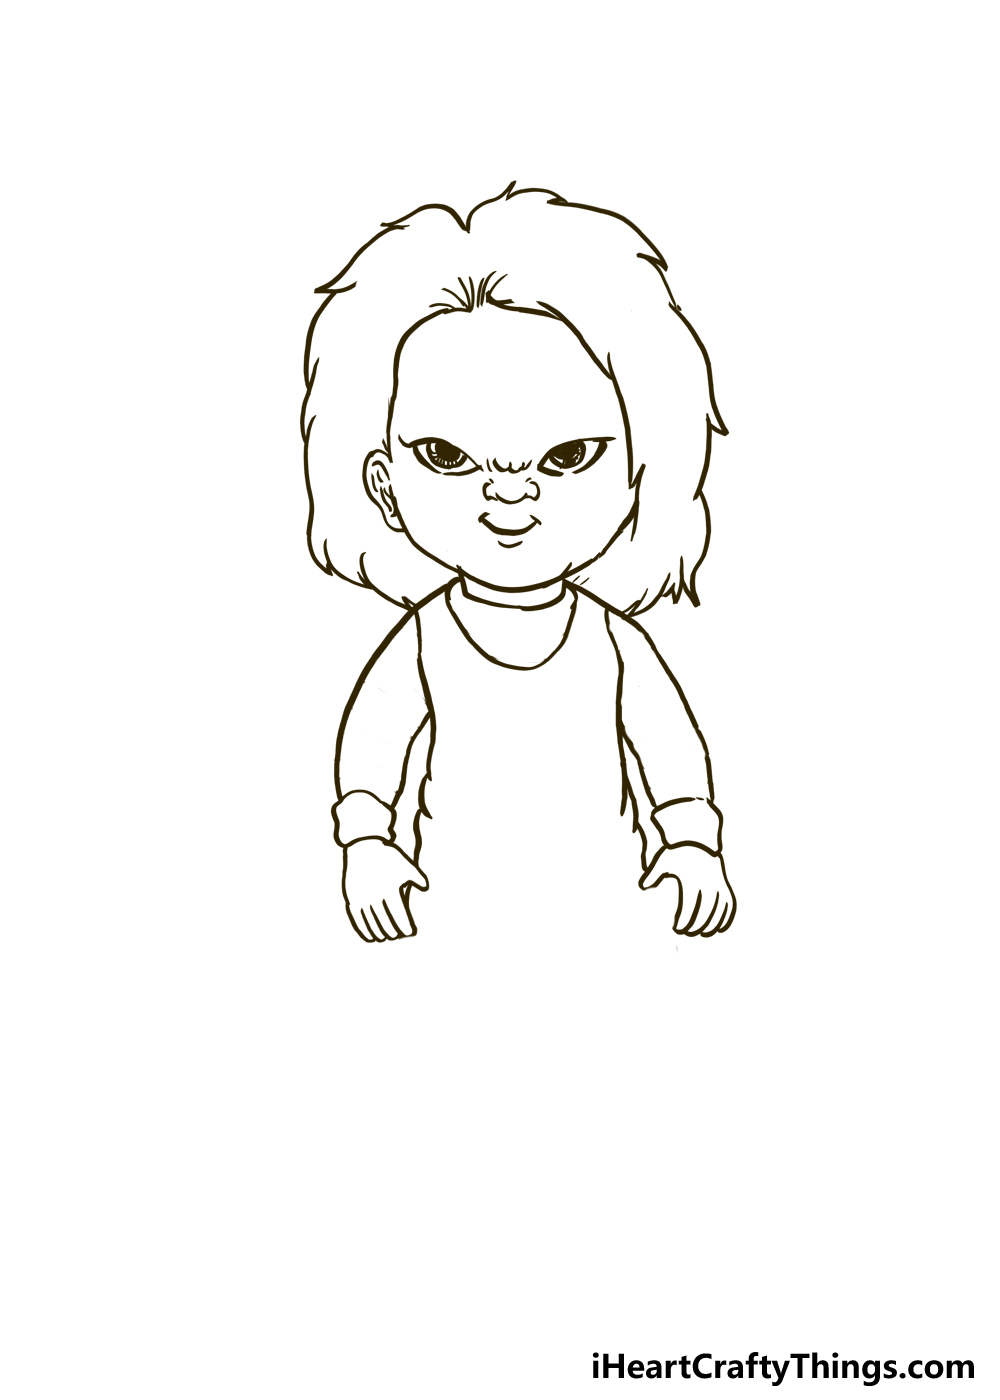
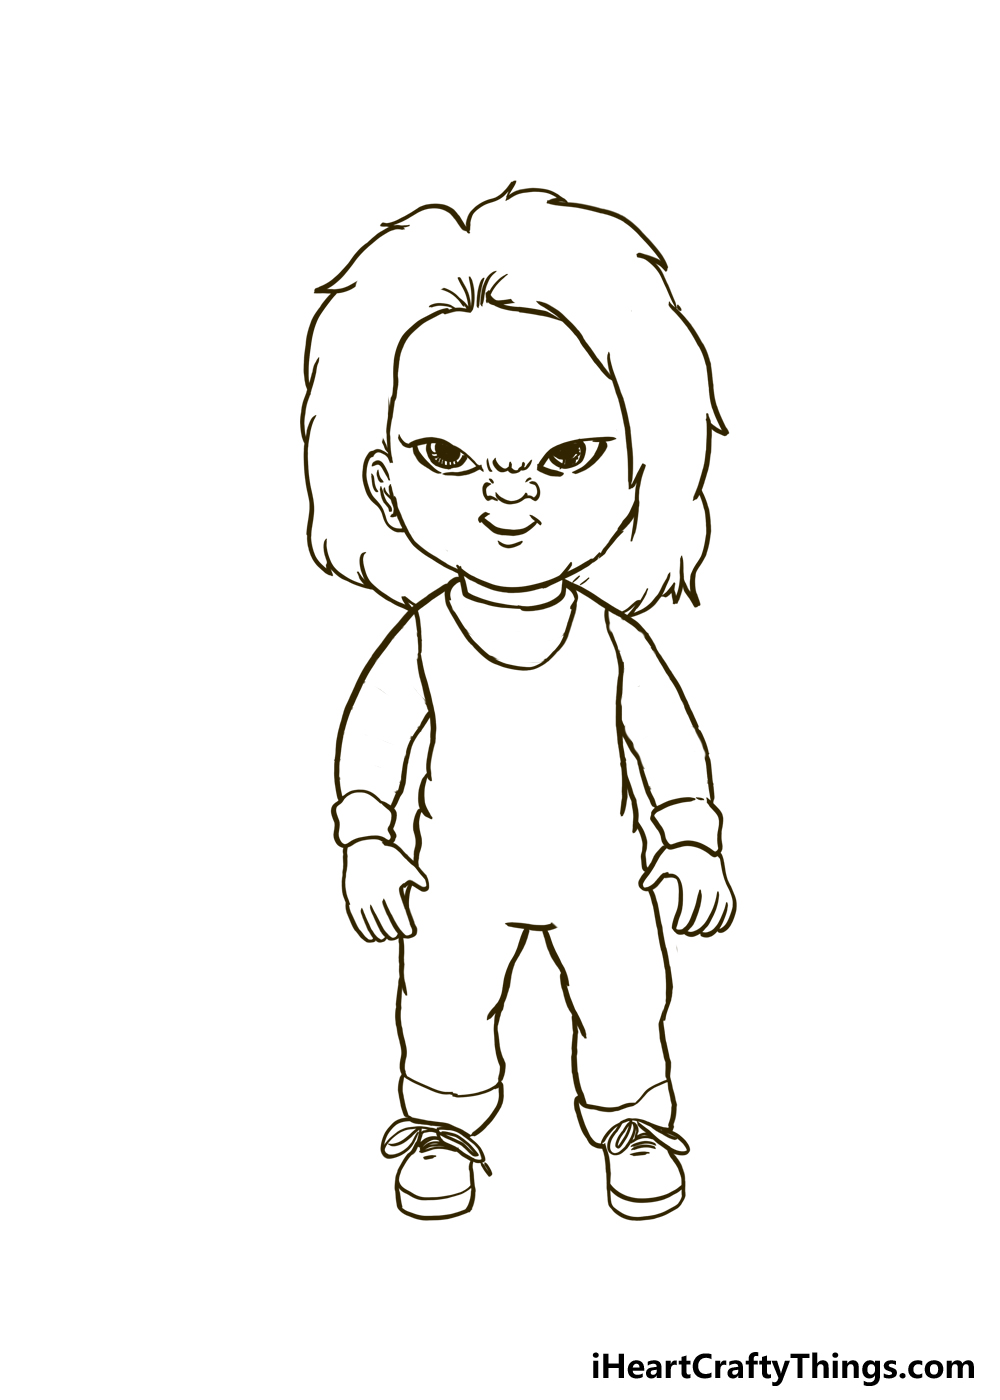
When drawing his body, remember that Chucky is a doll, not a human.
As you will see in the later images, his head should be disproportionately bigger than his body.
For now, we will focus on his arms and chest.
First, draw a short neck with some straight lines coming down from his head.
Then, add a curved line at the base of his neck for the top of his overalls.
Finally, we will add his little hands.
That means that we will be adding his legs in this particular step.
As you would imagine, these continue directly from the chest area that we drew in the previous step.
He is a doll at heart, after all, so the legs will be quite short and stubbly.
This will help to give them the appearance of having material trousers over them.
Finally, we will draw the shoes he is wearing.

Once those are drawn, we will add the shoes themselves.
They are fairly simple in design, as they can be drawn with some fairly simple rounded lines.
Each show will have a separate, flat base at the bottom to finish them off.

With that, youre ready for some final touches!
Before you move on, ensure that everything is as you want it so far.
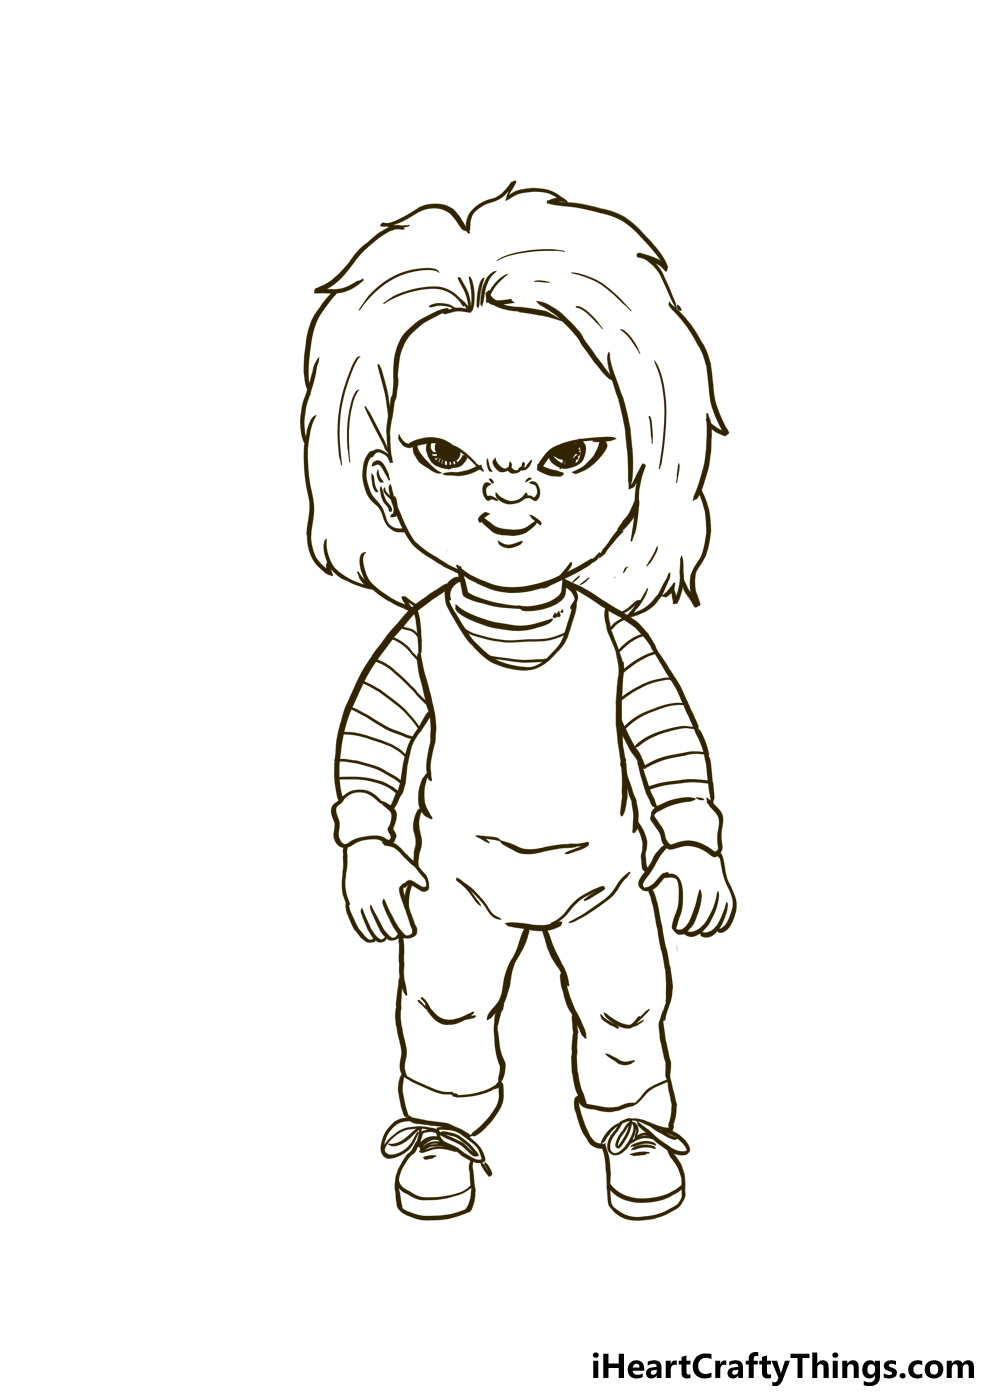
First, we will make his hair look a little more textured and realistic.

This can be done by adding a series of small, slightly curved lines inside the hair outline.
You dont have to match these to our example, as you could place these details where you yo.
Earlier, we mentioned how his striped shirt is an iconic part of his design.

These will go across each arm of his shirt along with his visible collar and chest beneath the overalls.
With these details, youre ready to color in Chucky!
This is a great way to recreate your favorite scenes and looks from throughout the films.

If youre feeling ambitious, you could even draw other characters from the films!
Adding background elements or props for Chucky to interact with would also be a great fit for this drawing!
Chucky isnt the nicest character, so we dont mean that literally!

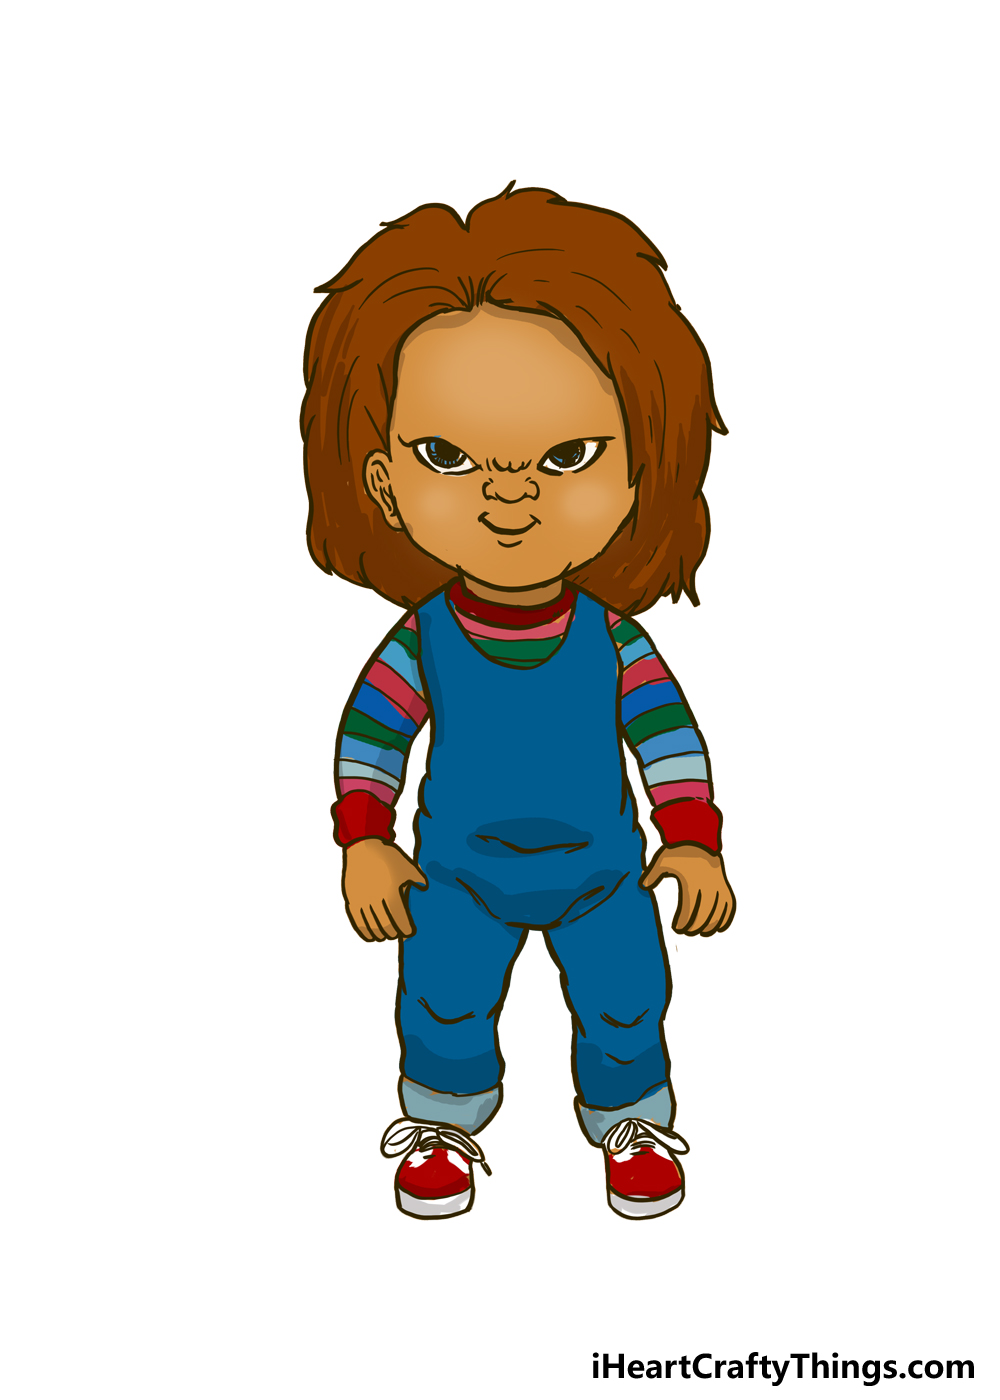
Lets start with his signature red hair.
We then used a few darker shades of blue for his overalls to recreate the look from the films.
The shades are very dark in some areas to add some shading.
Then, we will color his striped shirt.
Finally, you could use some red and white coloring for his shoes to finish off his look.
Your Chucky Drawing is Complete!
The design for this character is deceptively simple.
Now you’ve got the option to take everything you learned here and make your own variations.
It would be awesome to portray some of your favorite Chucky moments from the films!
When your Chucky artwork is complete, we would love to see how you portrayed this scary doll.
you’re free to share the finished drawing on our Facebook and Pinterest pages.
That way we can all be terrified and impressed by your awesome picture of this famous villain!
We cant wait to see how scary he looks.
More From:How to draw
Printable Bubble Letters A Complete Guide!
