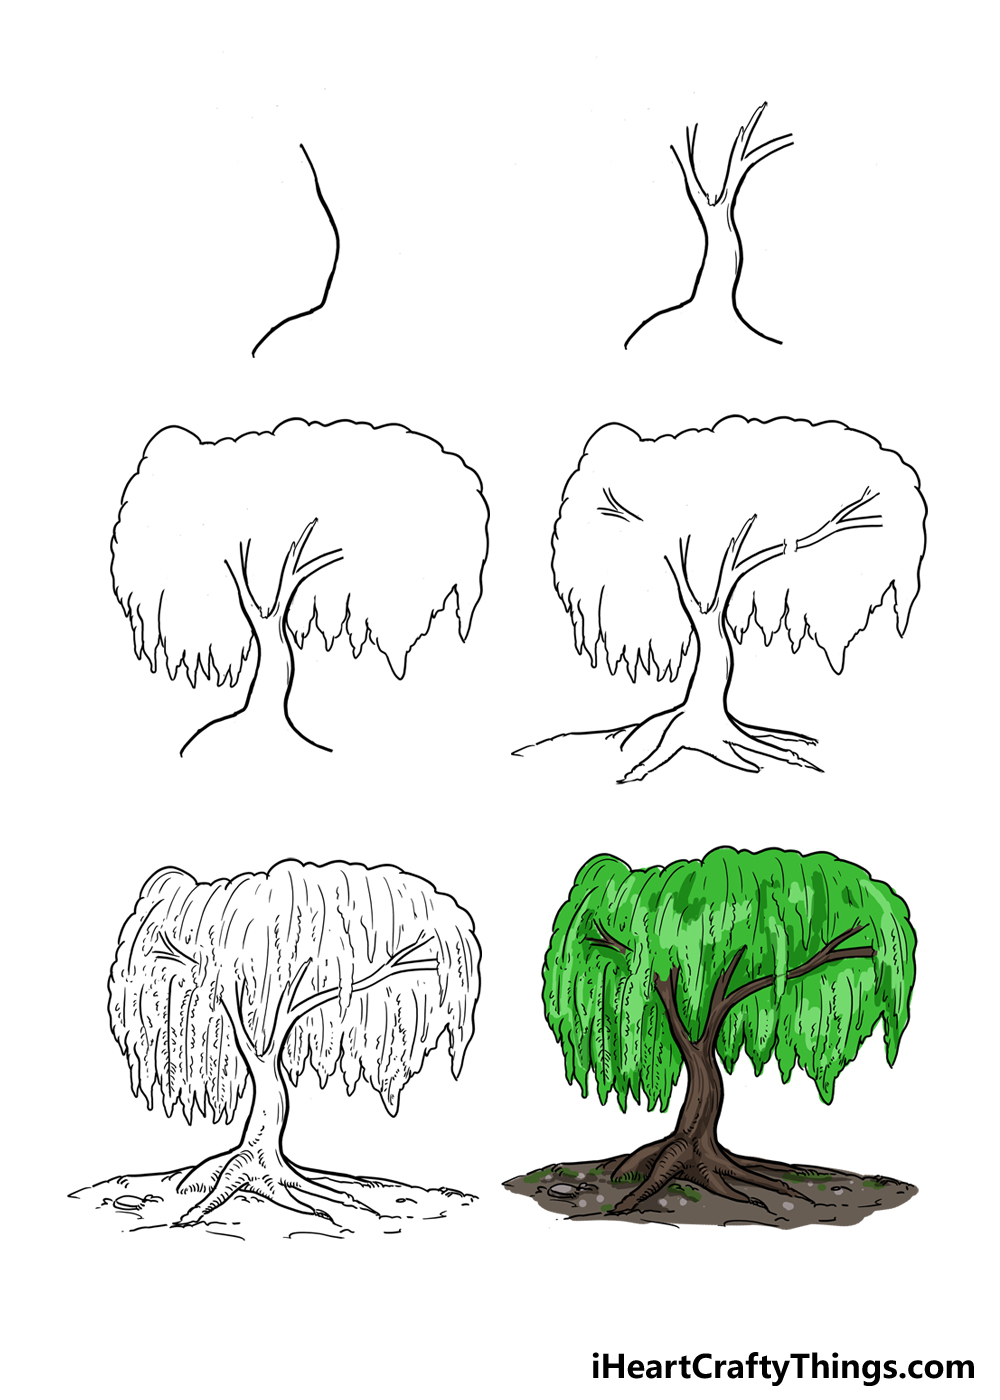
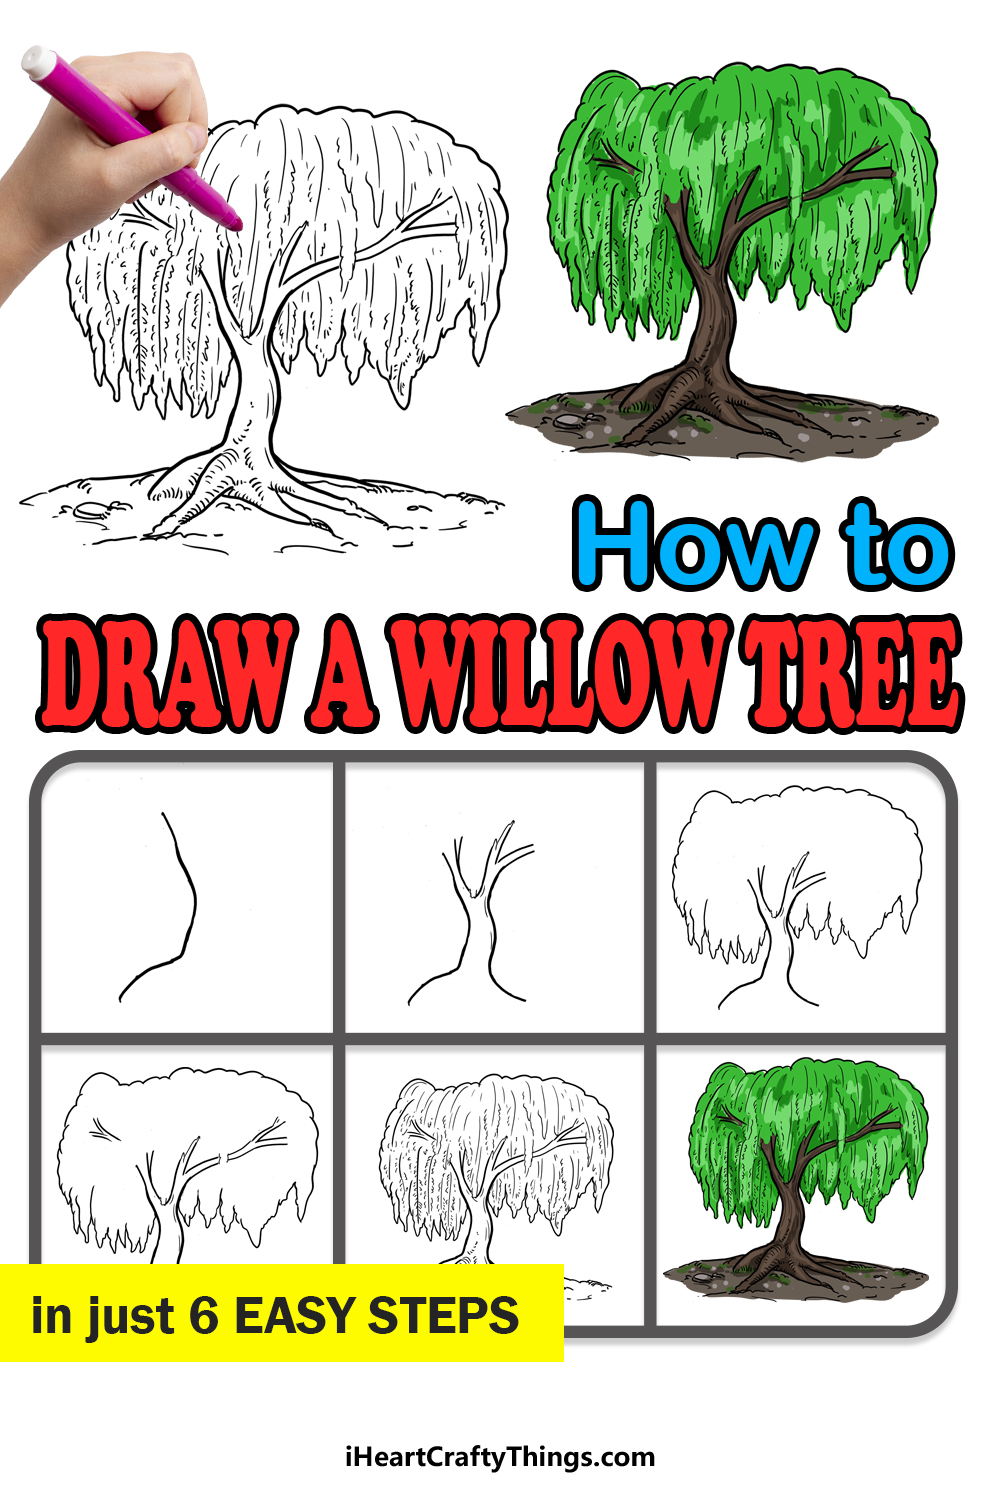
Willow Tree Drawing in Just 6 Easy Steps!
In nature, there are thousands and thousands of different kinds of trees.
Among all the different species of trees, the willow tree is a favorite of many.
This tree has a really distinctive look and is an amazing addition to any garden, yard or landscape.
Thats why youre in the right place if you would like to see how it can be done!
So lets begin and see how its done!

How to Draw A Willow Tree Lets Get Started!
Step 1
When it comes to drawing a willow tree, there are two main components.
These would comprise the trunk and the leafy canopy, and we will start with the first of these.
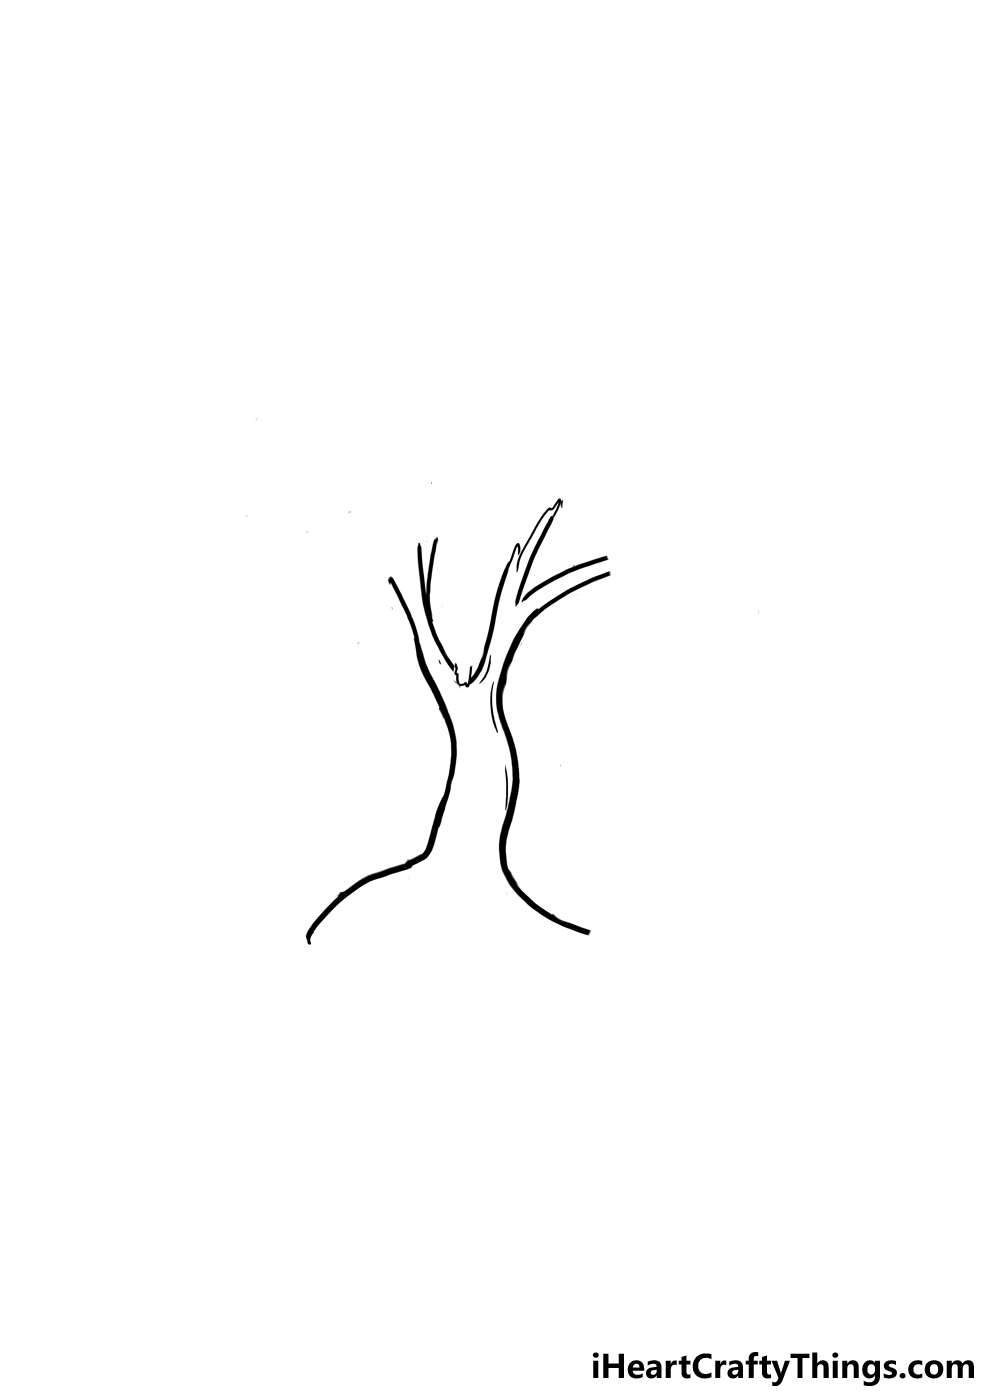
That being said, its still important to portray the trunk and branches properly.
The trunk and branches are more complex than they appear, as they are a bit twisty and intricate.
To do this, we will be drawing just one line to begin the outline.
It will also help you to visualize the trunk, leaves and how they all relate to one another.
With that in mind, we can draw the first line.
It will be a rather sharply curved line that bends inward.
Then, we will be ready to move on to step 2!
That first line was simple, but this is where it starts to get trickier.
First, we will draw the line on the right-hand side of the trunk.
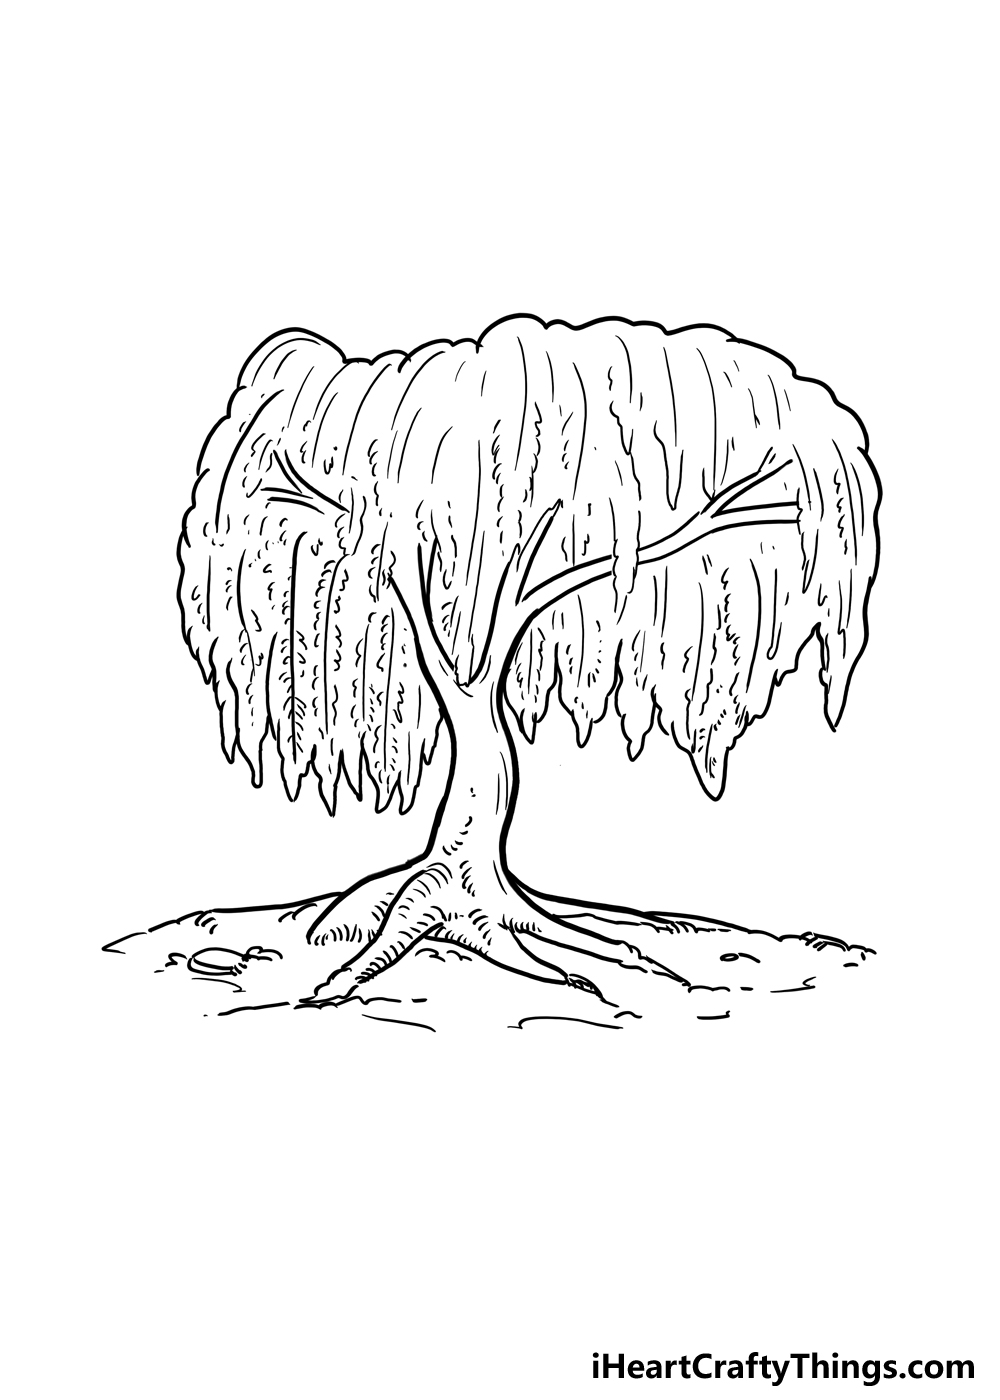
For now, the line on the right should head up and then curve out to the right.
Then, we will add two diagonal lines to the left of this that form a V shape.
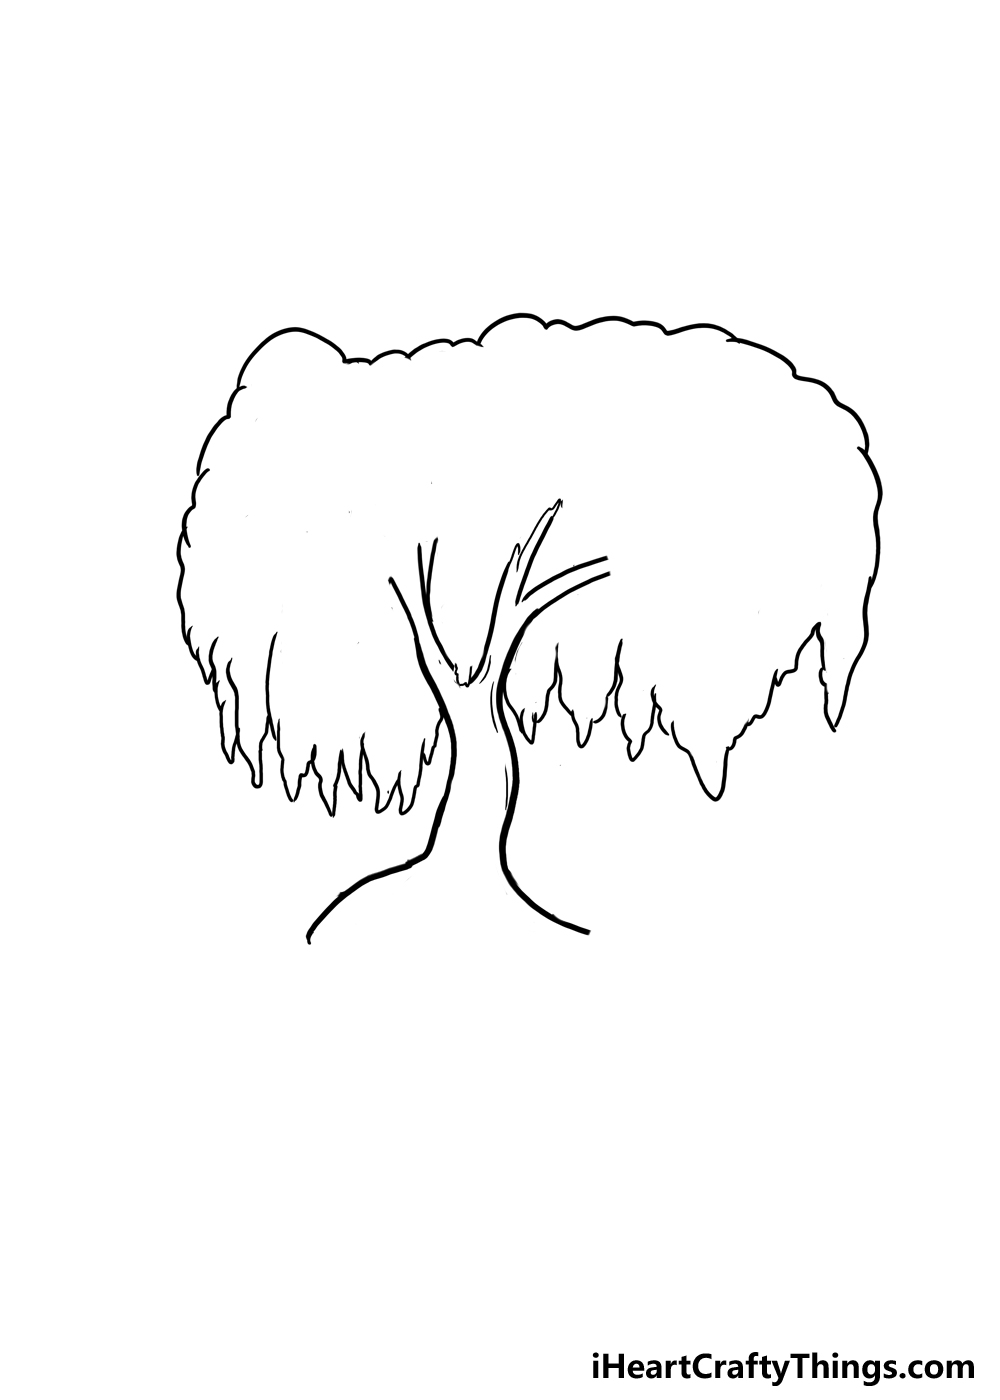
For this step of your willow tree drawing,we will focus on drawingthe outline of the canopy.
These will still be drawn with a similarly bumpy line to the top of the canopy.
The sides of the willow tree canopy should extend quite far outward.
For now, if your drawing is matching the reference image, then youre in a good spot!
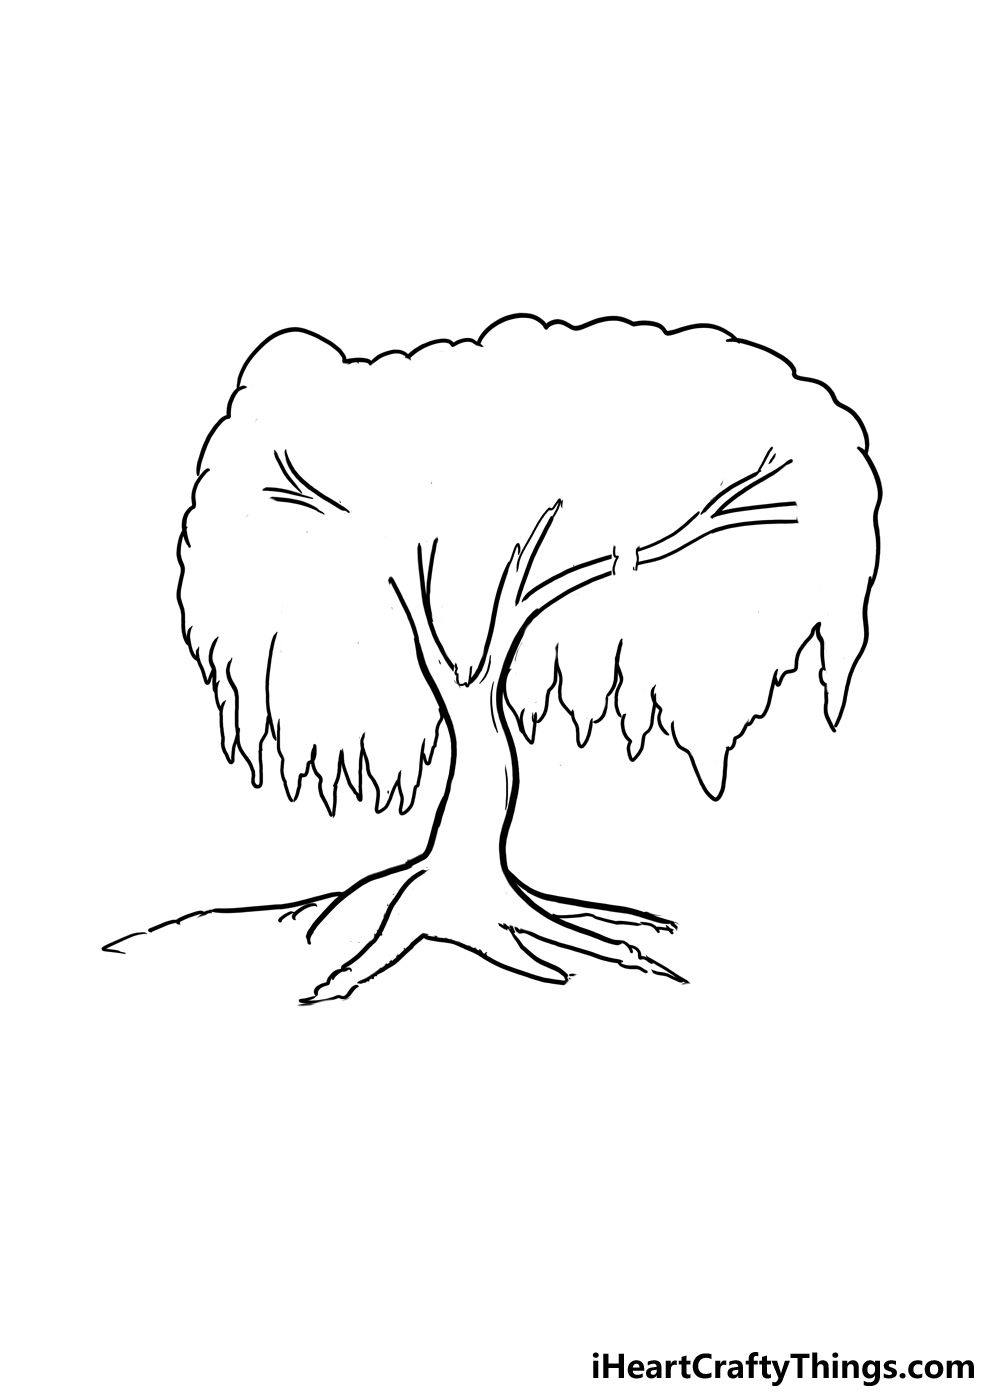
First, lets focus on the roots of the willow tree.
The roots will look a bit like fingers extending from the base of the tree.
We will also add a horizontal horizon line to the background, as shown in our reference image.

Before we move on, we also need to add some branches poking out.
Instead, they will poke out from the leafy canopy of the willow tree.
There will be a small gap between them, though.

The branches poking out on the left will be poking seemingly out of nowhere, though.
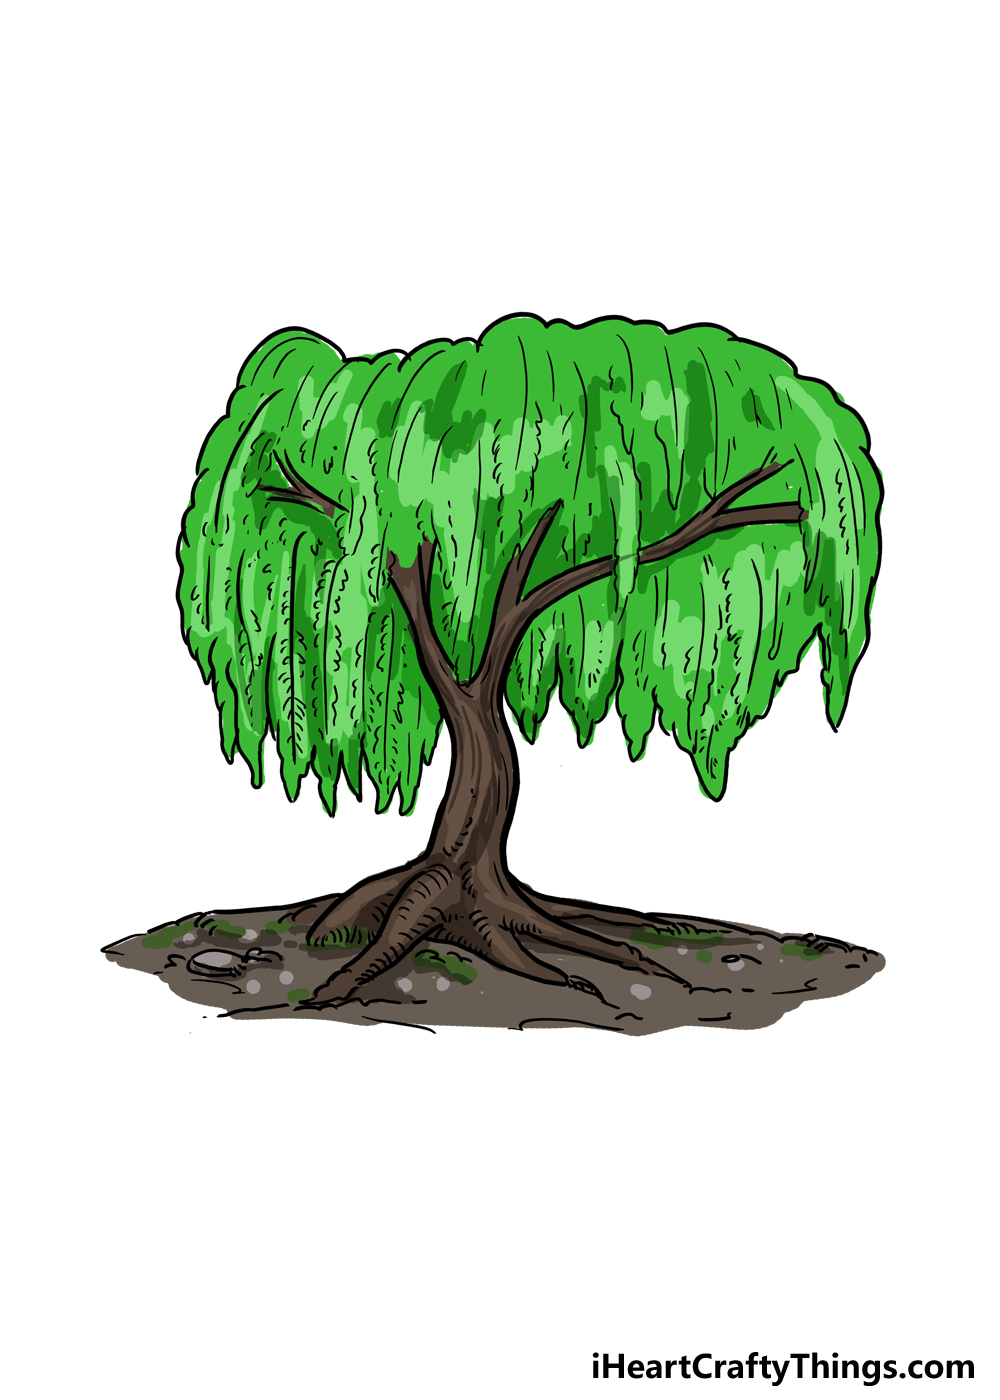
Now, we are ready for some final touches in the next step of the guide.
This will prepare you for the final step where you will add some color to your artwork.

First, lets start with some of the simpler details.
it’s possible for you to start by drawing a series of slightly curved vertical lines.
Then, add some smaller little curved lines around these larger lines.

If it sounds complicated, youll see what we mean in the reference image.
You dont have to move on just yet, however.
you’re able to also add some of your own ideas.

If you were to do the second idea, you could make the person look like someone you know.
They could even be based on yourself!
These are just a few ideas, but there are many more you could go for.

The same is true for the wood and dirt surrounding the willow tree.
When coloring your picture, choosing the colors is just a part of the process.
You could use some paints such as watercolors for a softer look to the colors, for instance.
Colored pens or heavier paint like acrylic paints can be used to make the colors darker.
You could always have a mix of both approaches as well.
This can be done to make the colors even more interesting and dynamic.
There are so many different options, so which ones will you choose to finish off your own version?
Your Willow Tree Drawing is Complete!
Dont be afraid to get creative with it and try out some interesting new combinations of colors and details.
When your willow tree drawing is complete, we would definitely love to see how it looks!
When its done, you could share your creation on our Facebook and Pinterest.
More From:How to draw
Printable Bubble Letters A Complete Guide!
