Saxophone Drawing in Just 6 Easy Steps!
Music is something that is important to every culture, country and society around the world.
It also has a really distinctive look, and this can be fun to recreate in art.
The instrument looks quite distinctive, making drawing it a bit of a challenge.
So put on your favorite music, grab your best art and drawing tools and lets begin this guide.
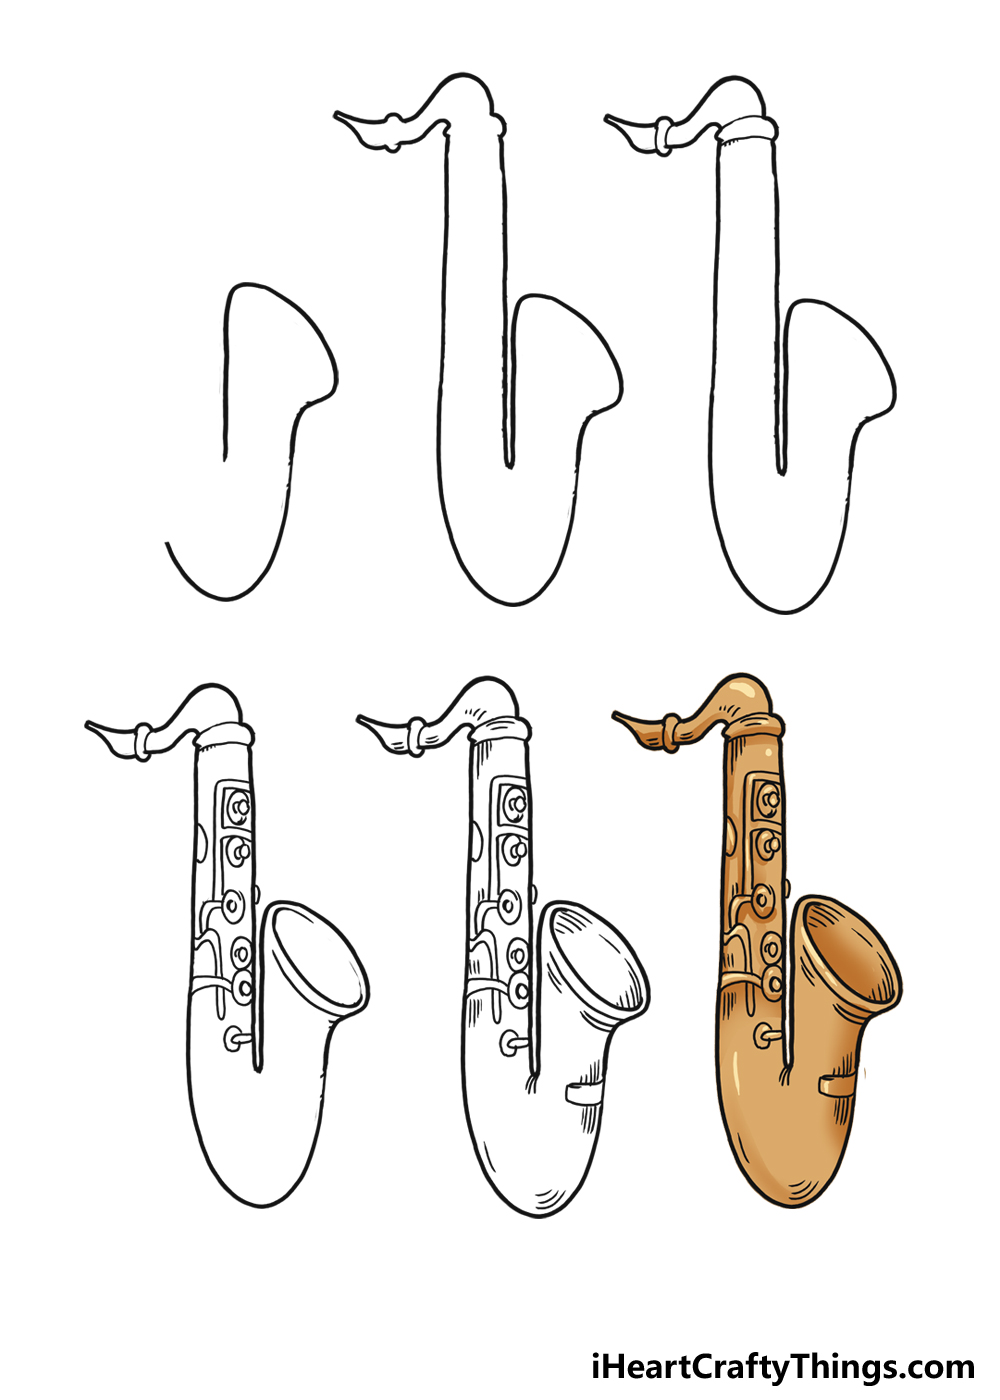
How to Draw A Saxophone Lets Get Started!
Having this pencil outline will help you to keep the proportions of the saxophone accurate and consistent.
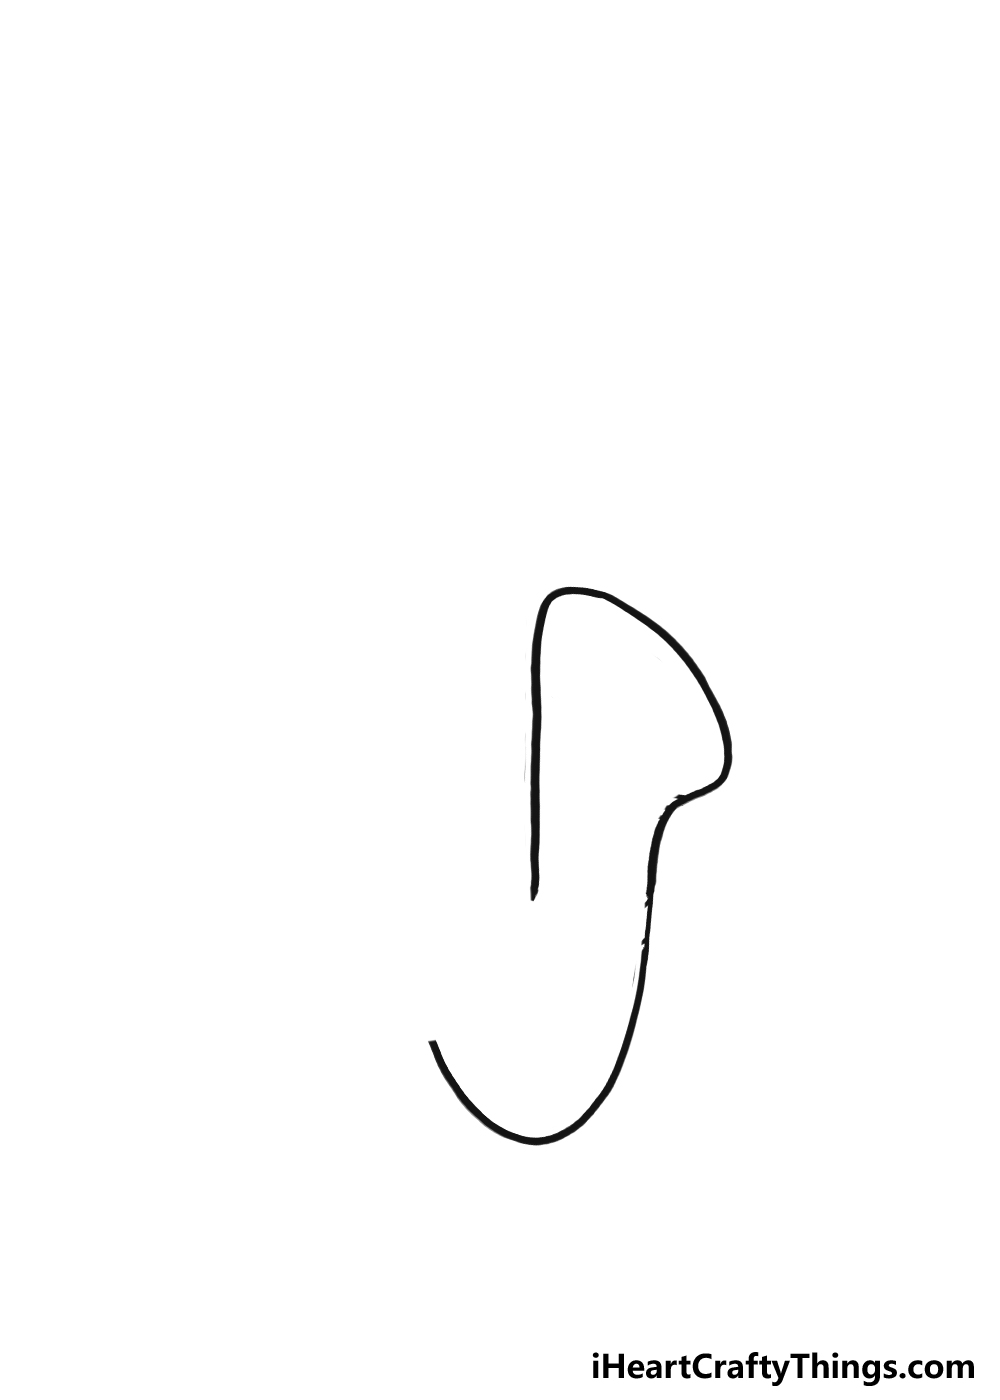
Then, we can start drawing the actual outline itself.
Start with a very slightly curved vertical line for the left side of the bell section.

This will then fan out and then over in another curved line to create the ridge of the bell.
Some of this may sound complicated, but its simple when you know what youre doing.
Just confirm to follow the reference image closely and use the pencil guide that we recommended earlier.
Then, we can move on to step 2 of the guide and continue this saxophone!
There will be quite a lot to add in this step, but we will take it slowly.
Once again, we will add a small bump opposite the other one that you drew.

Then, its on to step 3!
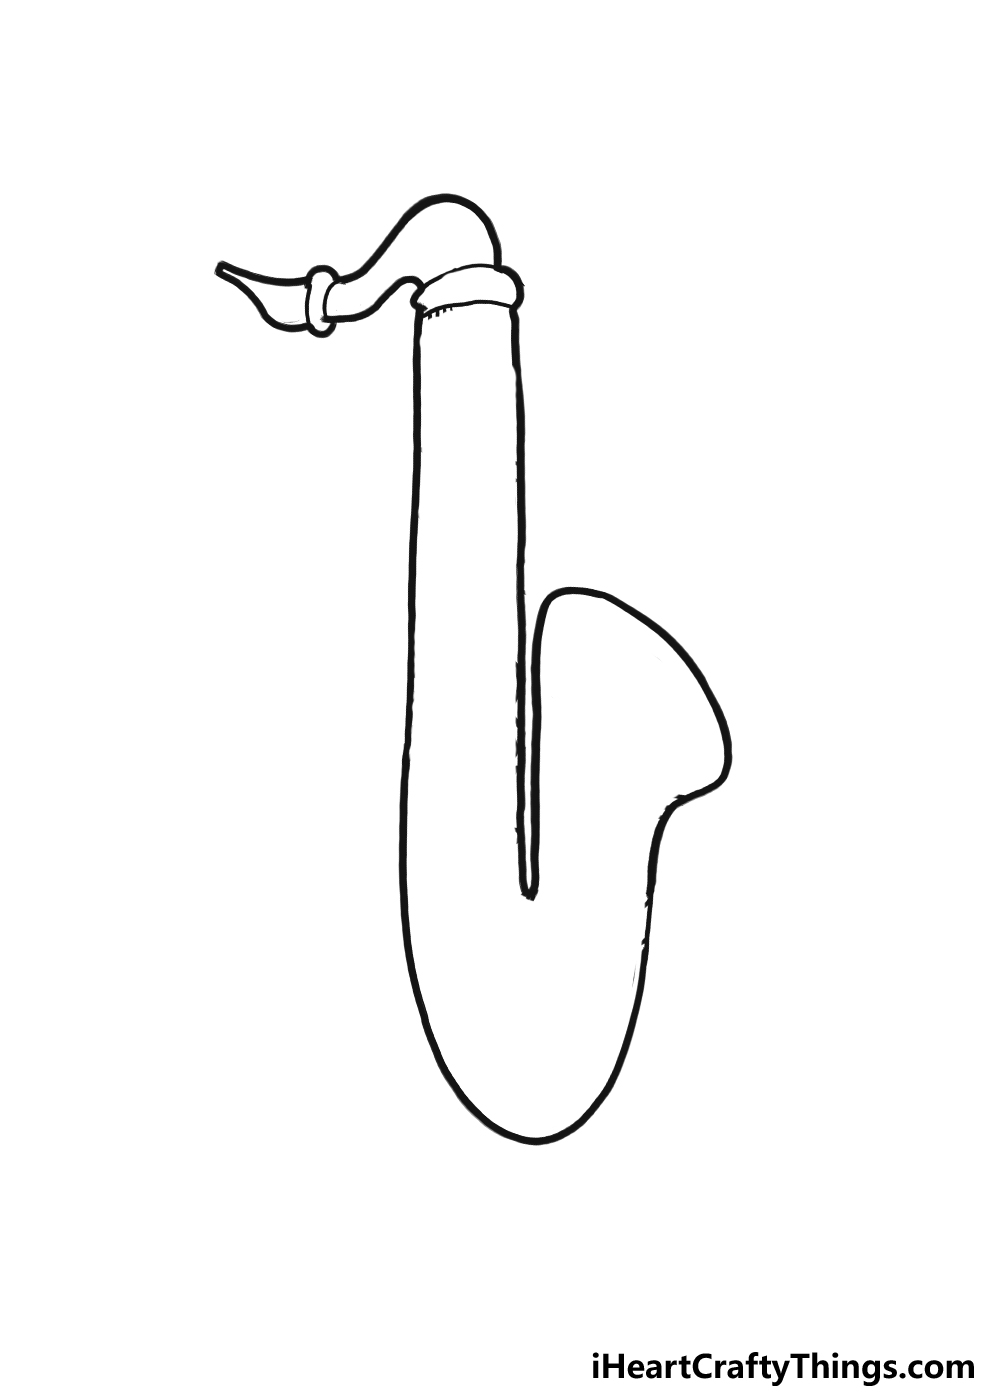
For this one, you will be focused on the neck and the mouthpiece of the saxophone.
Specifically, we will be adding some simple rim portions to these two areas.

The good news is thatthese details will be drawnwith some very simple curved lines.
That makes the next few steps sound scary, but dont worry!
As always, we will go over everything you better do so that you dont get lost.
Youve already mapped out where these sections will go, as you added those small bumps in the outlines.
These will go on the body of the saxophone, and we will draw 5 of them.
Theyre arranged more or less in a row, but some will stick out a little.

after you snag drawn these keys, we have a few more details to add.
When drawing these, we would recommend looking closely looking at and replicating these lines between the keys.
after you grab added these lines, you will see that the saxophone is really starting to take shape!

These should be easy enough to add, and this is where you could change things up a bit.
These lines are very simple, but they help a lot to make the saxophone look more defined.
once you nail added these texture and form details, youre ready for the final step!

Before you head to that step, however, there are some additions you’re able to make.
This is where you’re able to take over and make this drawing more unique to you.
There are many ways that you’re free to do this.

You could even draw a cartoon character playing the saxophone!
Drawing a background would also be a great way to give this drawing more sense of place.
These suggestions work as a good starting point for your imagination to take over!

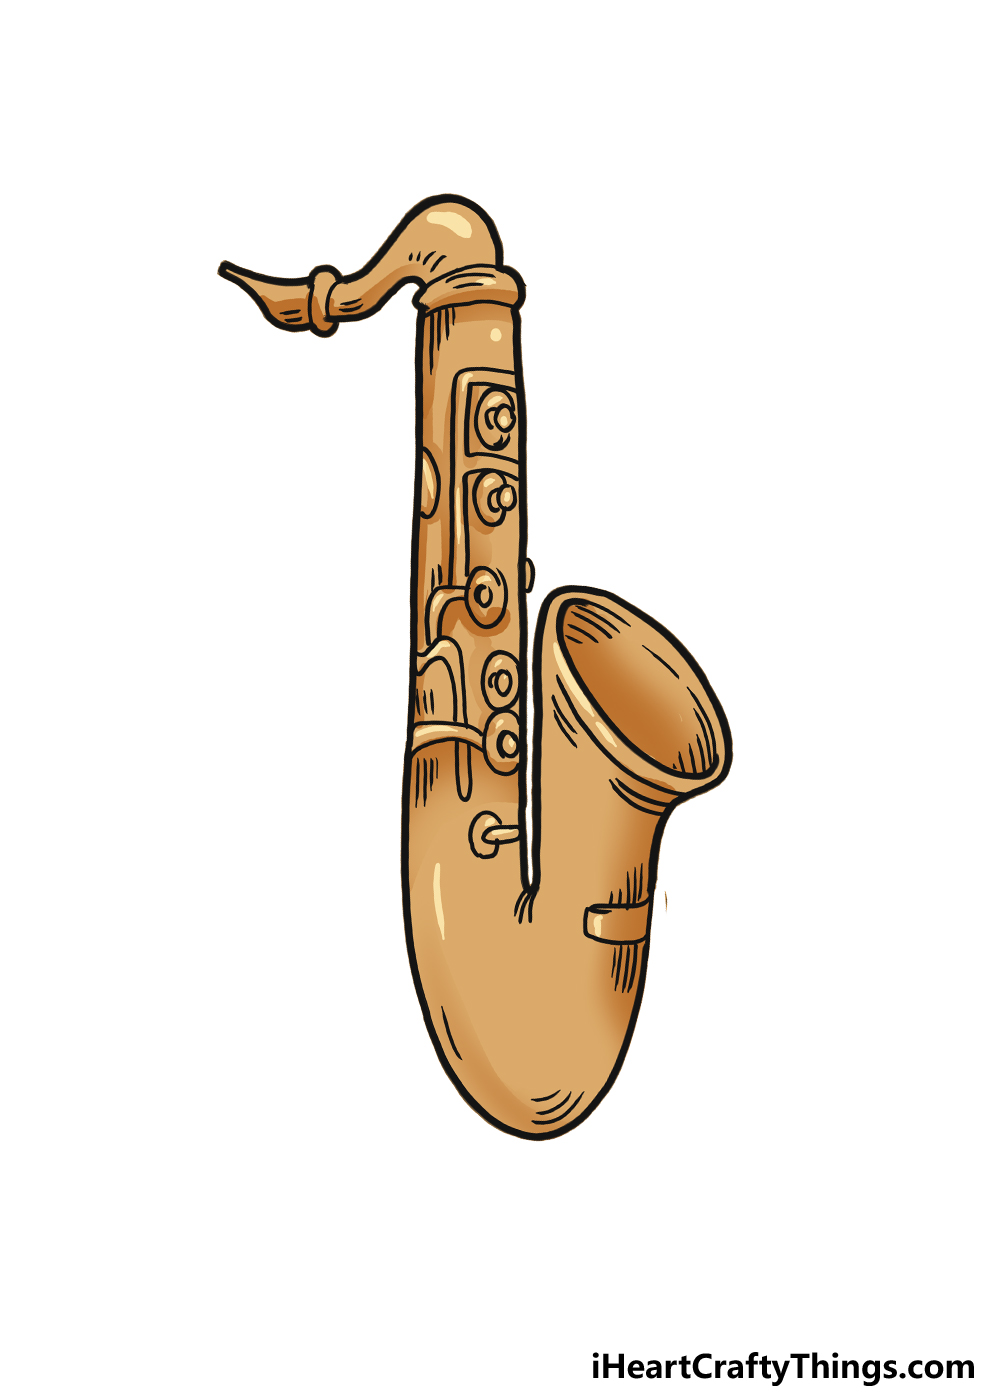
We will attempt to recreate this bronze color in the saxophone were creating here.
We used some gold tones for the saxophone to capture the look of saxophone.
You will see that various shades of the color were used to create some different tones.

It also makes it look like there is light reflecting on the bronze.
attempt to examine our example and see where we used light and dark tones.
Some colored pens even have a metallic look to them, which would be perfect for this saxophone.

If you have some other crafts and art tools on hand, then that would be great too.
For instance, you could add some sparkle to this drawing by using some light sprinkles of glitter.
You also dont have to stick to realistic bronze colors if you want to do something more stylistic.
Your Saxophone Drawing is Complete!
We hope you enjoyed having some musical art fun with this guide on how to draw a saxophone.
The saxophone is a very distinct instrument, which makes it fun and tricky to draw in equal measure.
More From:How to draw
Printable Bubble Letters A Complete Guide!
