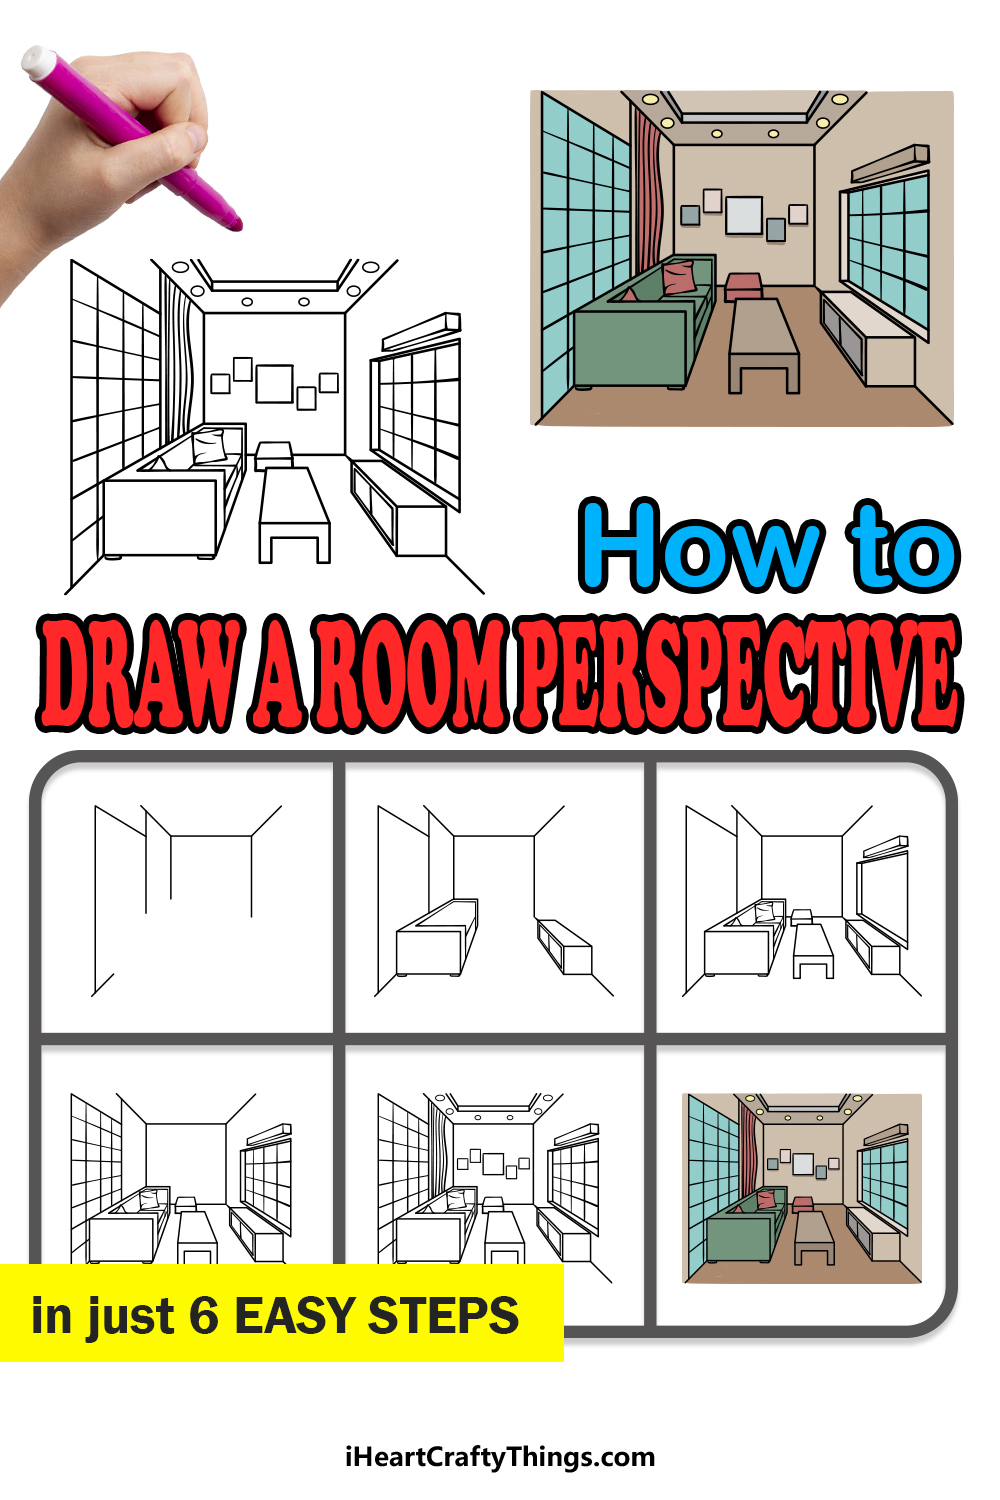
Room perspective drawing in just 6 Easy Steps!
How to Draw A Room Perspective Lets Get Started!
When you have everything youll need, we can begin the first step!
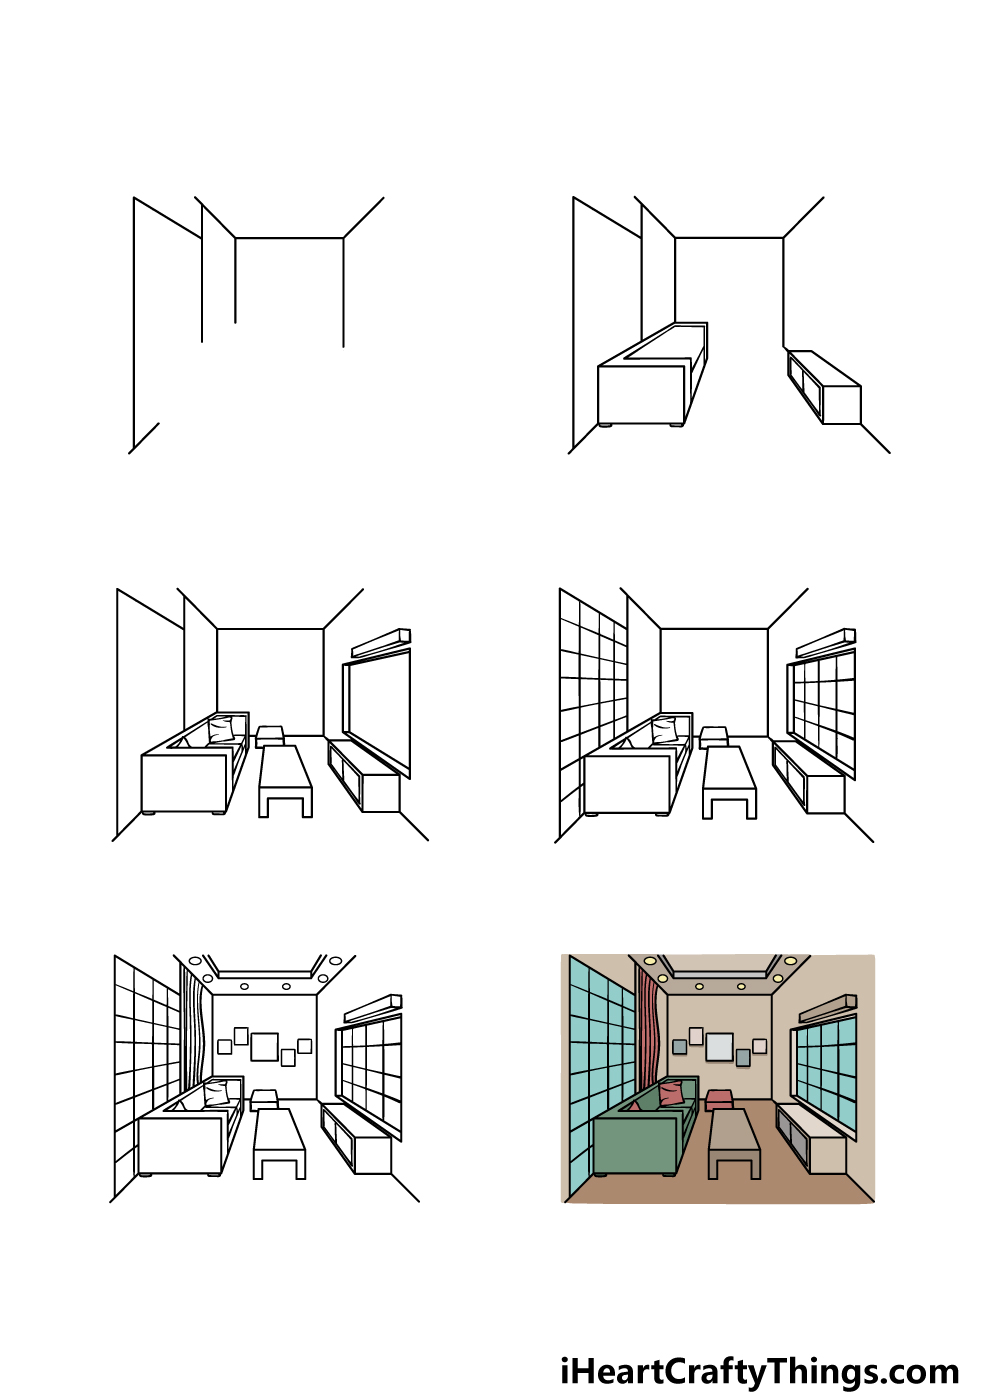
For now, we shall be drawing some simple straight lines.
Everything else that we draw will be drawn in accordance to these lines to contribute to the illusion.
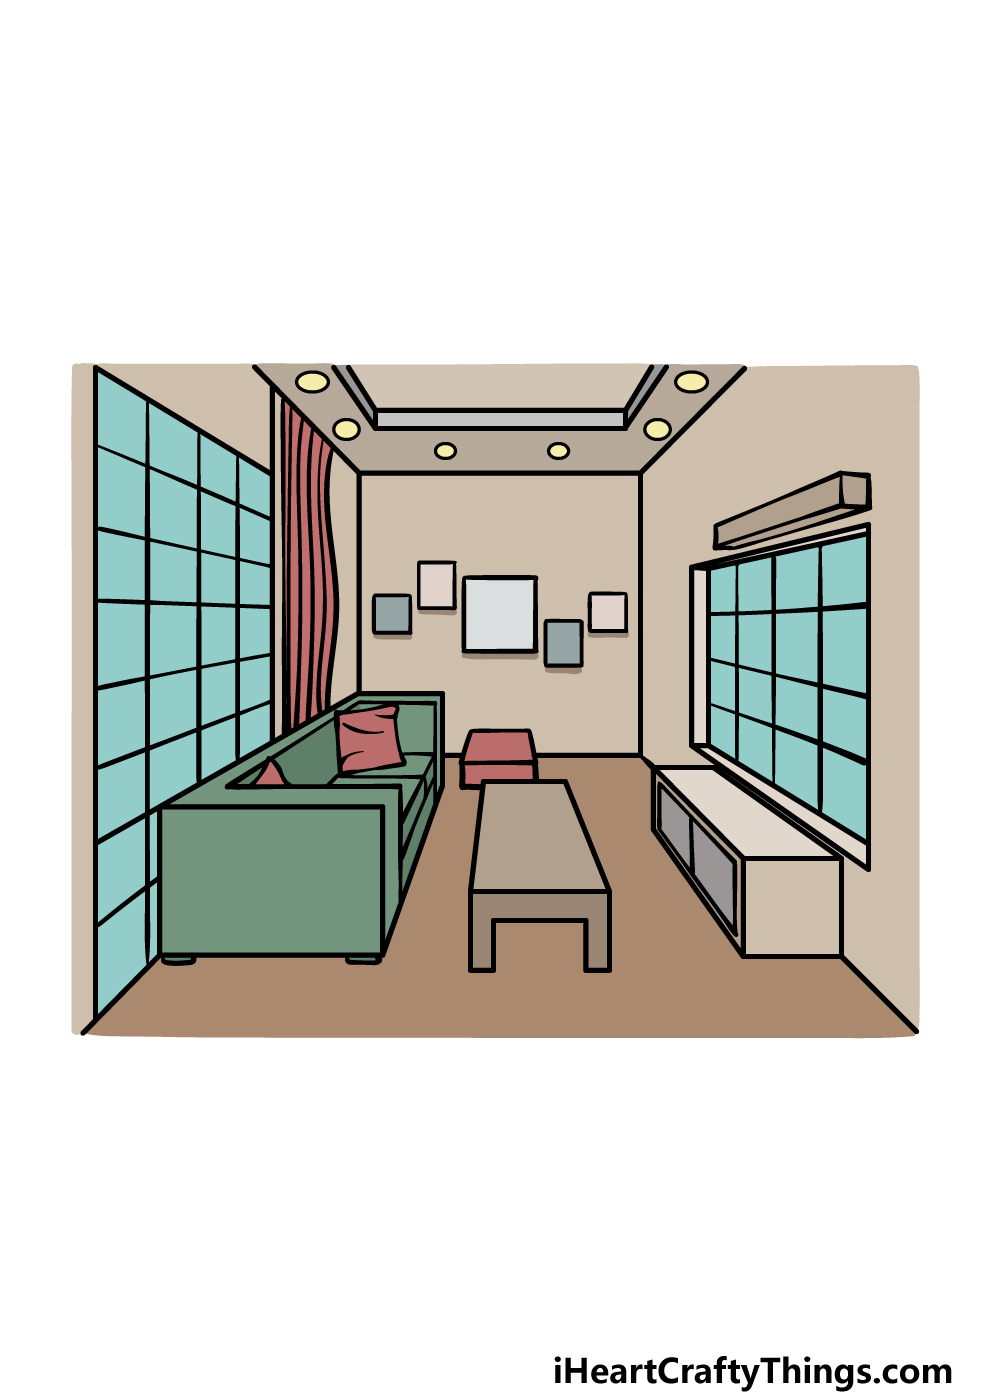
you could then draw a rectangular small cabinet on the right side of the picture.
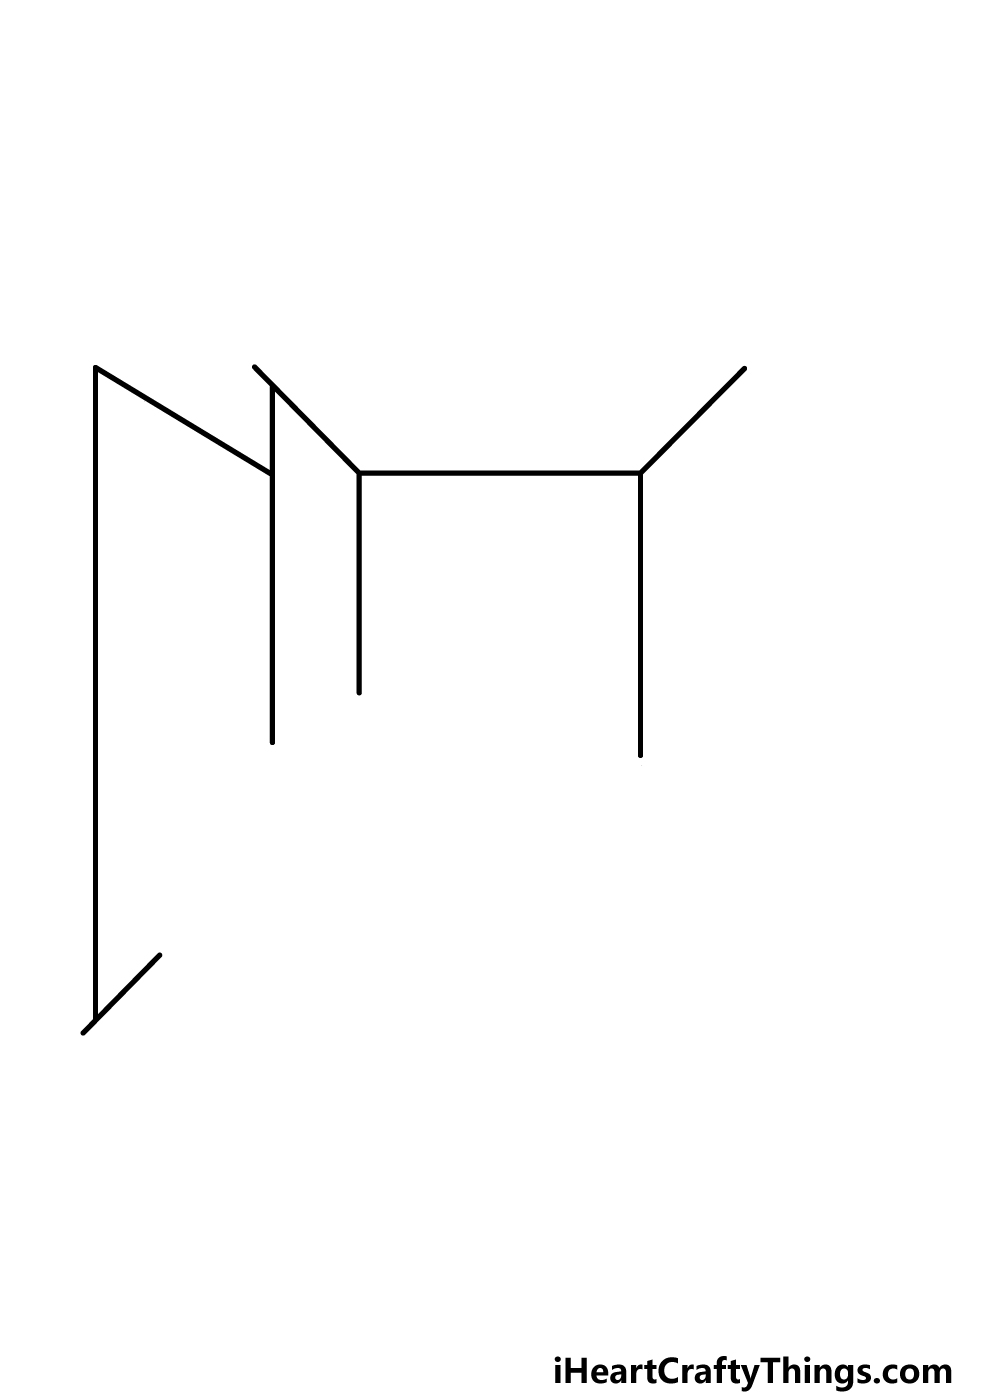
With these pieces of furniture, you will then be ready for the third step of the guide.
First, draw a flat, long rectangle for a small table at the center of the image.
This will then have some squared legs on it.
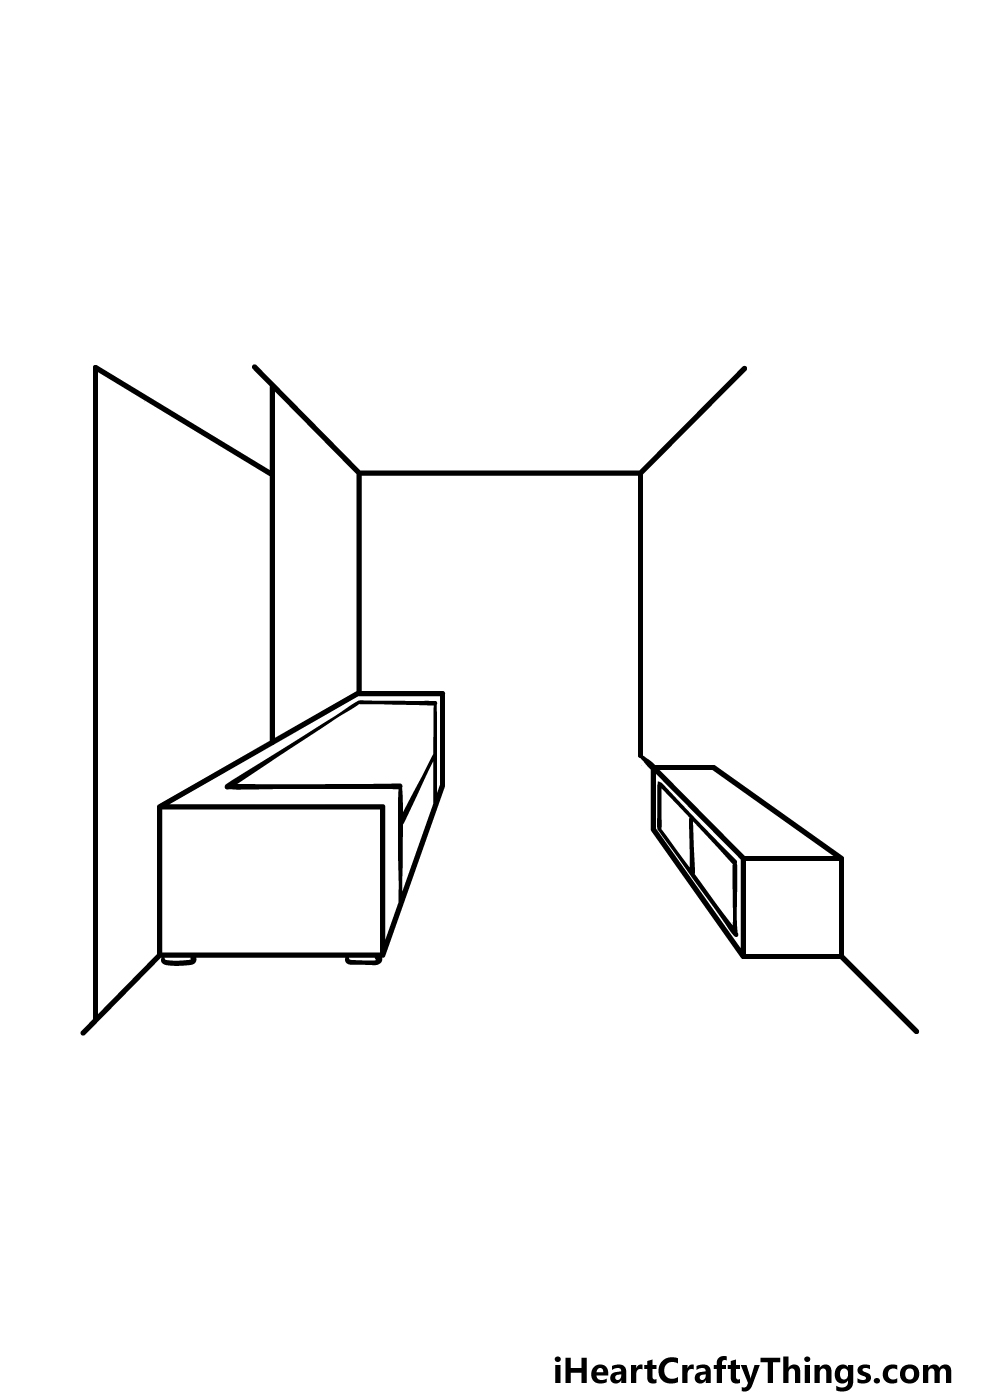
There will also be another smaller footstool above this.
Then, draw some small, elegant pillows and small details onto the sofa from the previous step.
Finally for this step, we will be drawing a window on the right-hand side of the image.
This will be rectangular in shape, and in will have a thinner rectangular portion above it.
With these elements drawn, we can keep adding some more in the fourth step of the guide!
First, draw some wavy lines for a stylish section on the left-hand side of the room.

Then, draw a series of squares and rectangles onto the far wall of the room.
What colors, art mediums and other tolls will you pick to finish off this amazing room perspective drawing?
5 Tips To Make Your Room Perspective Drawing Even Better!

Youll want to make room in your life for these tips for your room perspective sketch!
The drawing of a room perspective that we created in this guide has some really modern looking furniture.
You could change this furniture to a design that you may prefer!
You may like more antique furniture or maybe some that is cozier.
It could be based on the furniture in your own living room if you need some inspiration!
What sorts of furniture do you think would look good in this room?
The far side of the wall in this room has some blank squares.
These look like they could be artworks, so you could draw some pictures on these squares!
They could be photos of people, landscape images or maybe some expressive modern art.

This would depend on what kinds of pictures you would like to have on the wall!
Similarly to the previous tip, you could add some features to the large windows on the walls.
The objects in this room perspective drawing are somewhat limited.

You could add some more to build up the living space a bit!
For example, you could shed some light on the subject by adding some lamps to the scene.
Objects such as plants, clocks or vases would also look great in this room.

What other features could you add to the room?
A room like this would be pointless without people to enjoy the space.
You could fix this by adding some people to this room perspective sketch!

They could be drawn in a simple style, and you could base them on real people you know.
It could also be fun to draw yourself lounging in this room!
What do you think the characters would be doing in this room?

Your Room Perspective Drawing is Complete!
How will you finish off this image?
We have a huge selection with more on the way, so keep checking in to never miss out!

More From:How to draw
Printable Bubble Letters A Complete Guide!
