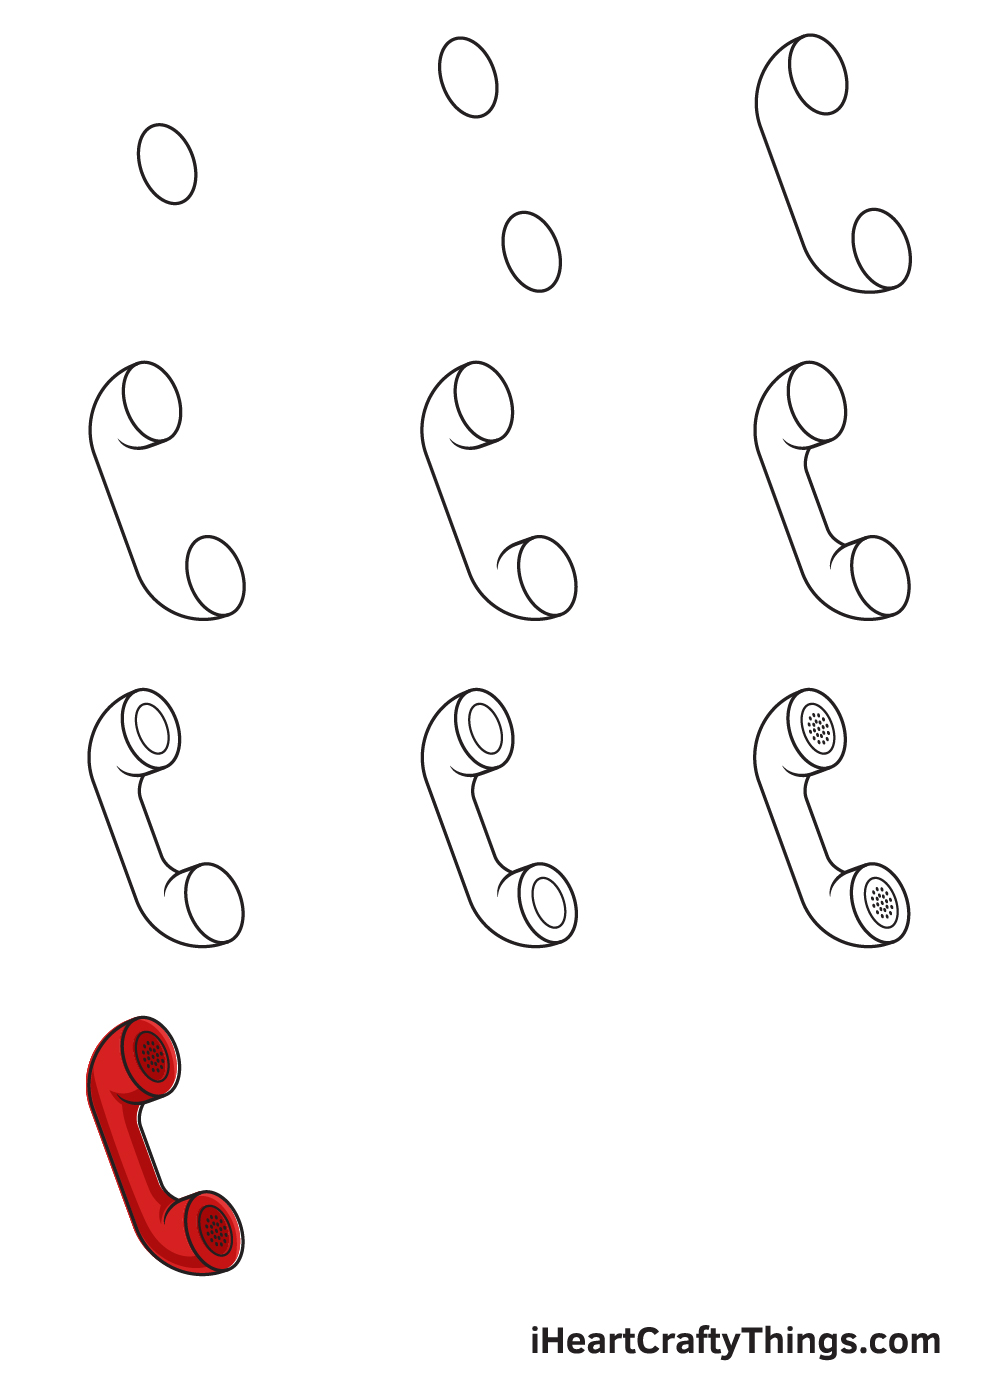
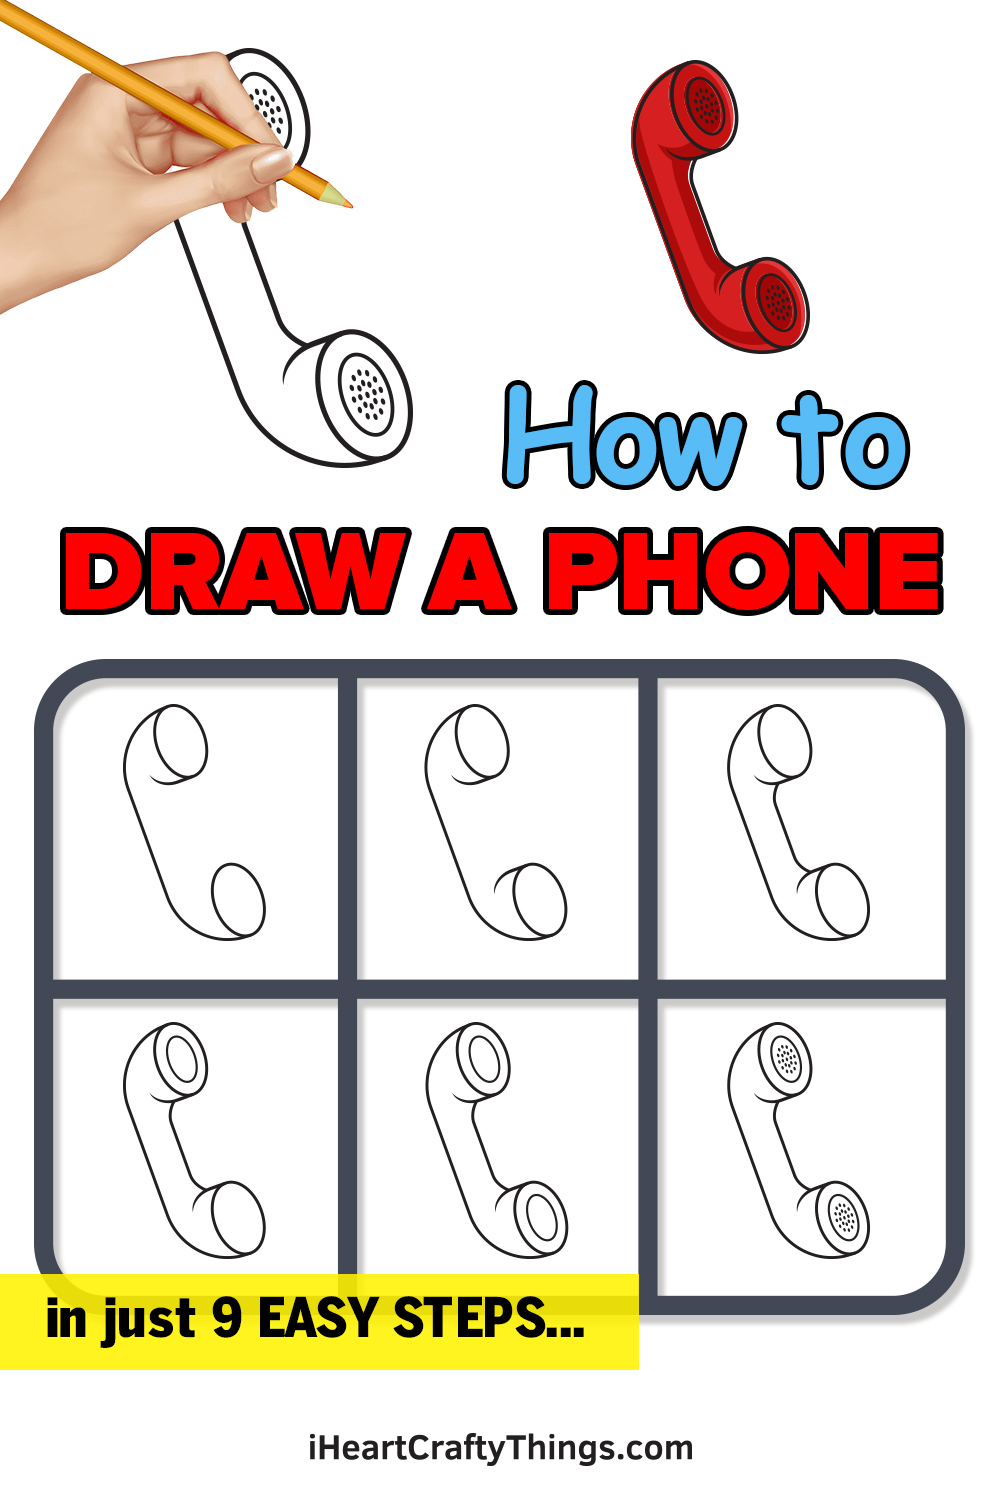
Complete phone drawing in just 9 easy steps!
You dont need to call for help if you want to learn how to draw a phone!
Everything you gotta know is contained within this tutorial for kids, so lets get started.
Even though most people use mobile phones these days, the classic phone headset is still recognizable.
Because theyre not as common now, it can be a bit tricky to learn to draw one.
Step 1
Begin by drawing a slightly diagonal oval shape on the upper portion of your paper.

check that that the outline will be drawn in the correct spot by creating reference lines.
Simply draw an intersecting horizontal and vertical line across your paper and use it as a guideline.
The vertical line above the horizontal line marks the spot where you should draw the outline.

This creates the outline of the microphone.
Keep in mind that the speaker and the microphone should not be aligned vertically.
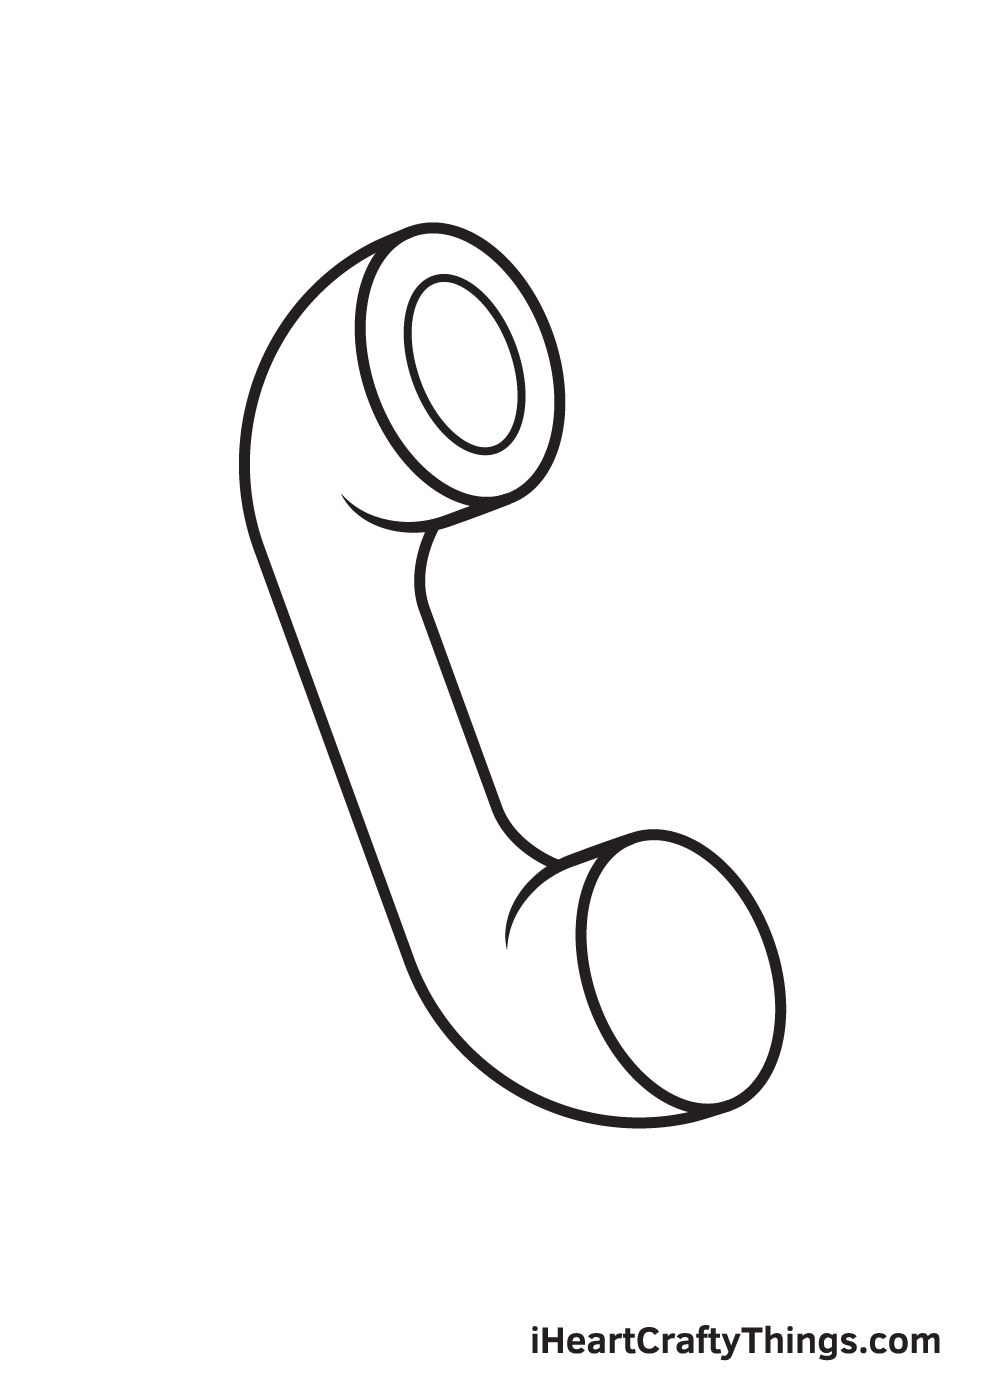
This forms the handle of the phone.

This is what connects the speaker to the handle.
Similar to the previous step, this is what connects the microphone to the handle.
This connects both the speaker and the microphone to the handle of the phone.

At this point, the structure of the phone should now be complete.
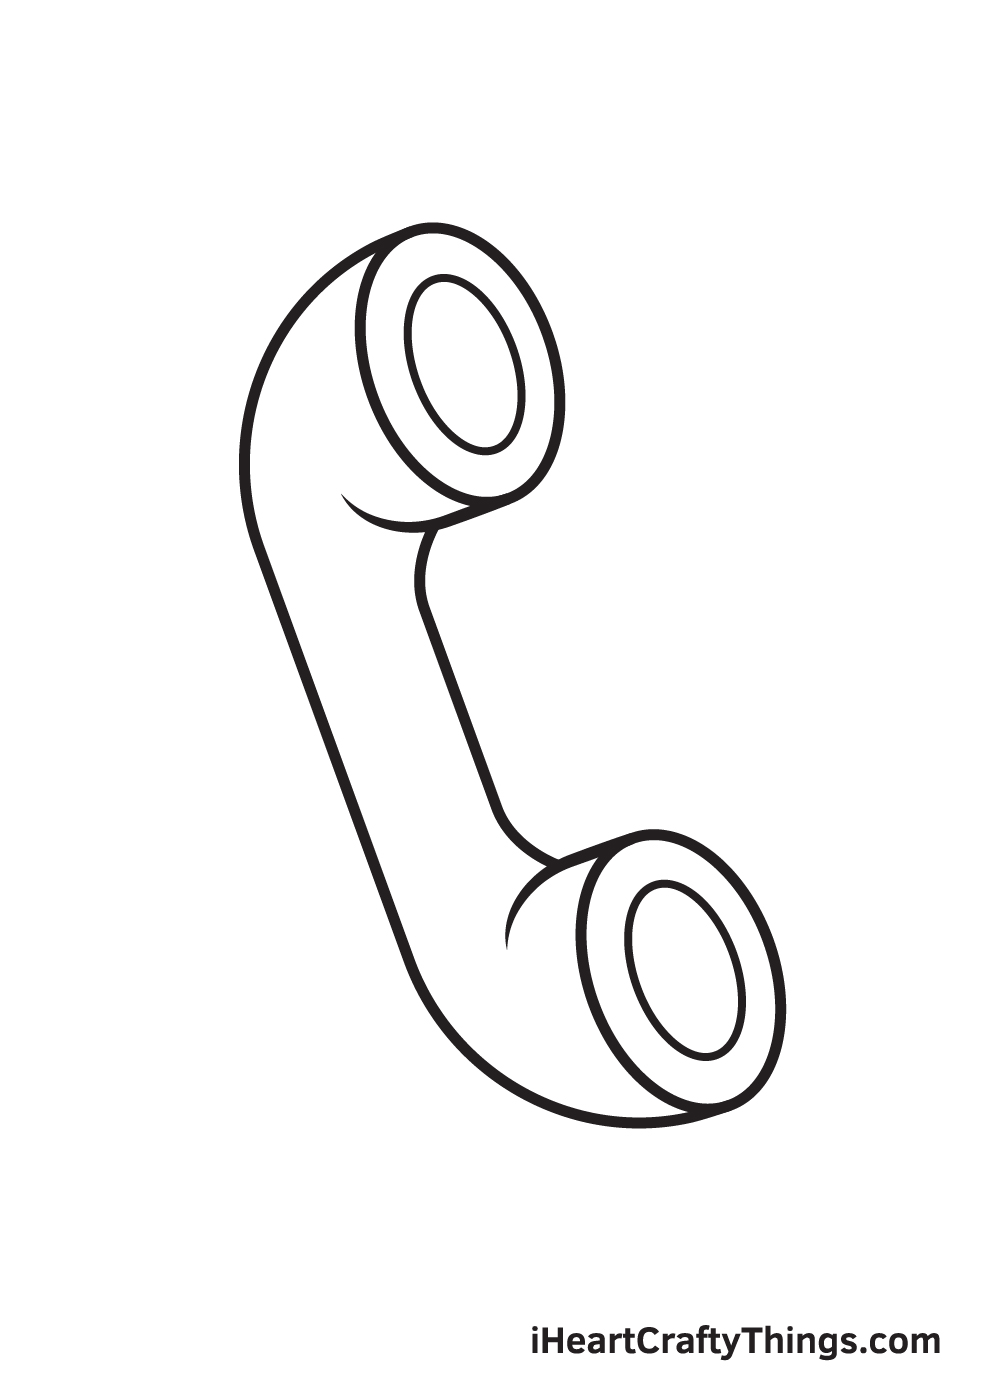
Proceed by drawing an oval shape within the outline of the speaker.
Keep in mind that this shape should have the same form as the outline surrounding it.

At this point, both the speaker and the microphone should have an inner oval shape inside.
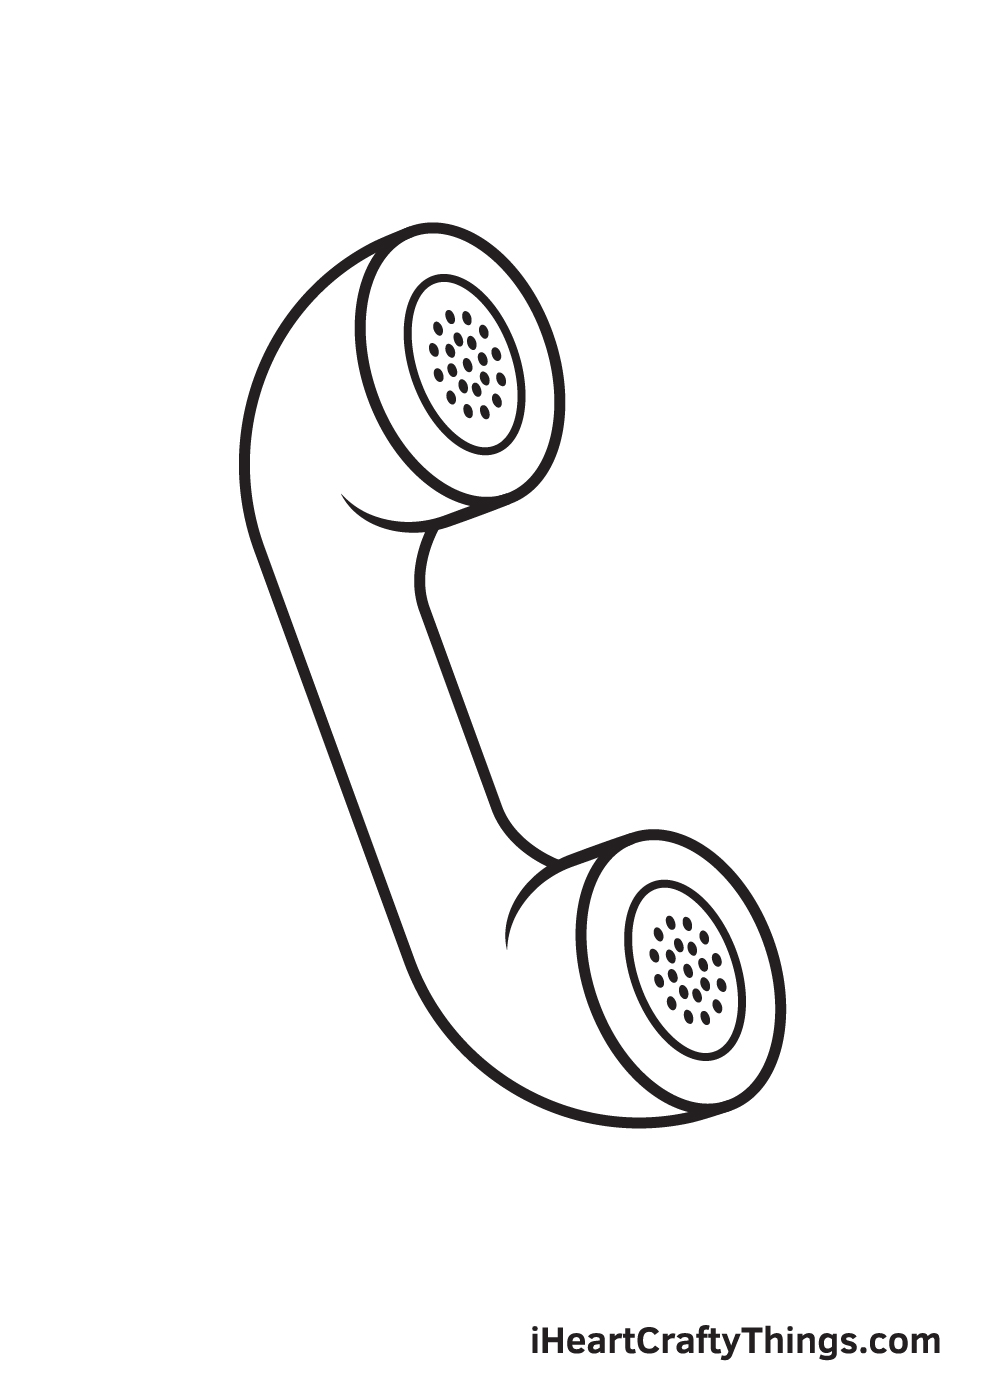
This creates the distinct holes on the speaker and the microphone that helps keep the audio loud and clear.
There you have itwe have successfully drawn a phone!

Traditionally, phones are predominantly black in color.
The colors you will be using for the phone is entirely up to you!
Feel free to use any colors you like.
Have fun playing with colors and watch as the phone ultimately comes to life!
With this phone drawing we created together, we focused on just the receiver.
This is just one important part of the phone, so you could add some more parts!
First, there would be a twisty cord attaching the receiver to the body of the phone.
This can be a bit of a challenge to draw, but it will look cool!
Then, you could draw the body of the phone.
This could be a rotary phone or maybe one with standard keys.
What kind of phone will you create?
This would be a fun chance to create a fully-realized setting!

Where do you think this phone could be located?
To make this phone sketch even more interesting, it could be fun to have a person holding it.
This would also be a challenge, but it would be a worthwhile one!
If youre not used to drawing people, it could be done in a simple cartoon style.
Then, you could add some text to show what the person using the phone is saying!
Who do you think is using this phone?

Not only that, but you could also play around with different art tools and mediums.
This is a great way to bring it to life, so what colors will you choose?
Your Phone Drawing is Complete!

Hopefully, you had an enjoyable drawing activity with this step-by-step phone drawing tutorial.
As soon as youve finished drawing and coloring a phone, ensure to show off your artwork!
Take a picture of your drawing and share it on our Facebook page and on Pinterest.

Completing a phone drawing is an achievement, so you should definitely feel proud of your masterpiece!
We would love to see your realistic and colorful phone drawing!
More From:How to draw
Printable Bubble Letters A Complete Guide!


