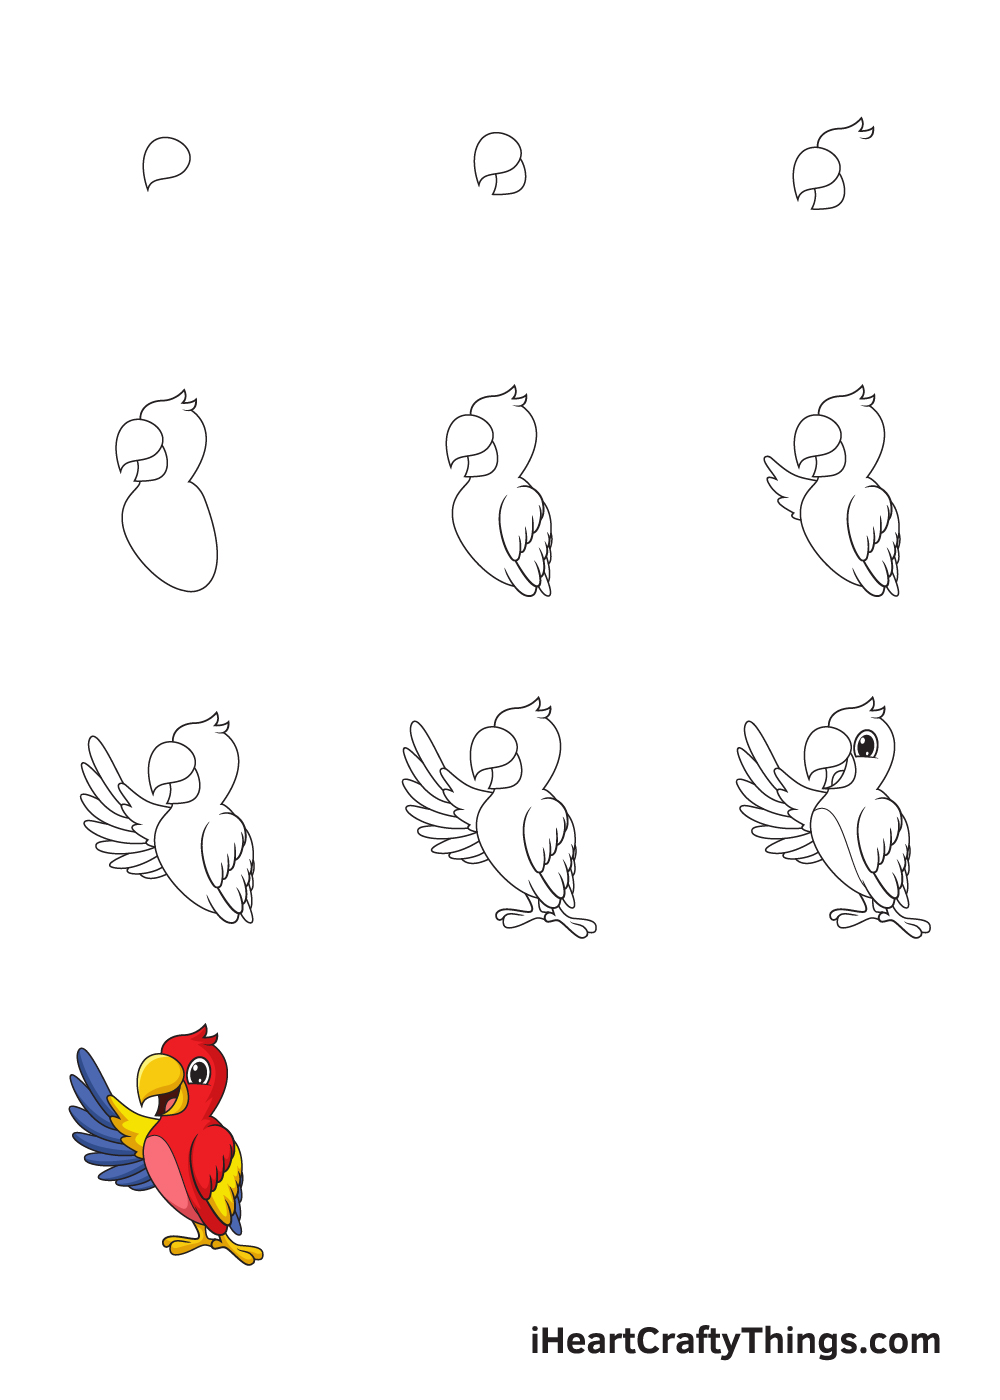
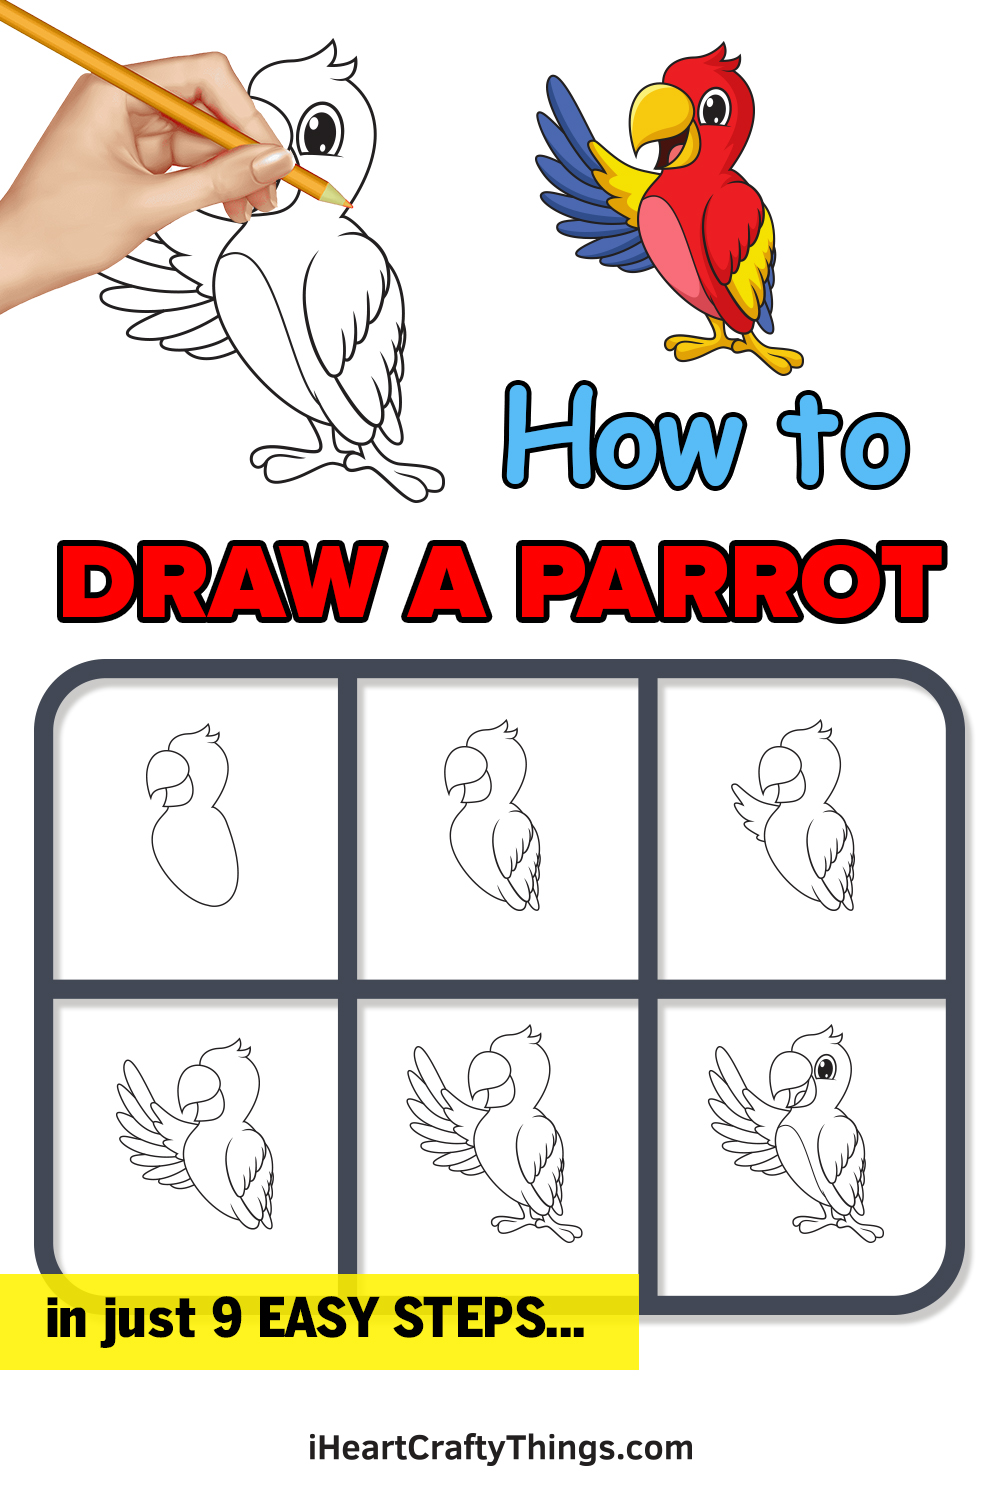
Complete parrot drawing in just 9 easy steps!
Its fun and easy to learn how to draw a parrot when you follow these intuitive steps!
Lets embark on this journey together and see how its done.
Parrots are so beautiful with their colorful features and unique appearances.
They also stand out because many of them can mimic human speech and other sounds.
Theyre also very intelligent with long life spans, making them perfect companions.
Ill take you through each step and show you how to make a pretty Polly of your own.
Then, you could design a background or draw some toys and food for it to interact with!
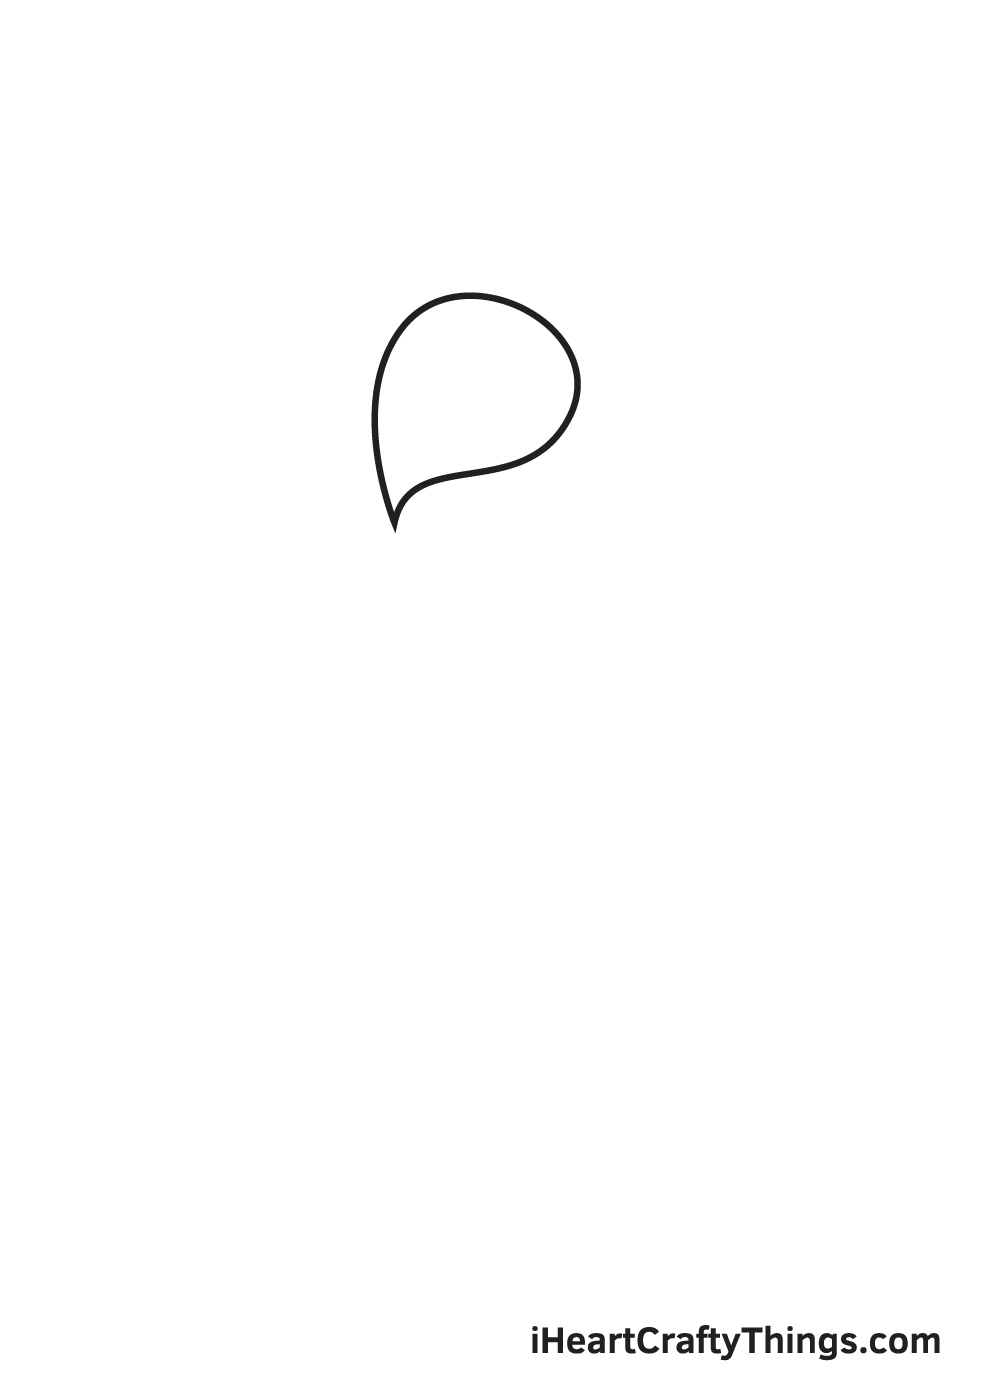
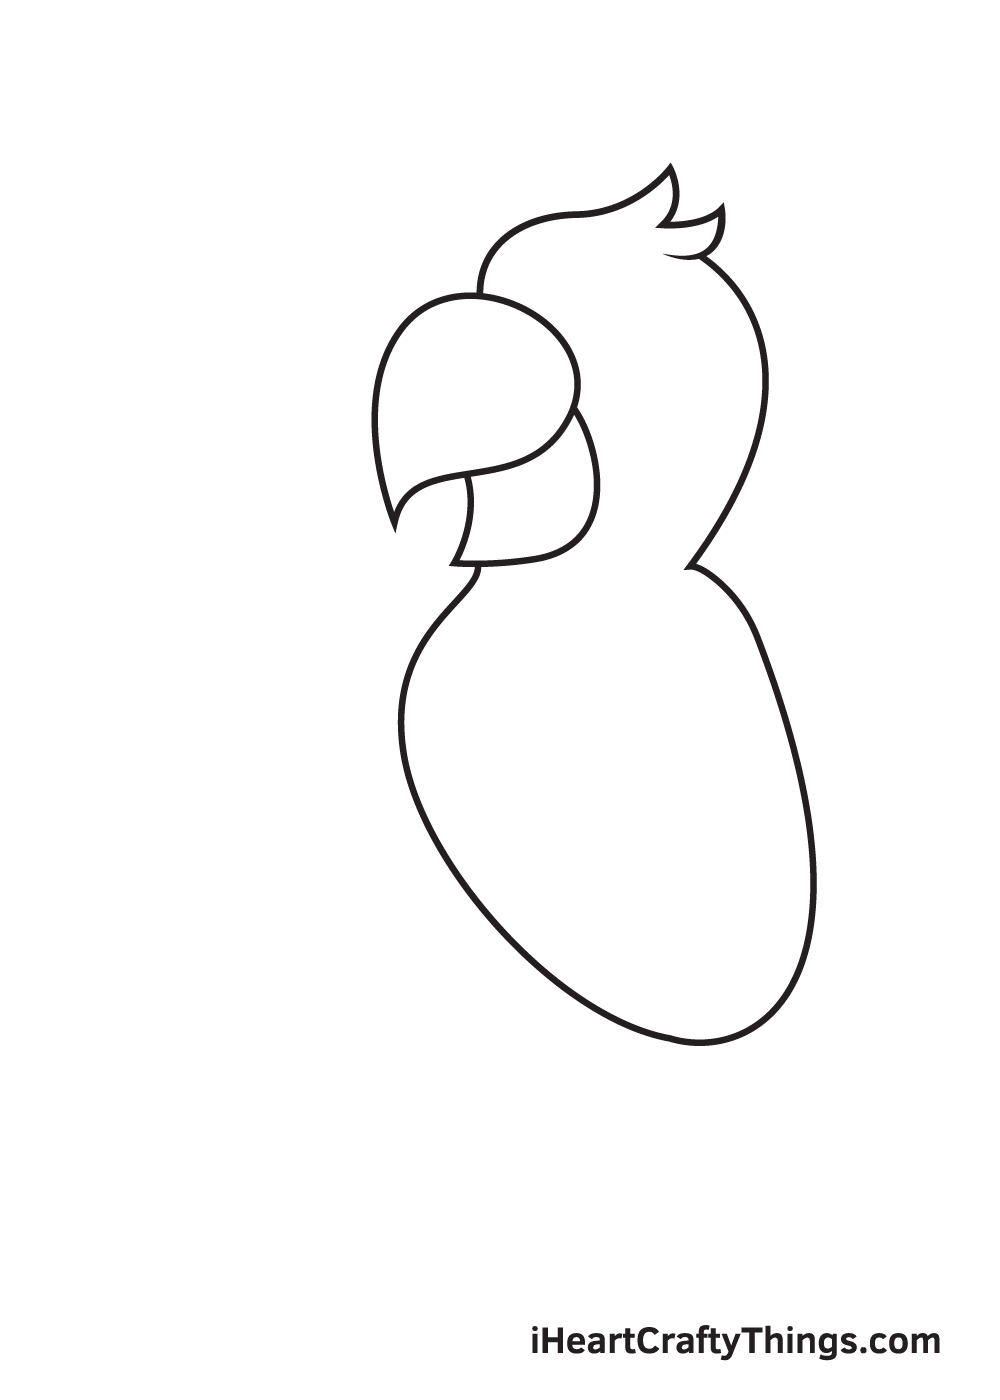
Step 1
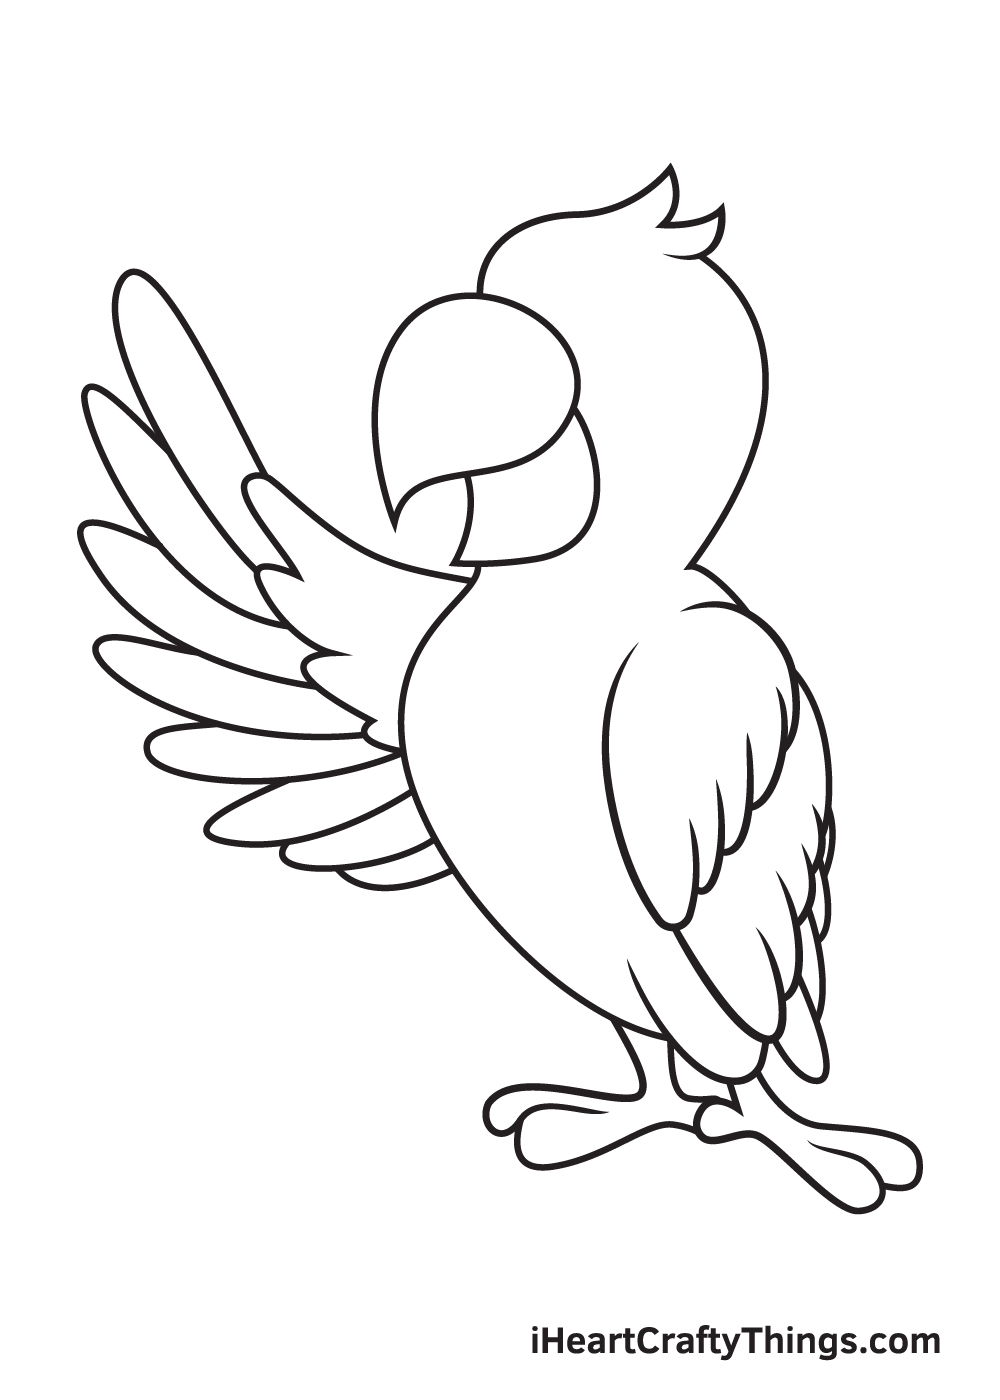
Beginning on the upper portion of your paper, draw an upside down droplet shape.
This forms the upper beak of the parrot.
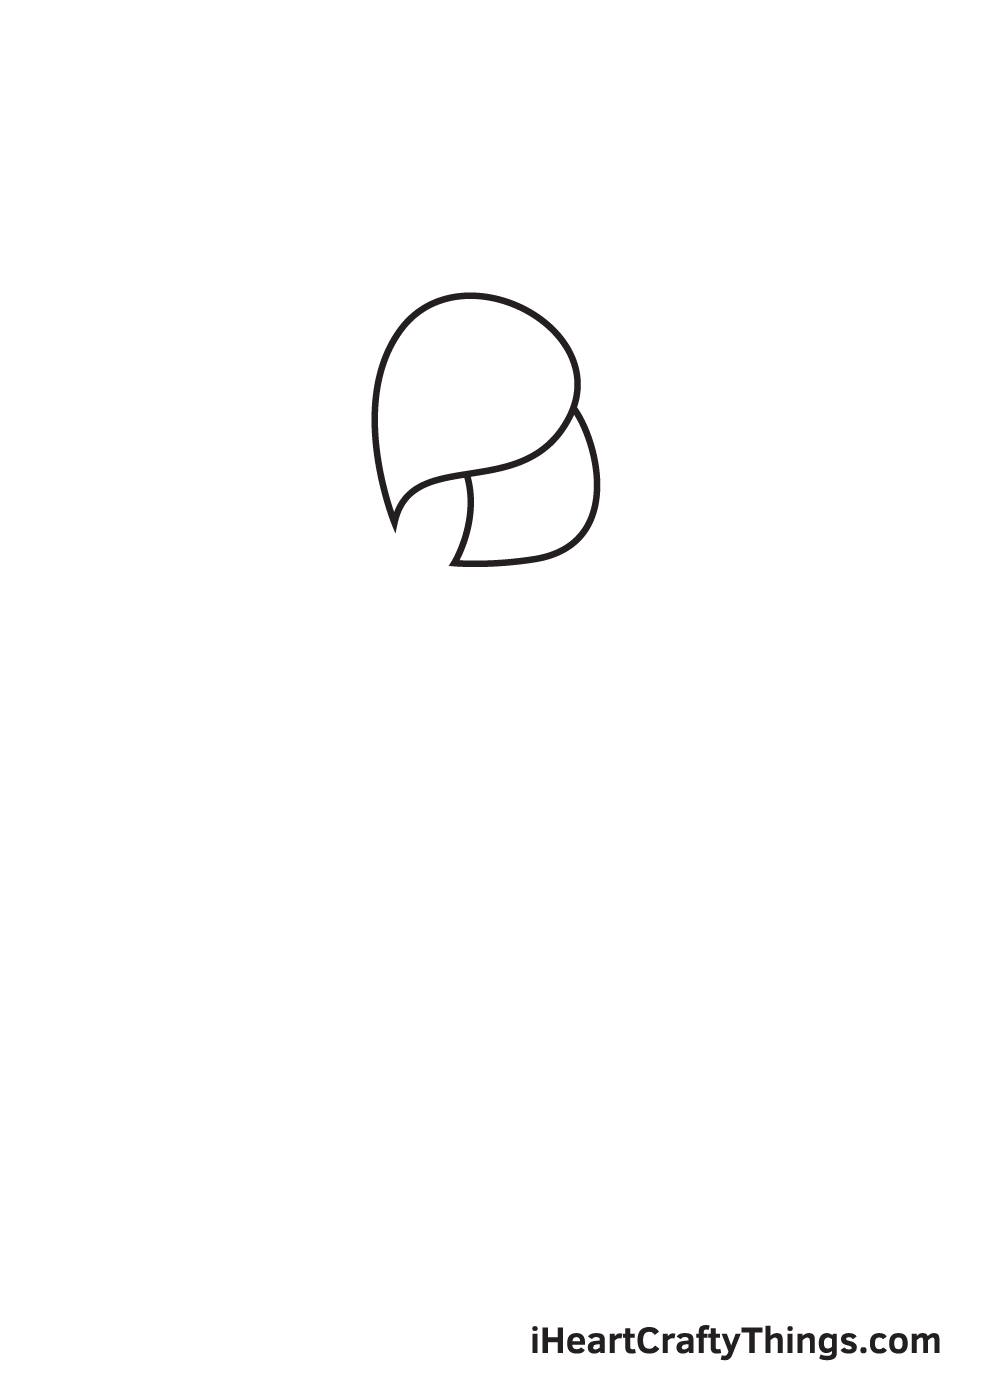
The vertical line at the top marks the spot where you should draw the outline of the upper beak.
This creates the bottom beak of the parrot.
Take note that this shape should be slightly smaller than the one we drew previously.
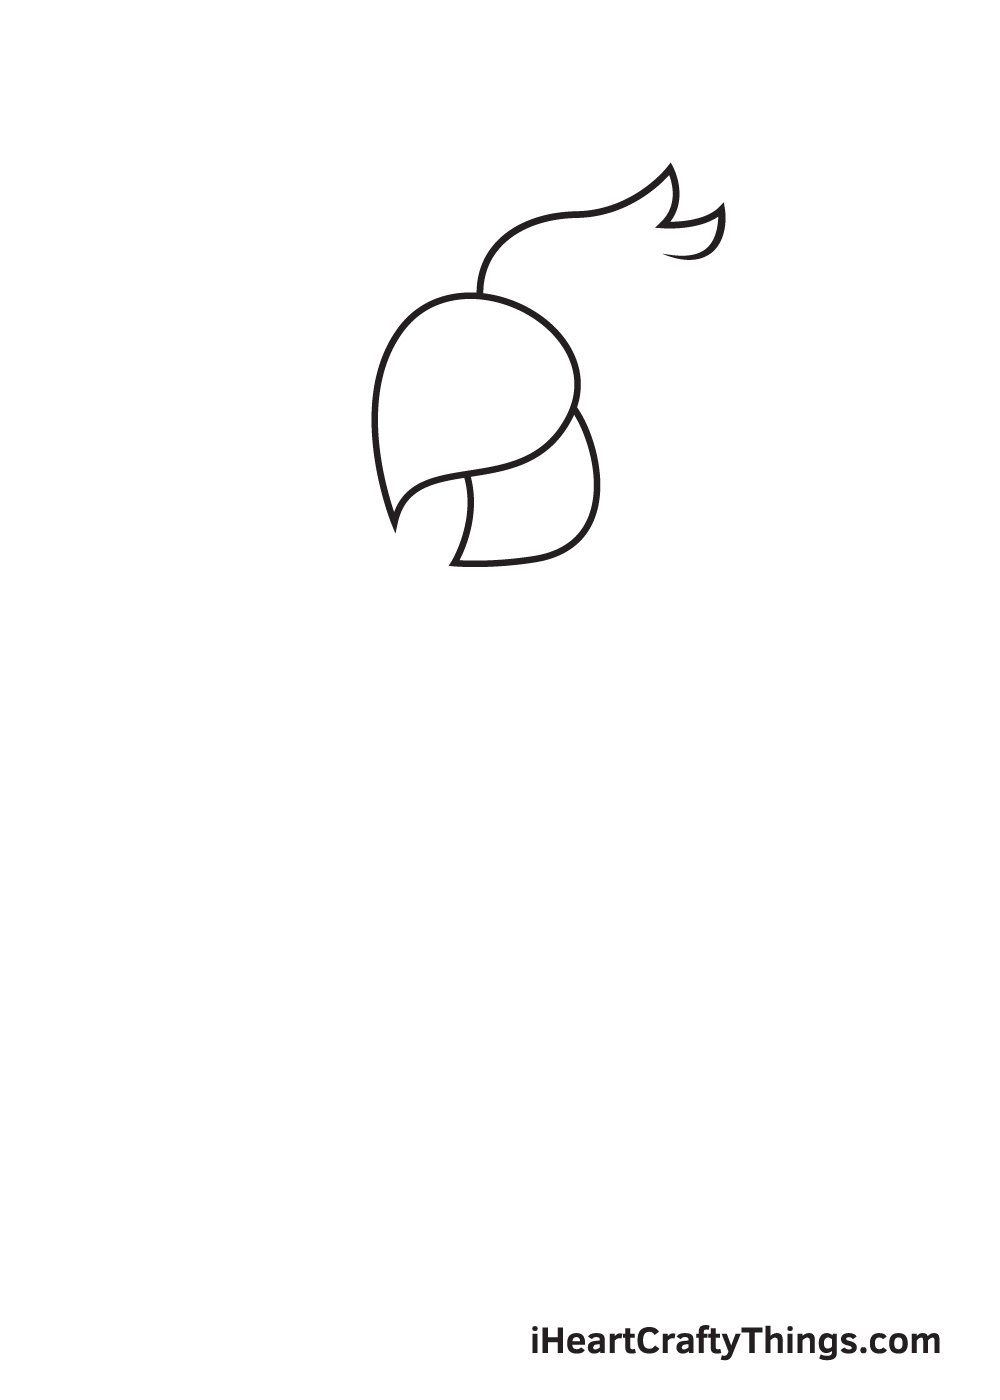
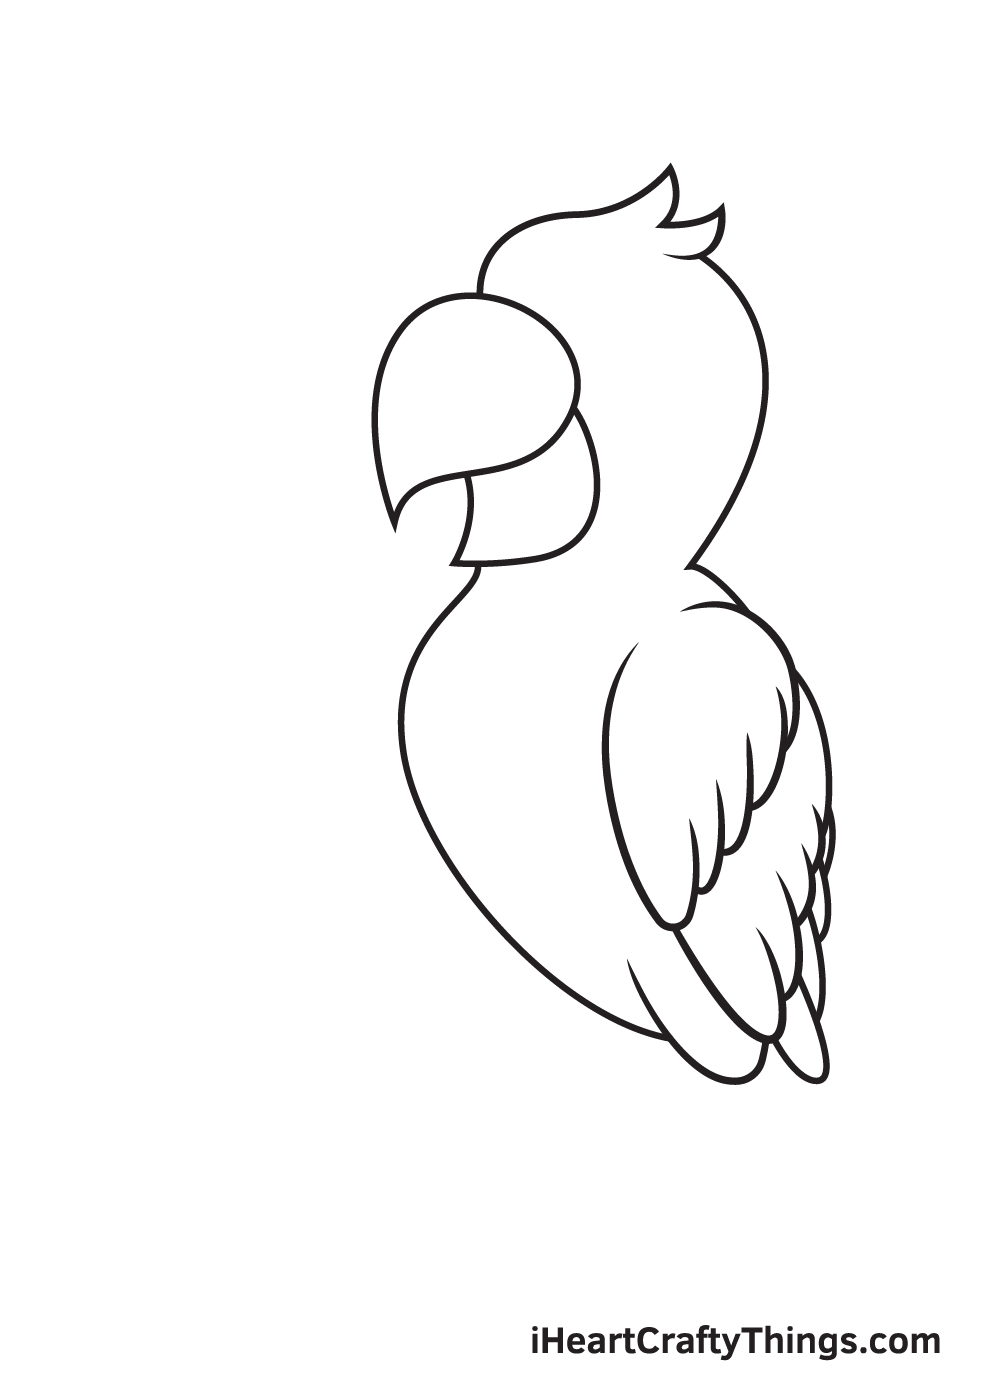
Dont forget to add thick pointed clumps of feathers to add texture!
This helps make the parrot appear more realistic.
The feathers can be created by simply drawing several curved lines shaped like a capital letter U.
The length of the wing should be nearly as long as the length of the parrots body.
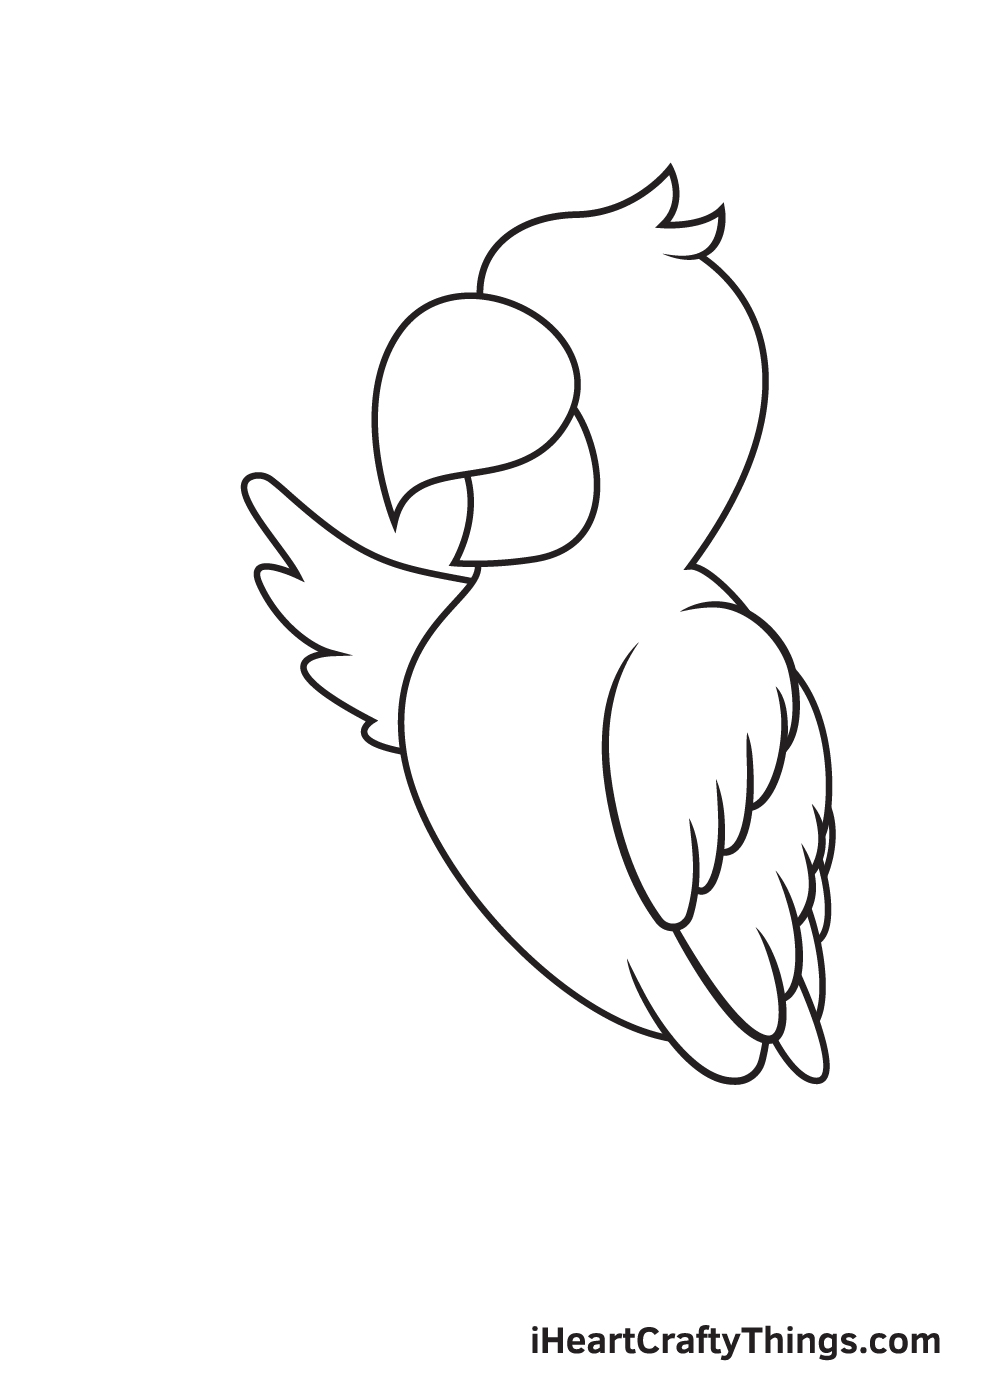
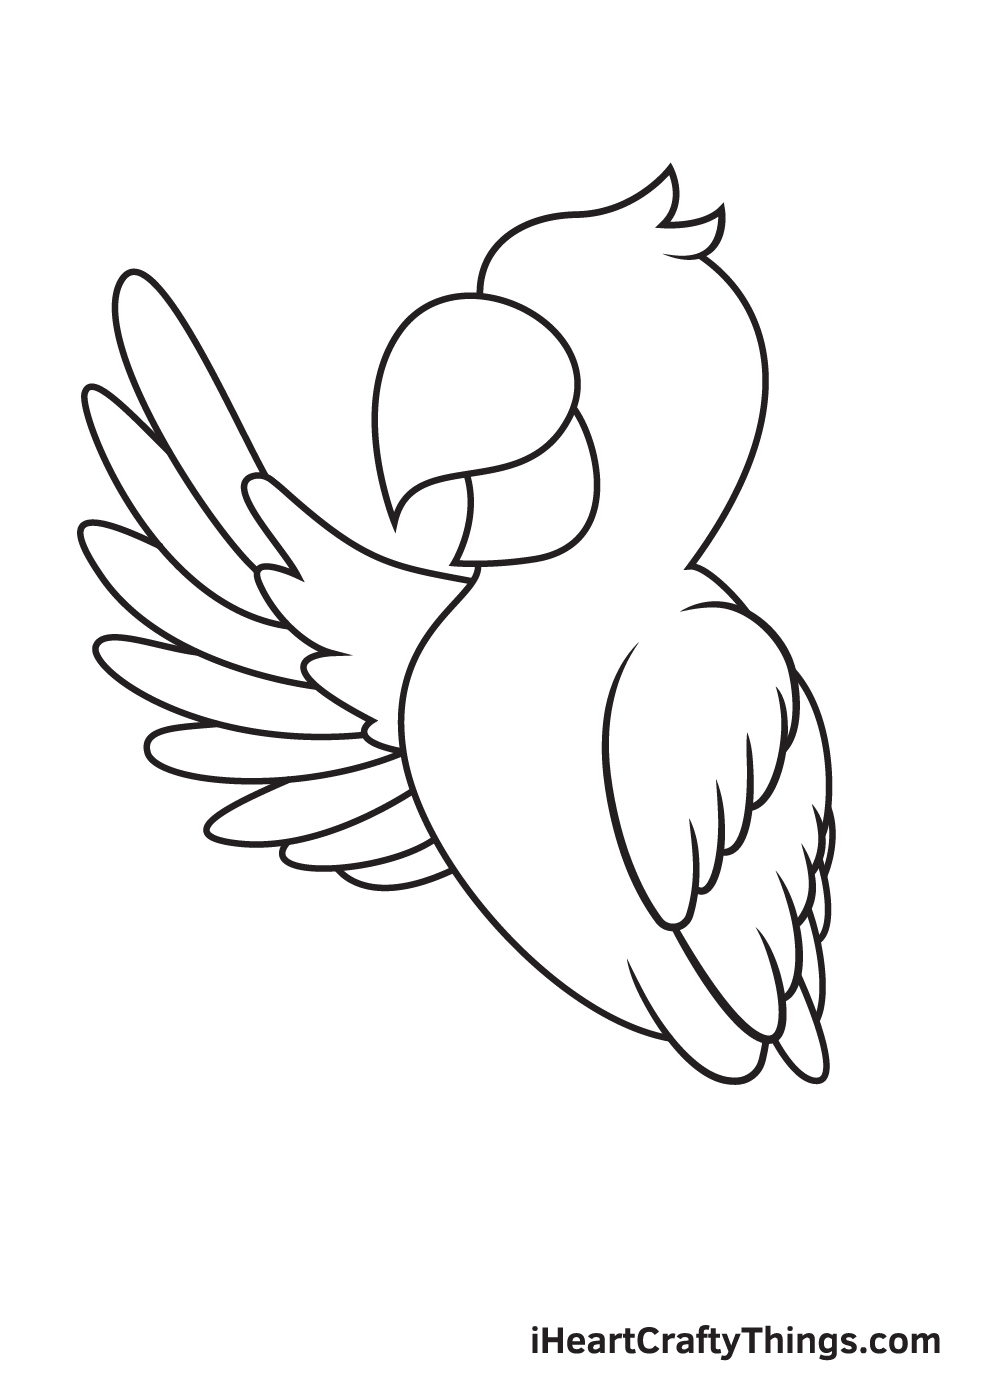
This forms the inner part of the left wing.
Thus, the shape and form of these two wings differ.
Dont forget to add separate toes at the front and the back of each foot!
It adds texture on the bird, making your drawing look realistic.
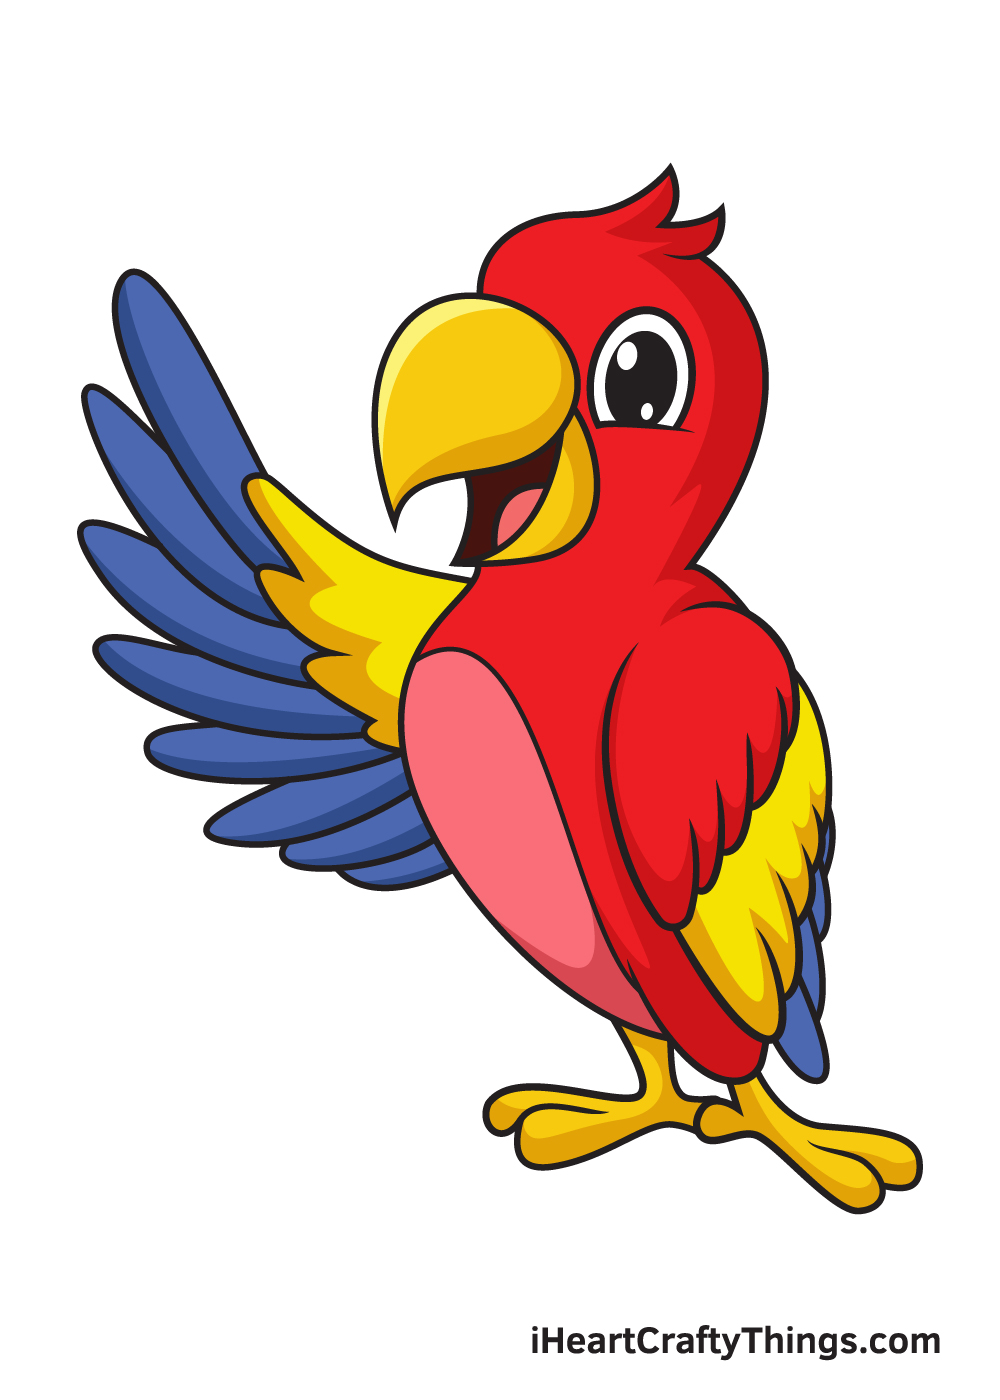
Then, draw an upright oval shape inside the eye to create the pupil.
Afterwards, draw a small circle within the pupil.
Now, shade the pupil while leaving out the tiny circle unshaded.
This gives you a wide range of color options to choose from when coloring your parrot.
Have fun playing with colors and watch as the parrot ultimately comes to life!
You could even create a few different variations on the same page!
What are some parrot species you would like to turn this one into?
You could do this by drawing a speech bubble near its head and then adding some text inside.
It could be a word or two, but you could also add an entire phrase.

What could this parrot be saying?
Parrots are very intelligent, so they like to have toys and objects to interact with.
You could add some of these objects to your parrot sketch to make it more interesting!
These could range from a perch and a food bowl to little mirrors or plastic toys.
The more you add to the image, the happier this parrot will be!
It will also allow you to add all sorts of great colors and textures to the design.
The final suggestion we have for your parrot drawing would be to add a background setting.
You could go for something standard like a parrot cage or a house and it would still look great!
There are some more imaginative configs you could also go for though.
These could include a pirate ship or maybe a lush tropical jungle.
Your Parrot Drawing is Complete!
We hope you enjoy this step-by-step parrot drawing tutorial.

What kind of bird would you like to learn how to draw next?
Dont be embarrassed to show off the results of your hard workwere sure it looks incredible!
Were excited to see your colorful parrot drawing!

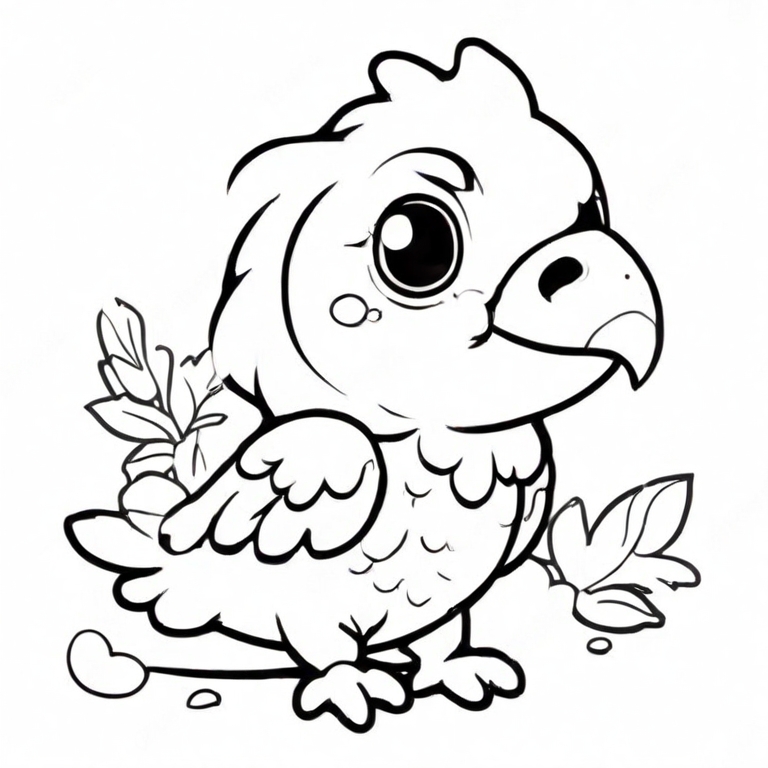
Here Is A Cute Parrot Drawing To Inspire You!
In this guide, you have seen everything there is to know about drawing a parrot.
Amanda even included some background details to give this cute parrot a home.

It would be a good opportunity for you to use some of your favorite art tools and mediums.
What could it be saying?
More From:How to draw
Printable Bubble Letters A Complete Guide!


