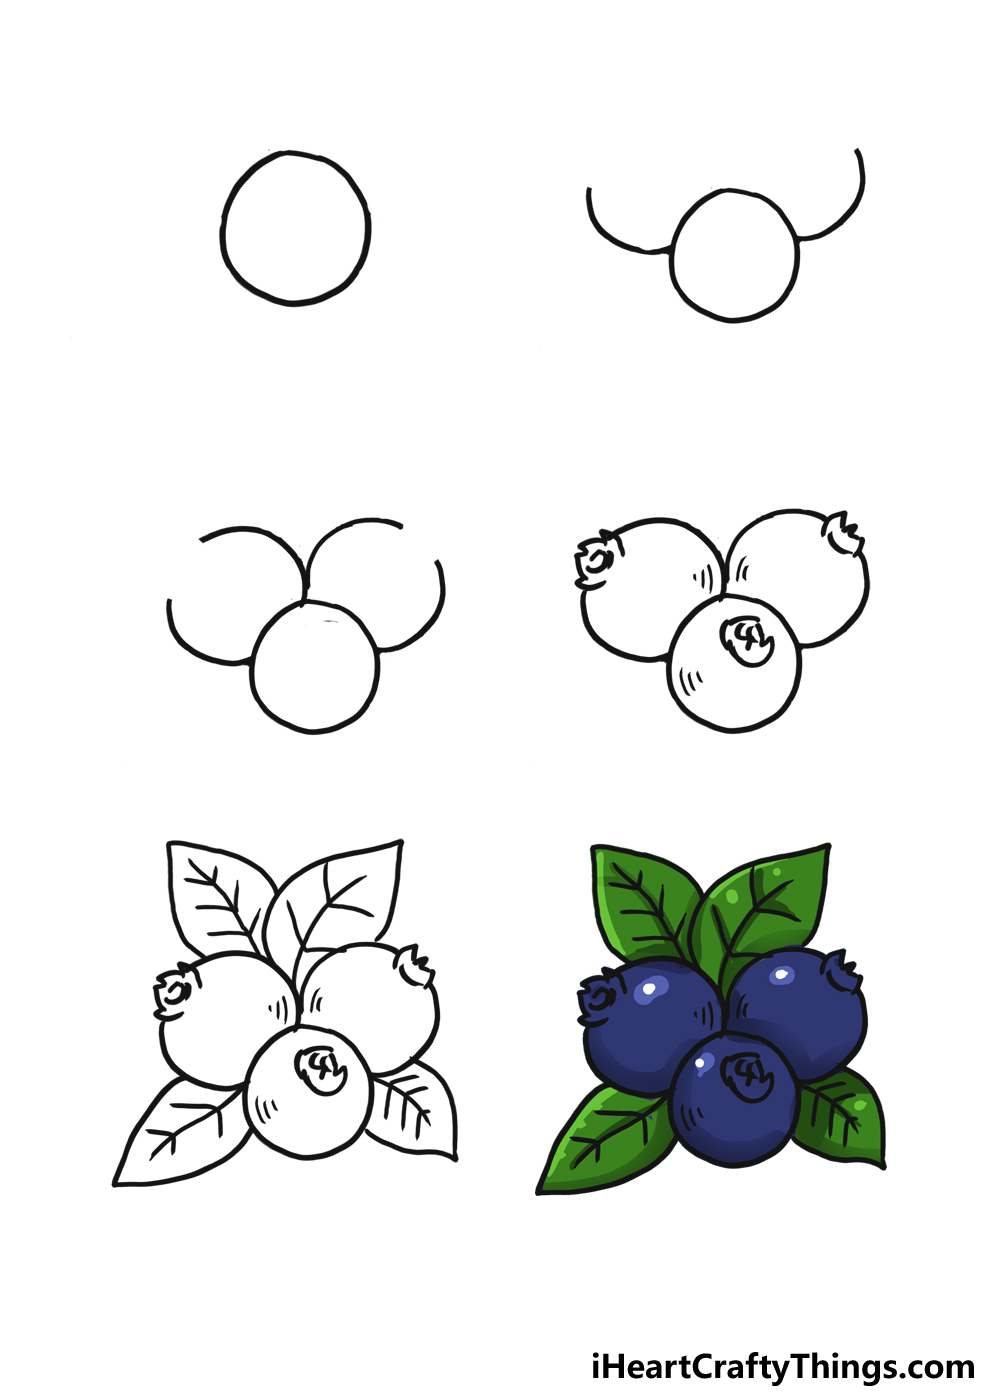
Blueberry Drawing in Just 6 Easy Steps!
There are so many different kinds of fruits and berries, and everyone has their favorites.
Not only can they be enjoyed as a juicy snack, but they have many other uses as well.
They can be made into juices, jams or baked into pies to name a few.
They can also be surprisingly hard to draw, however.
Thats where this guide comes in, as we will be showing you how to draw a blueberry.

Without further ado, lets begin by doing the first step.
How to Draw A Blueberry Lets Get Started!
This will also include a few leaves to add to the design.
That will all come later, however, so dont worry about all that for now.
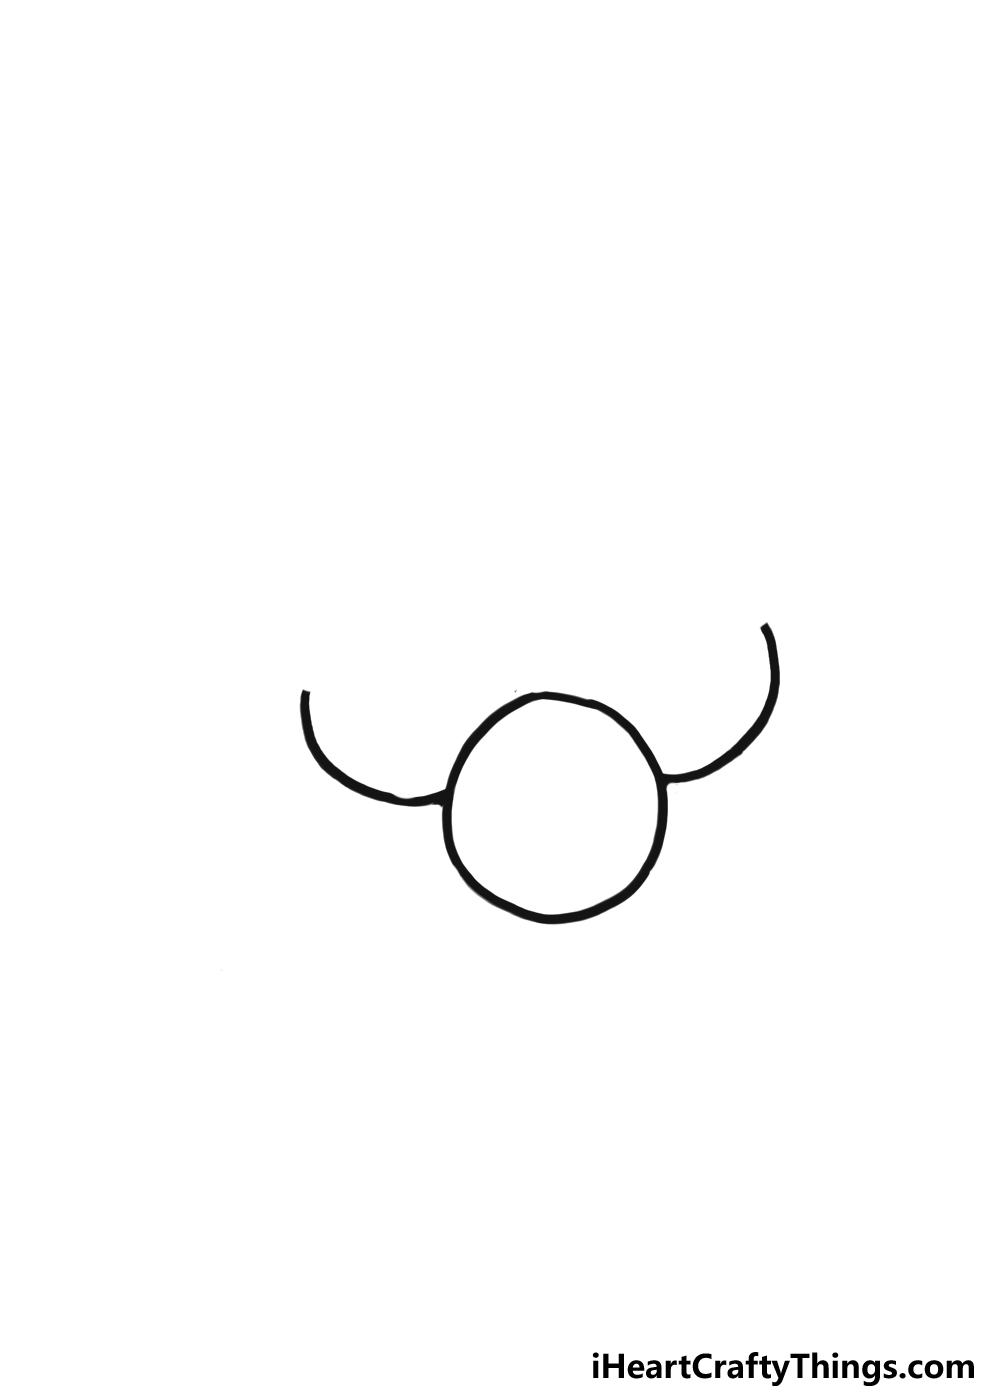
For this first step, we will focus on the central blueberry.
Luckily, the first step of drawing this blueberry should be pretty easy.
In fact, we will simply be drawing a circle for this first one.
Not only that, but it doesnt have to be perfect.
In this case, we would advice drawing it freehand.
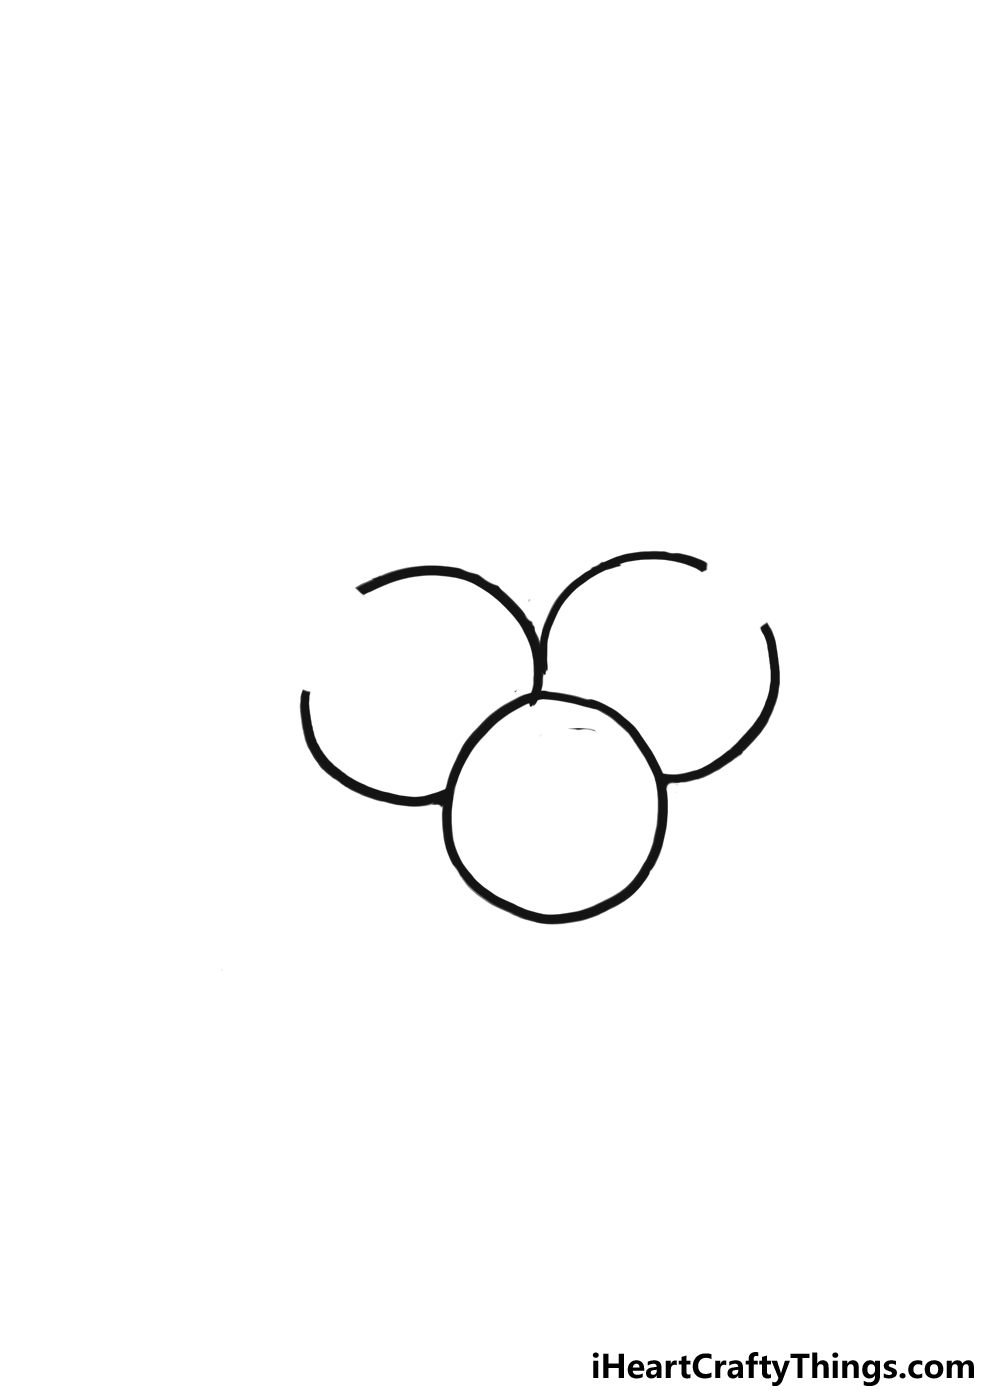
While this will be easier than the first one, these will be a little more complicated.
For that reason, we would recommend planning out these next ones with some pencil lines.
Once again, these dont have to be perfect, especially now that theyre just in pencil.

when you obtain drawn these planning circles, we can start drawing the actual blueberries.
For now, we will just be drawing the lower portions of the blueberries.
This will be done with some simple curved lines that extend out from the first blueberry.
Thats all there is to it for now!
These two blueberries look a bit weird now, but worry not!
So when youre ready, lets head to step 3 and add to these little berries!
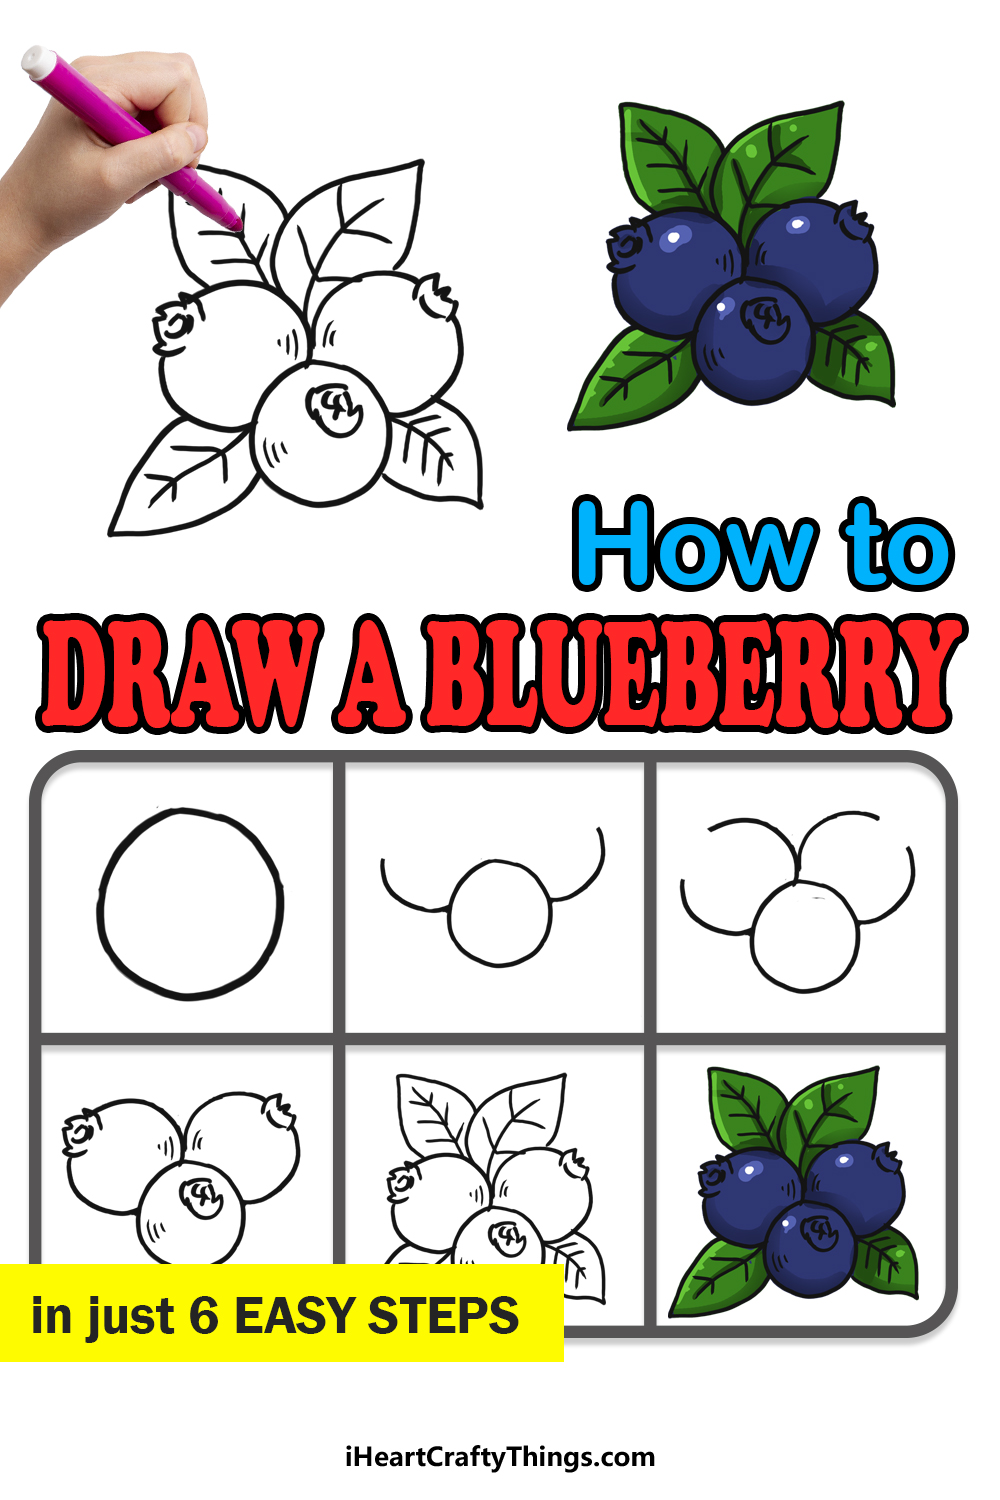
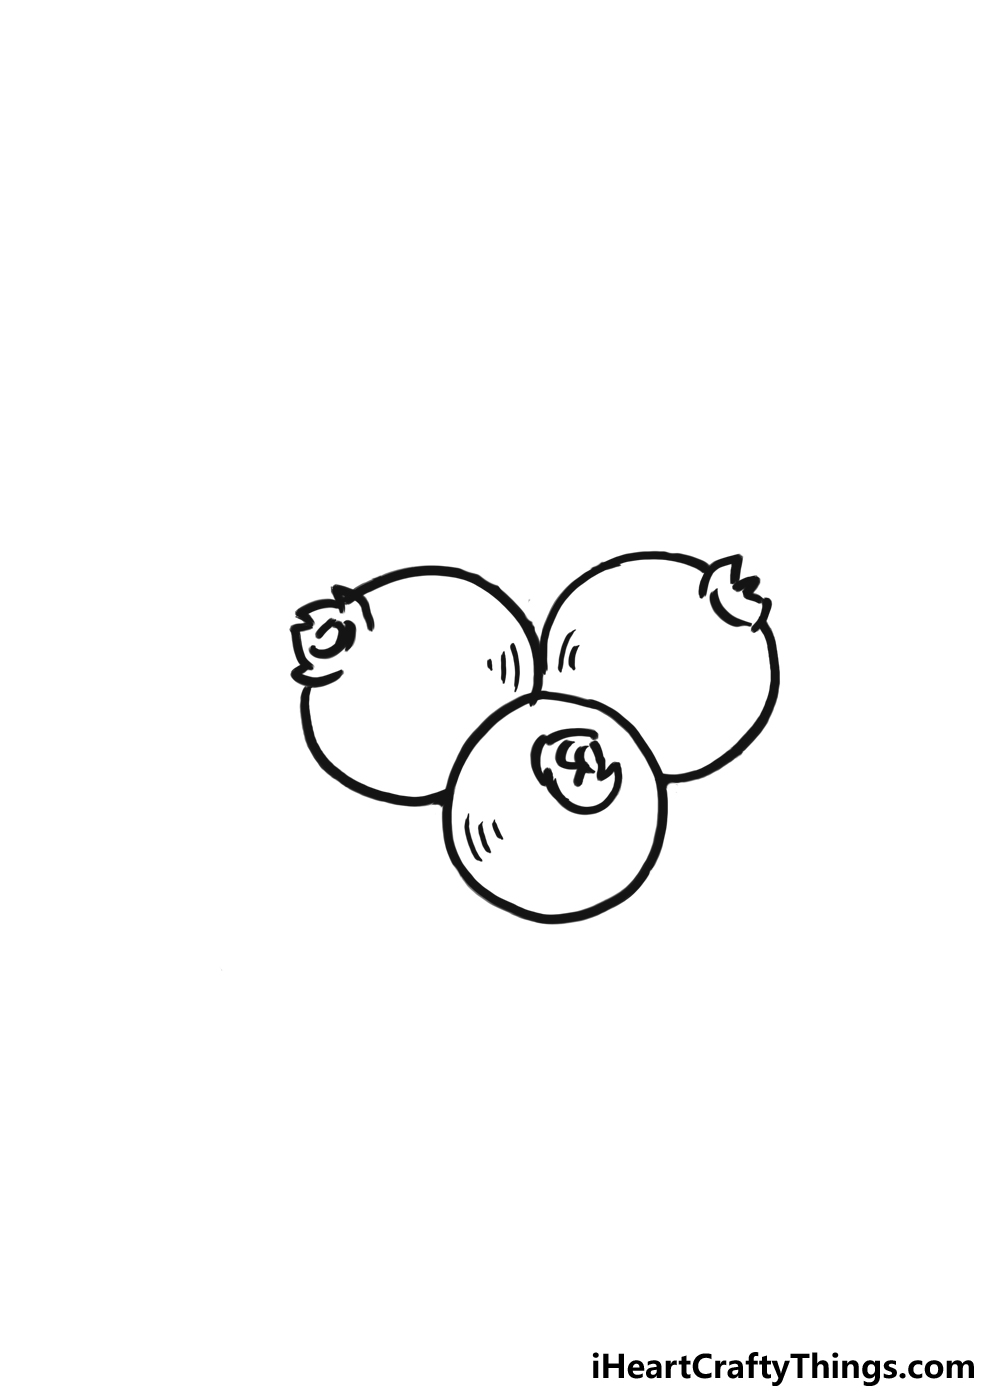
As mentioned, be sure to leave a gap between this line and the lower one from step 2.
Then, we will do the same for the blueberry on the right.
This will also be where we find out why we left those gaps earlier.

In those gaps, we will be adding small little leaf stubs.
Just be careful, as you may smudge ink or erase things you dont want to!
Now lets draw the first calyx on the central blueberry.

This is a simple rounded shape that has some pointy little line details in it.
Next, we will add the other two to fill in the gaps on the other two blueberries.
Because of the angle, these ones will have some pointy outlines sticking out.

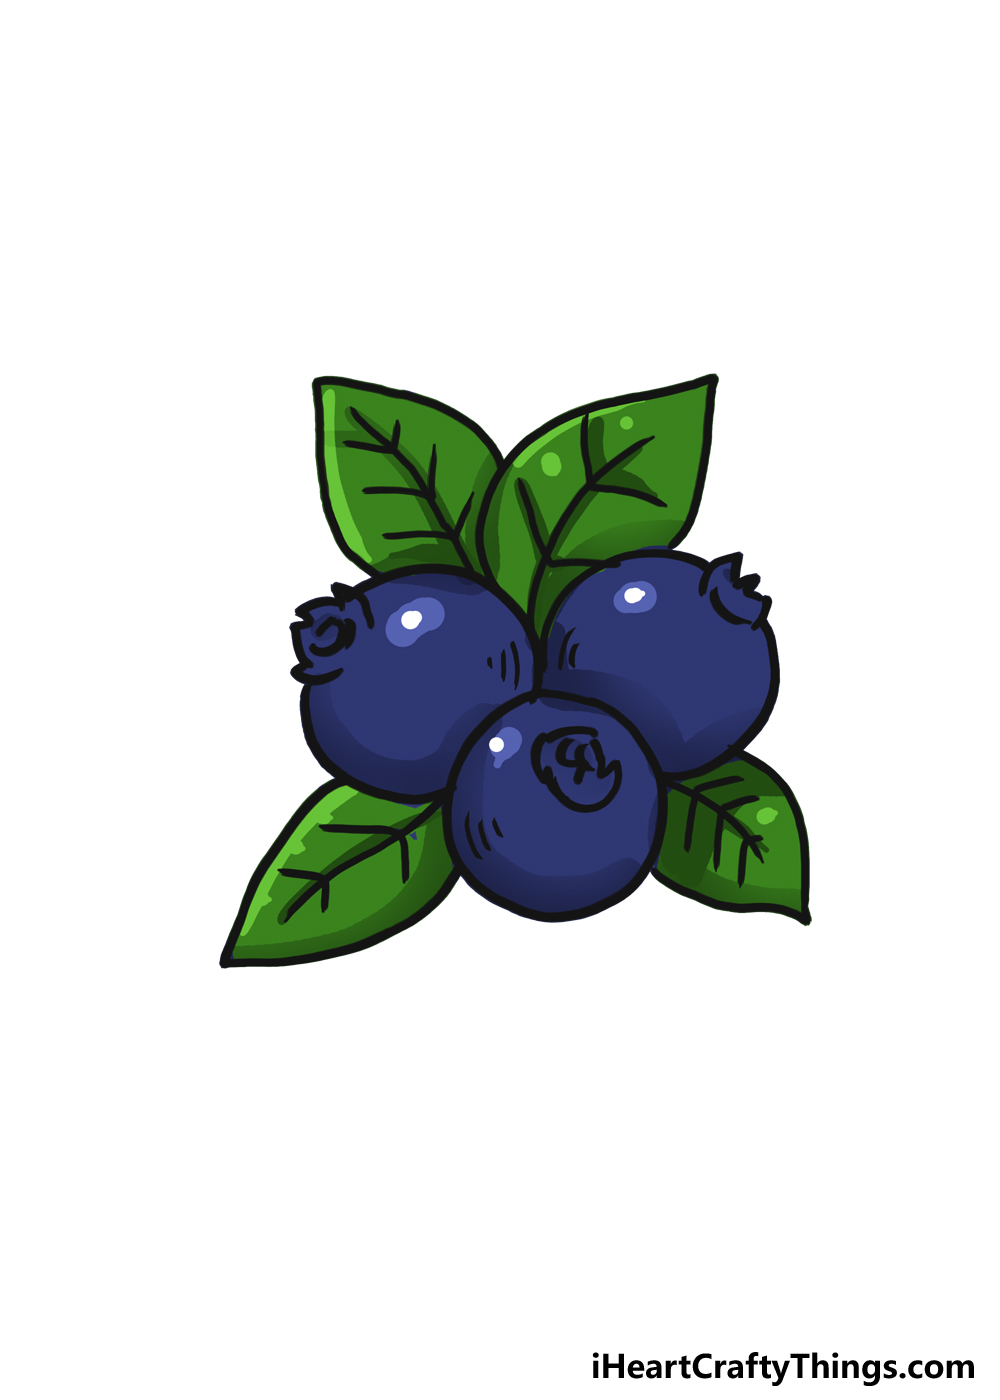
With that, we have the outlines for the blueberries ready to go!
The main thing to add in this step to finish off the design is some leaves.
Luckily, blueberry leaves are rather simple to draw.

As you will see in the reference image, we will be adding four leaves to the design.
There will be two on top next to each other, and two more separated at the base.
The leaves are drawn with some slightly curved lines that end in some pointy tips.

With these leaves, were technically done!
One would be to add some more fruit to the image.
You could stick to blueberries, or you could add other kinds of fruit that you enjoy.

Earlier in the guide, we spoke about how blueberries can be used in many other kinds of food.
Can you think of any other kinds of food that a blueberry can go in?
you might also draw a background to give this even more of a sense of place.
This is the step where we will color in your artwork to really bring it to life.
Even for the blueberries themselves, we will be using lots of different shades.
you might use one shade of blue if you want, but the blueberry wont look as dynamic.
We used some dark blues and purples around the edges of the blueberries to create a shading effect.
Then, we colored in the leaves with shades of green.
The colors you use are up to you, and you dont have to stick to our choices exactly!
Not only can you choose the colors, but also the art tools and mediums that you use.
Colored pens and markers would make the colors really pop, however!
These are just a few examples, but there are so many more you could use!
What colors and art mediums will you choose?
Your Blueberry Drawing is Complete!
Be sure to let your creativity run free!
More From:How to draw
Printable Bubble Letters A Complete Guide!
