It also happens to be an easy and fun letter to write.
We see it in many words and names, so its a good one to learn early on.
By the end of the guide, you will see how easy it can be!
Of course, we will be adding a lot more to the design later.
make a run at follow the reference image and replicate the curvy, twisty lines.
It could be a dark pencil, but using a pen is always a great idea.
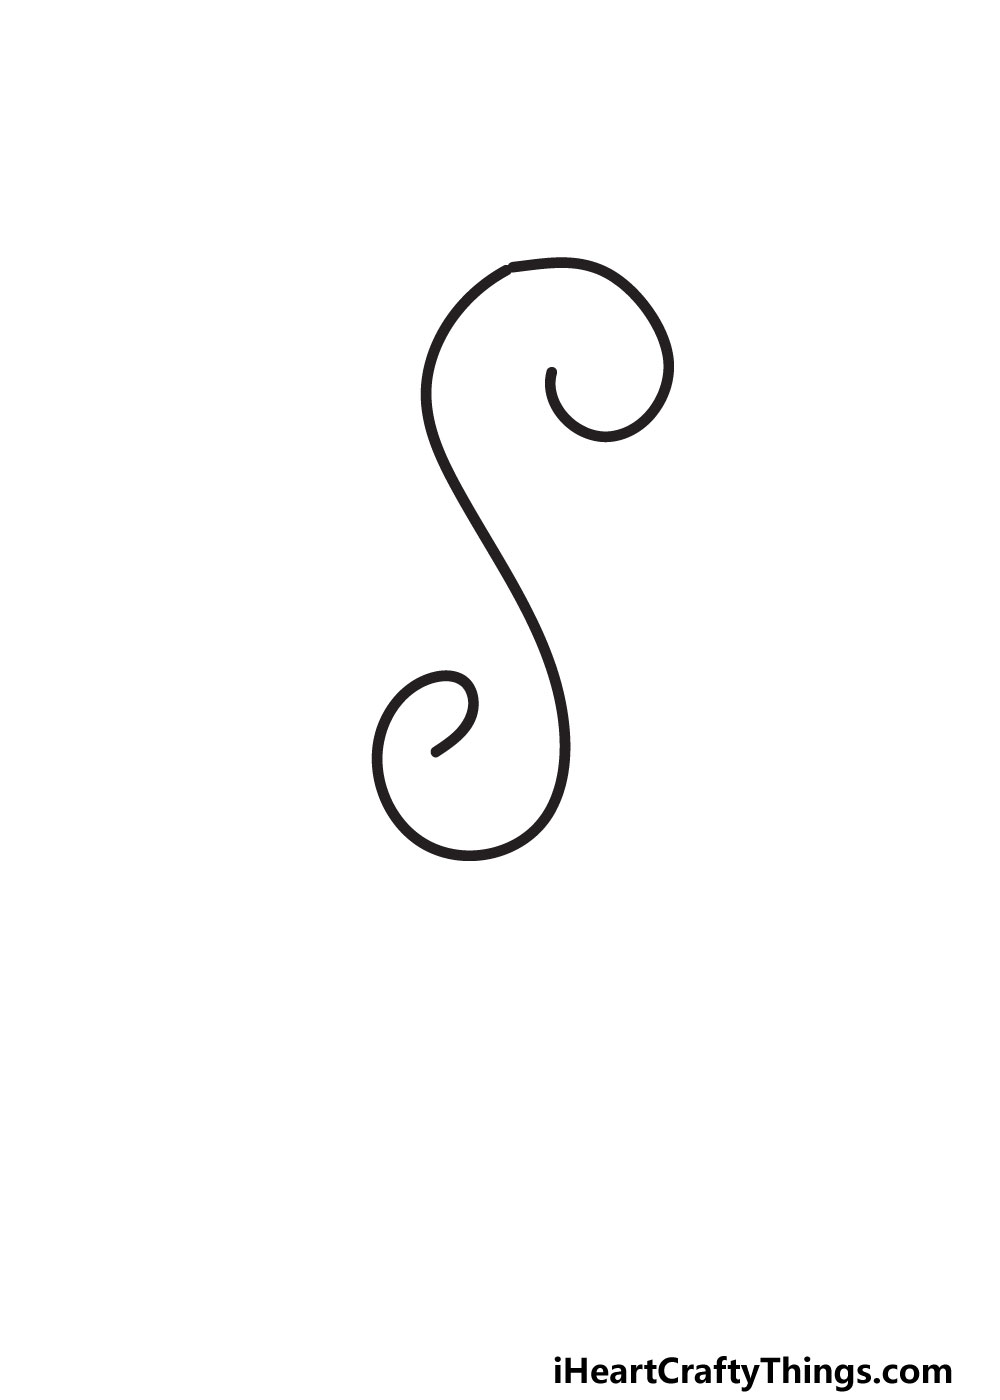
The curl at the top of the letter is wider than the one at the bottom, for instance.
This will come into play later when we add the other outlines.
For now, lets proceed to step 2 and continue the outline.
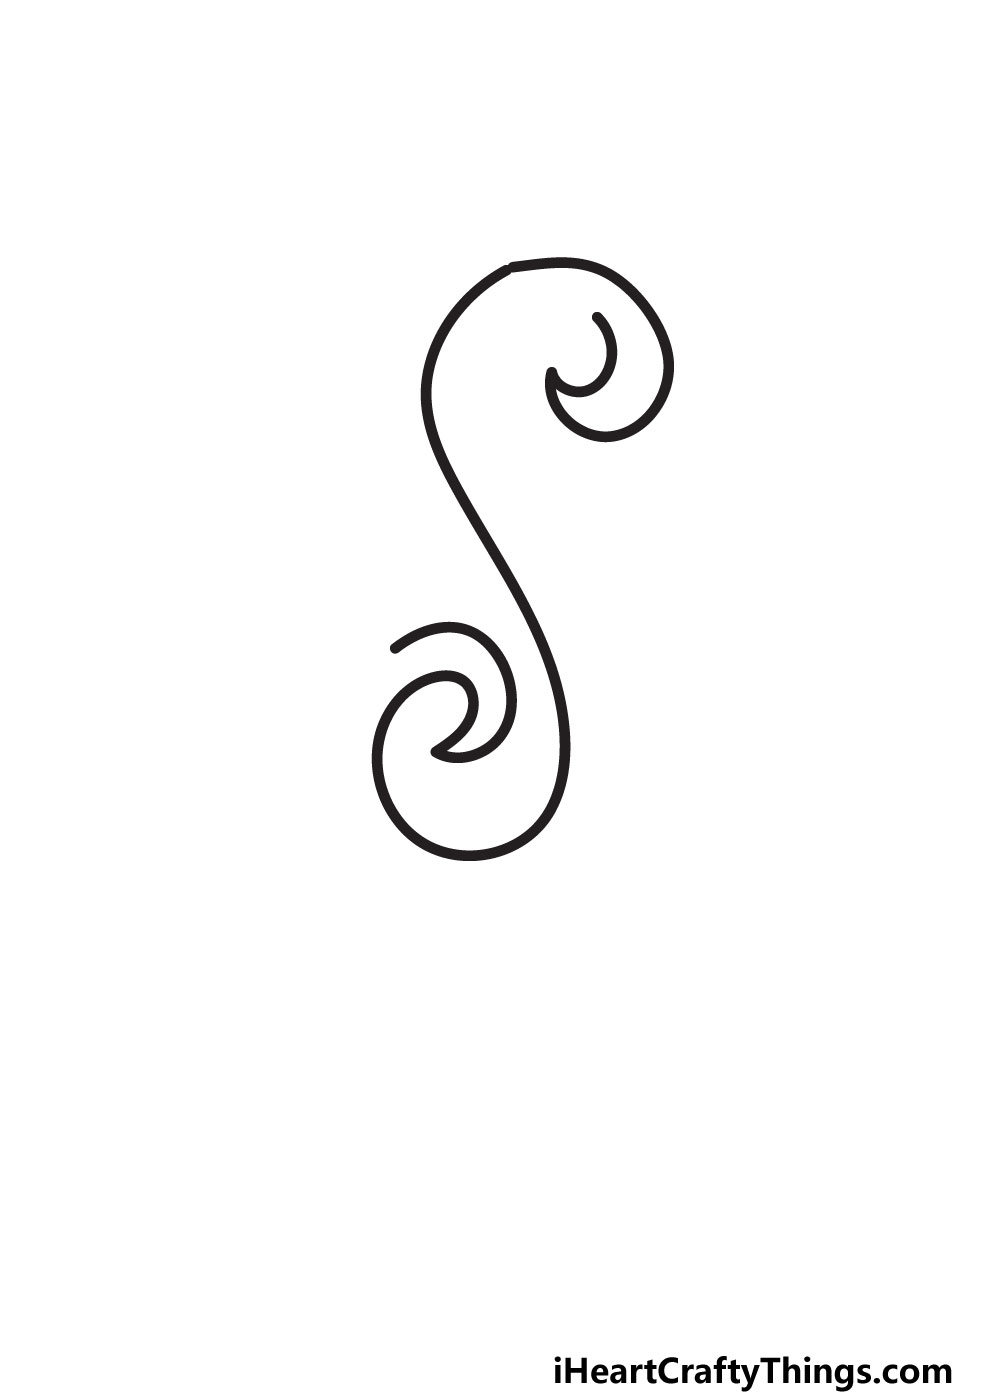
To begin this, simply draw a small curved line at the upper tip of the letter.
Then,we will be adding a similar curved line.
For that reason, we would recommend taking it slowly.
Lets start from the upper side of the letter where you left off.
From this pointy tip, there will be a line curving inward.
It will then curve out again, running parallel to the line that you drew in step one.

At the base of the letter, it will curve to the left.
Then, it will curve up gradually until you have closed the gap to finish off the outline.
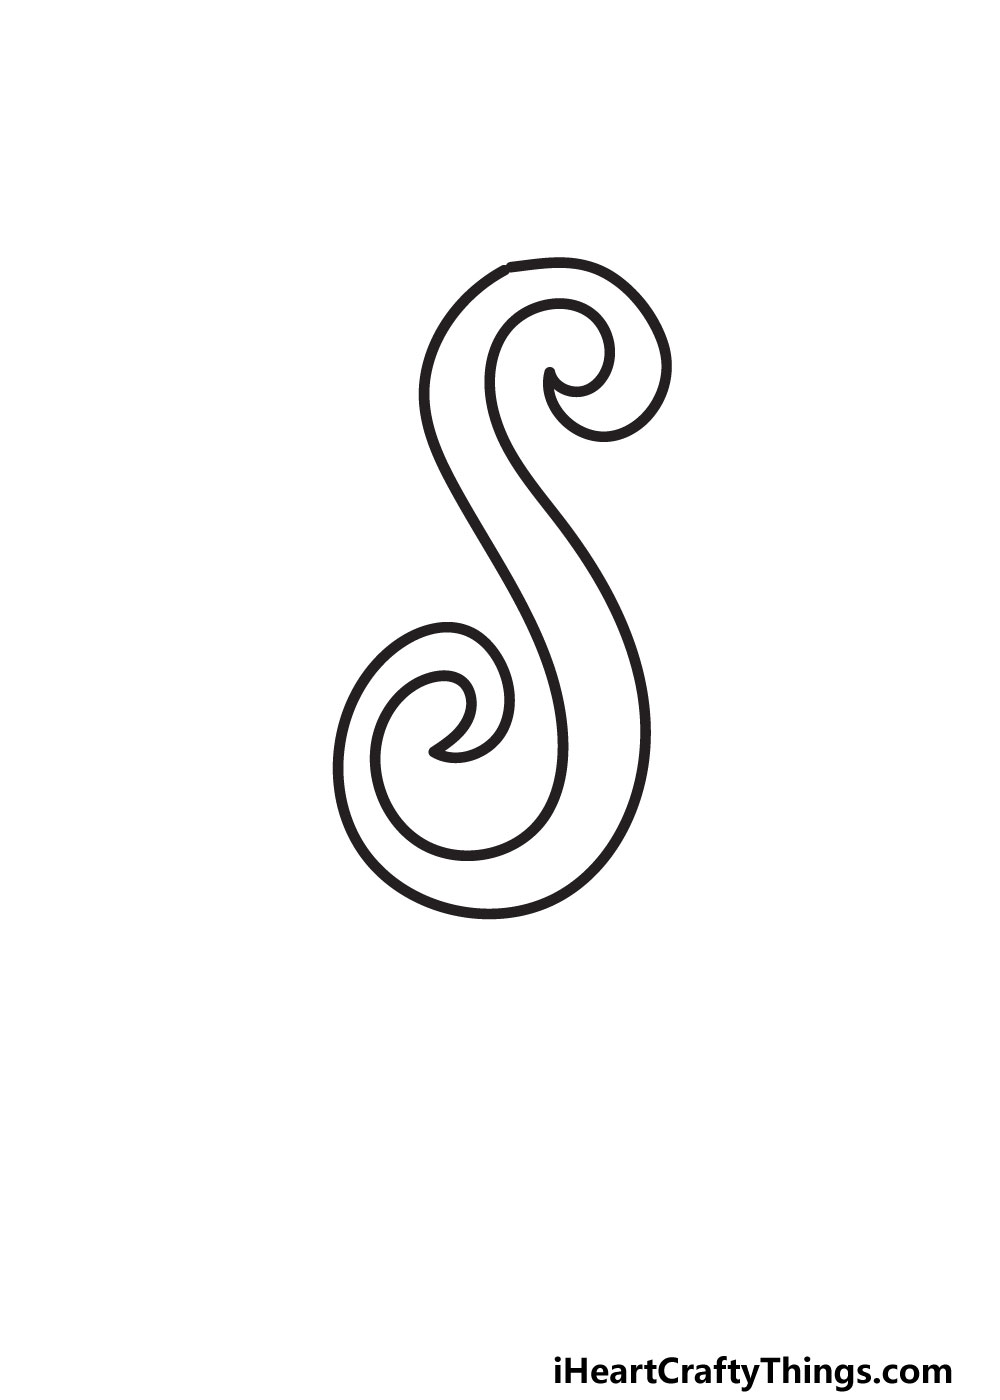
Before moving on, be sure to verify youre happy with what we have so far.

you could do this by smoothening and neatening up all the lines.
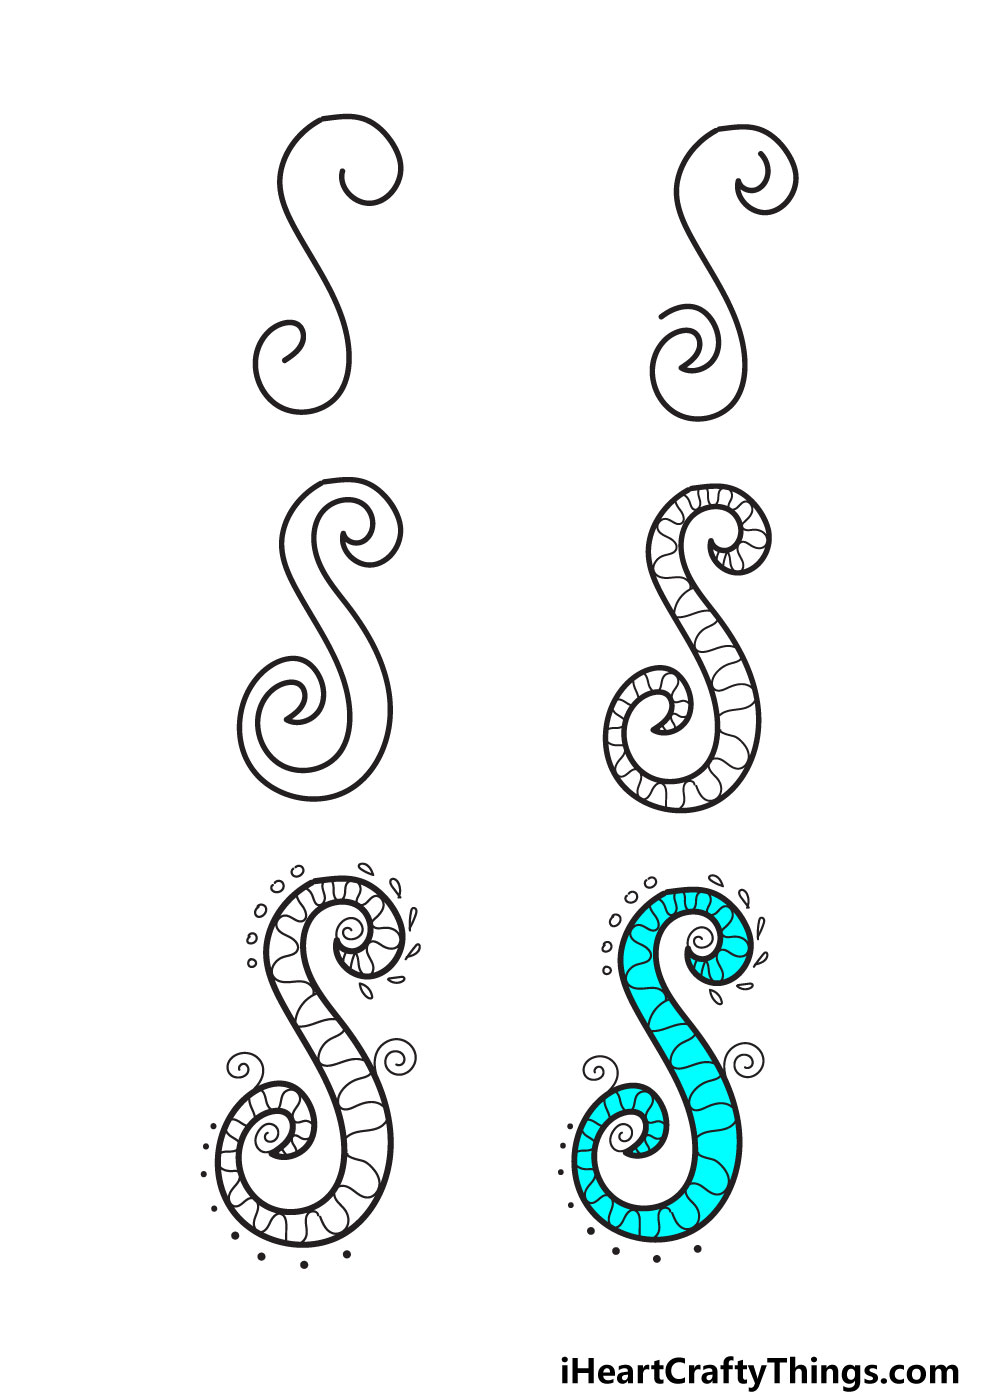
In our example image, we show you just one of the ways you could do it.
We chose to fill the letter with some curved, wavy lines.
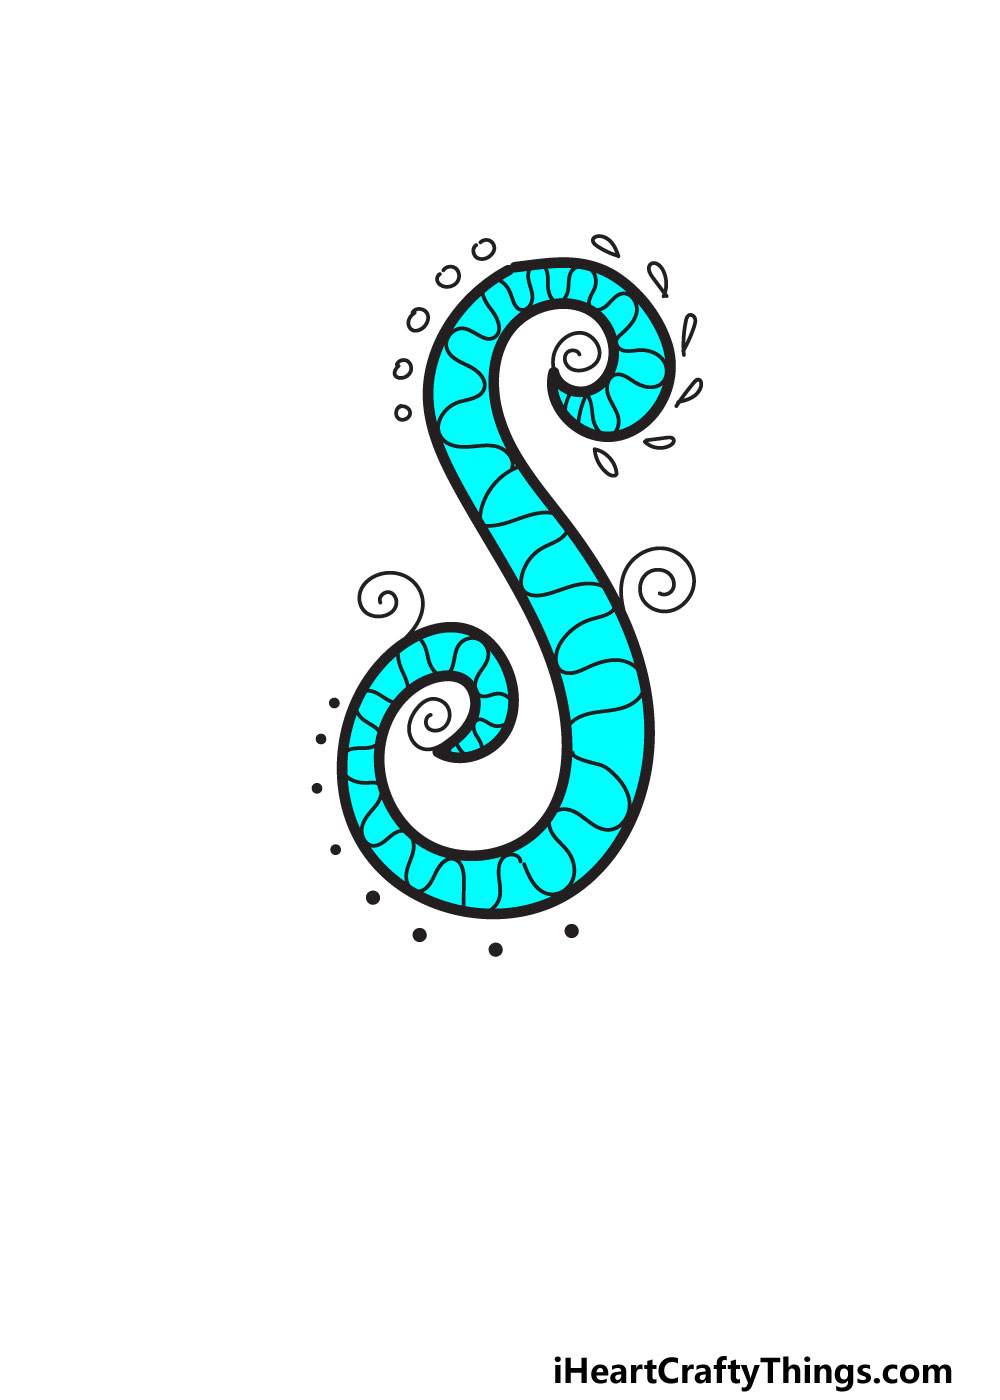
You could also fill the letter with some small shapes or symbols.
To begin, we added some simple spiral lines poking off various parts of the letter.
We kept this to three, but you could add a few more if you like.
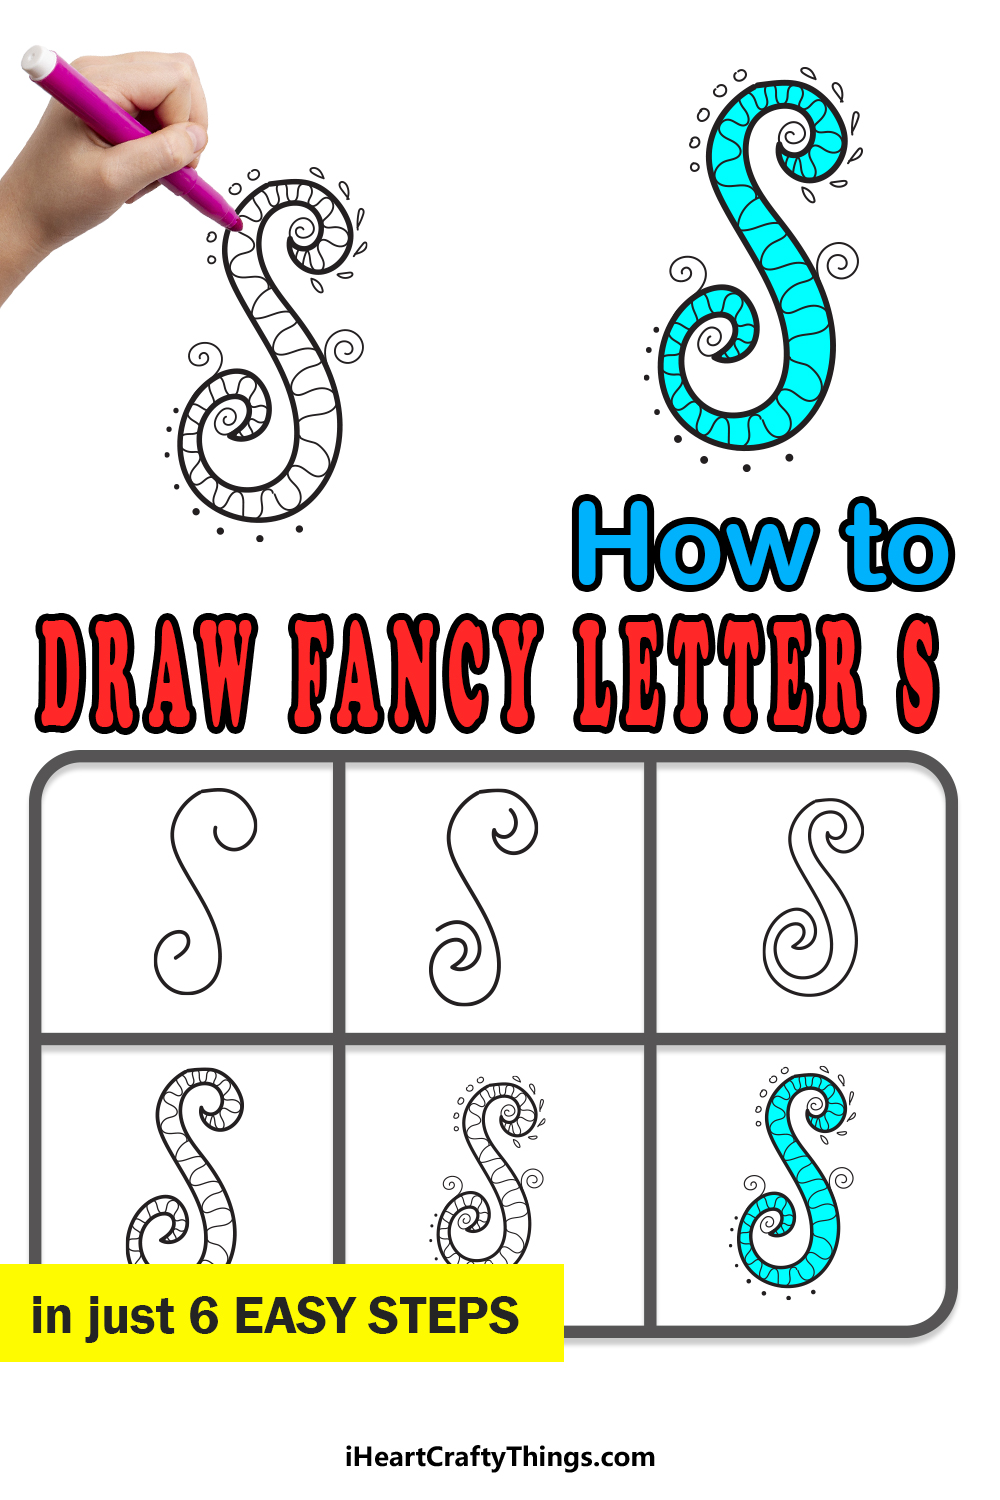
Next, we added some small dots below the base of the letter.
Once again, you could add a lot more of these if you wanted to!
We also drew a series of small circles along the upper left side of the letter.

Then, we added some small teardrop shapes on the upper right side of the letter.
you’re able to also fill the background with some details and additions.
In our example image, we went with a light blue color for the letter.

Of course, there are hundreds of other colors you could use if you prefer as well.
These could be other shades of blue or other colors entirely.
But were not done quite yet.

My Final Tips To Make Your Fancy Letter S Drawing Even Better!
We will go over a few ways that you could begin this process!
You could also draw elements that relate to the word to further create a theme.

Another way to go about it is to use a name instead of a word.
it’s possible for you to choose a name and then challenge yourself to write out the whole name.
What are some details you could add to a depiction of the name?

More From:How to draw
Printable Bubble Letters A Complete Guide!

