It will be based on the capital letter, but it will be a lot more rounded.
However, we will do more than just show you how to draw this design.
By the end of it, you will also have some ideas for coloring and decorating the design.

This could make it tricky to maintain the design.
When youre ready, we can draw the first part of the design.
This will be done by drawing two lines that curl and run parallel to one another.
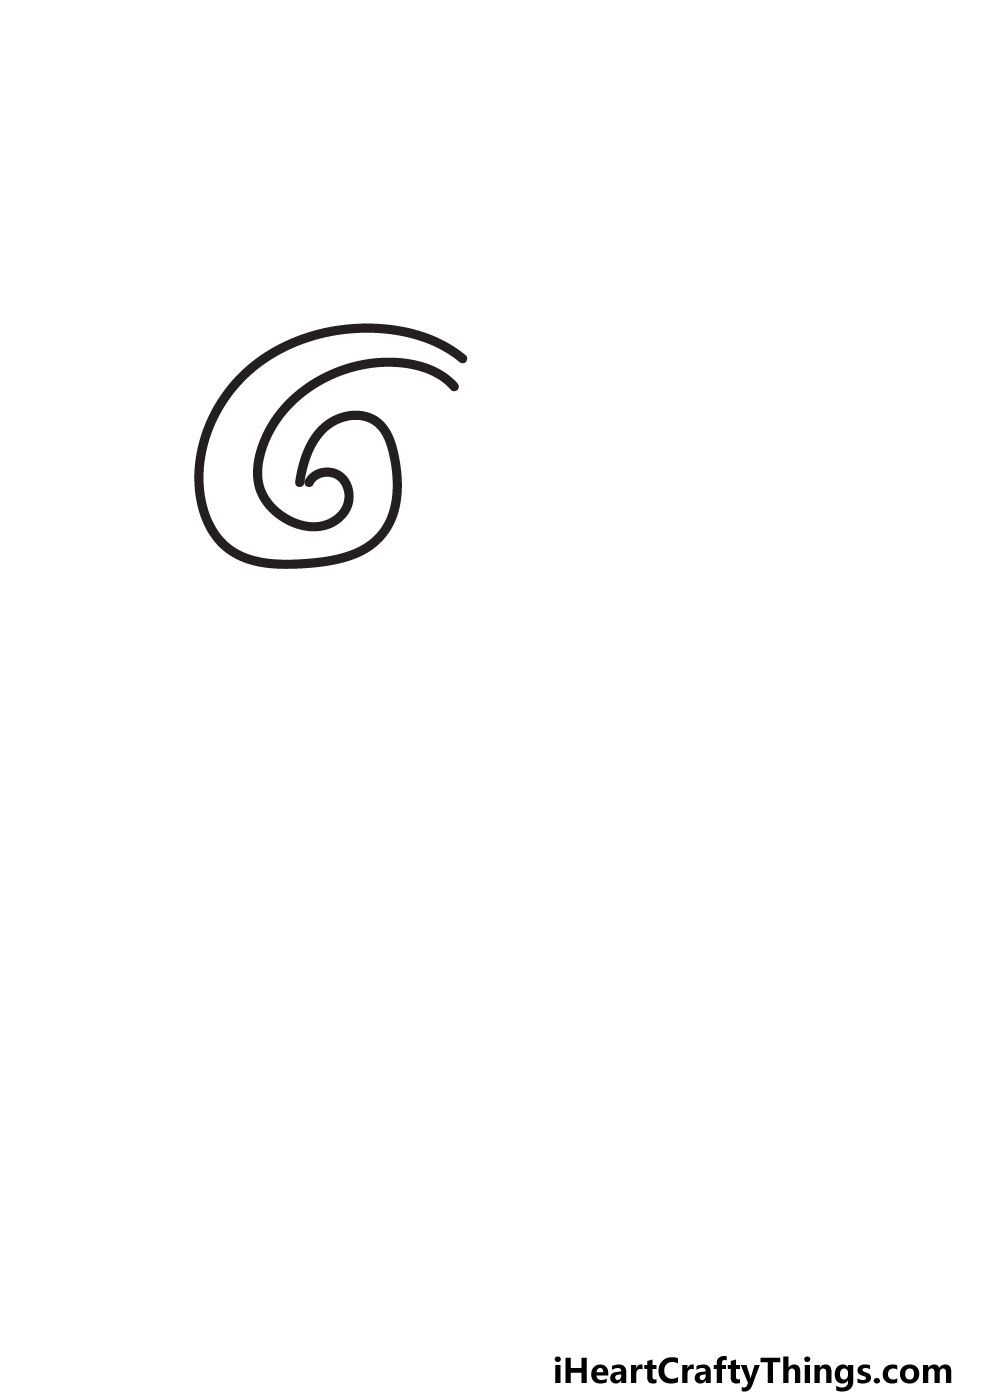
They will meet at a central pointy tip, as shown in the reference image.
With this first spiral drawn, we can continue to step 2 and add more to this design.
These would be the two sides and the dip in the middle.

In this second step,we will be drawingthe side on the left of the letter.
This section will extend down from and connect directly to the spiral from the first part.
As you get to the base of the letter, it will start to curve to the left.
This will gradually turn into another spiral shape that is similarly shaped to the first one.
As you will see in the example, it will be facing the opposite direction to that one.
This spiral will loop and curve to the right until it becomes another slightly wavy vertical line.
The vertical line will extend to the top of the letter.
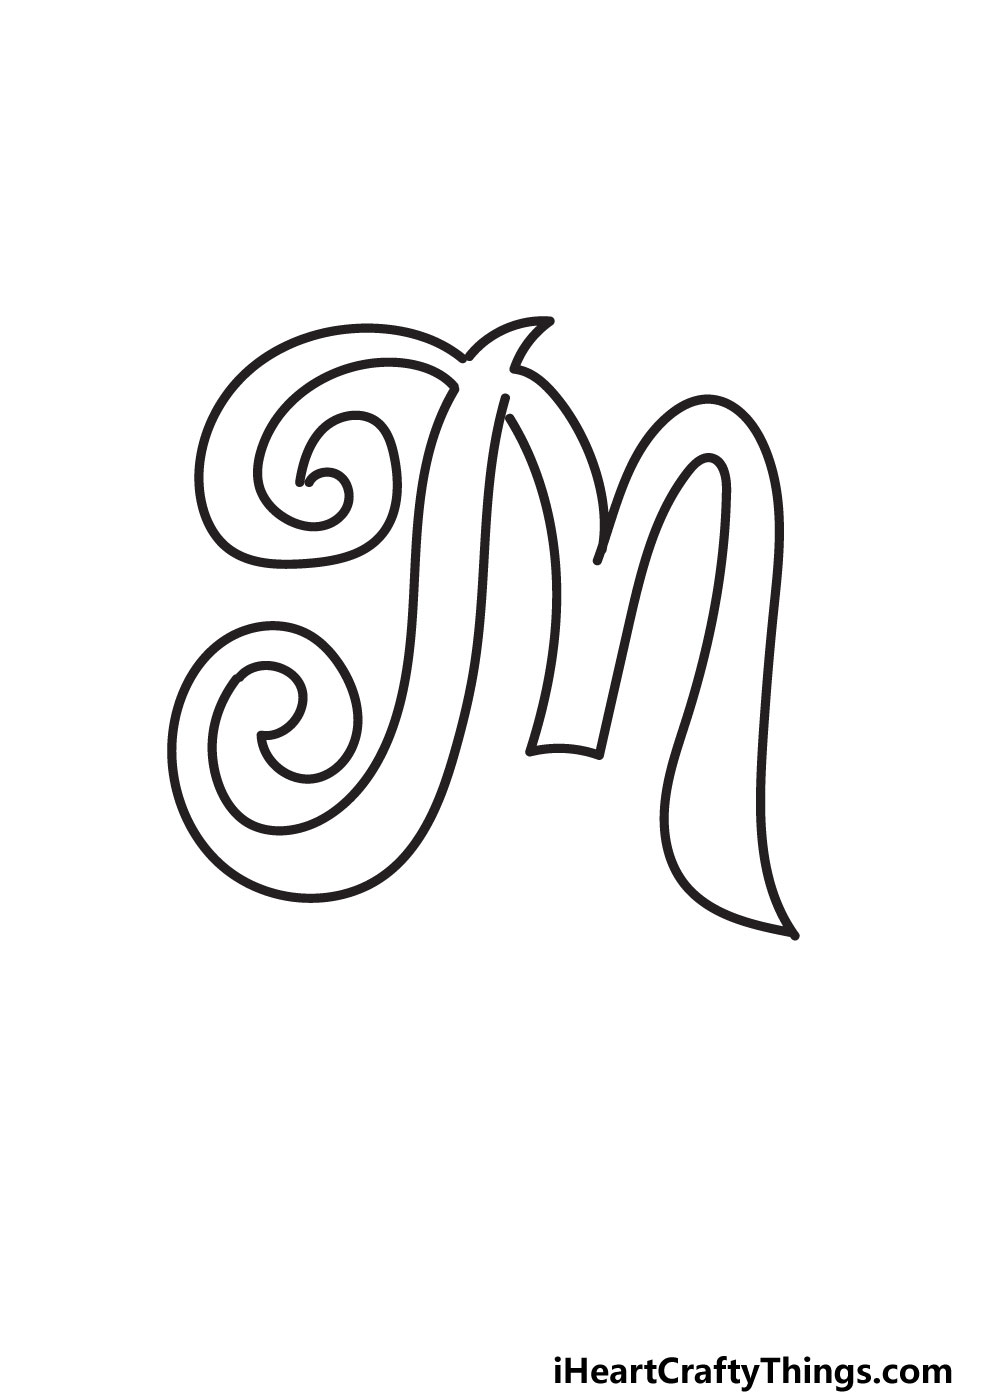
This is a step where we especially suggest following our example image as closely as possible as you draw.
First, we will begin simply with a sharp little shape near the top of the letter.

This will begin to fill in that gap left at the end of the previous step.
At the base of this sharp point, we will then draw a curved line heading down.
The line will slope up and around to form the top of the right-hand side of the letter.
This will then slope down sharply, ending in a sharp little section at the base.
Curl it back around and then up to form the right-hand leg of the letter.
Near the top, it will loop down again to create the central dip of the letter.
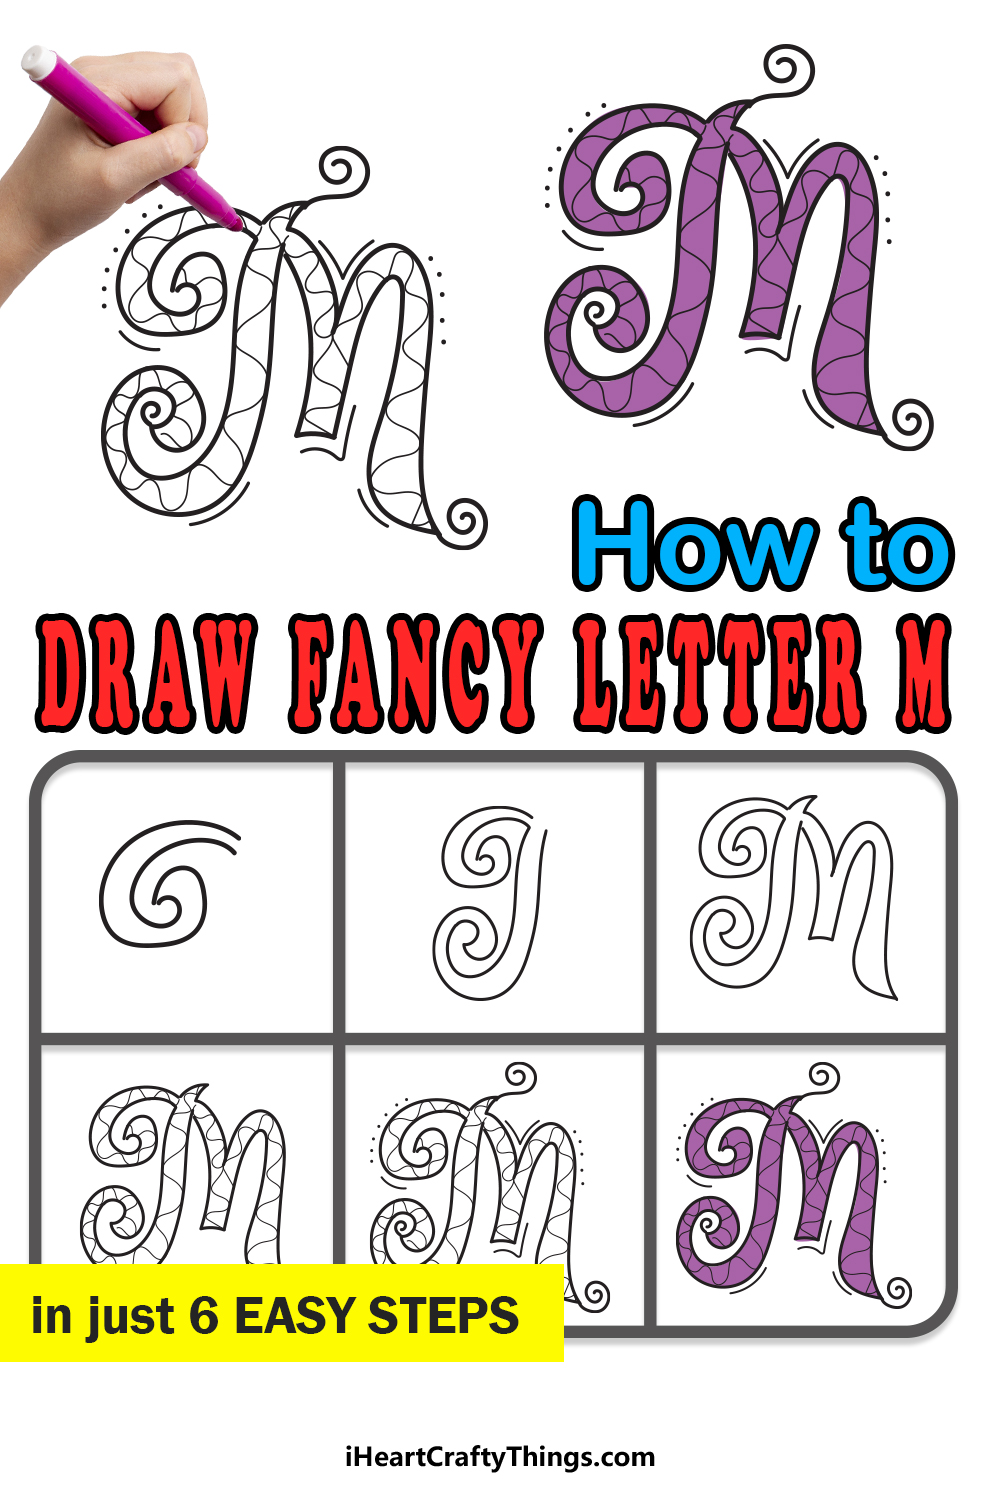
The dip will have a flat base before arching up to fill in the gap higher up.
This may sound complicated, but its easier than it looks if you go slowly.
It will also be easier if you drew out the letterin pencil to start with.

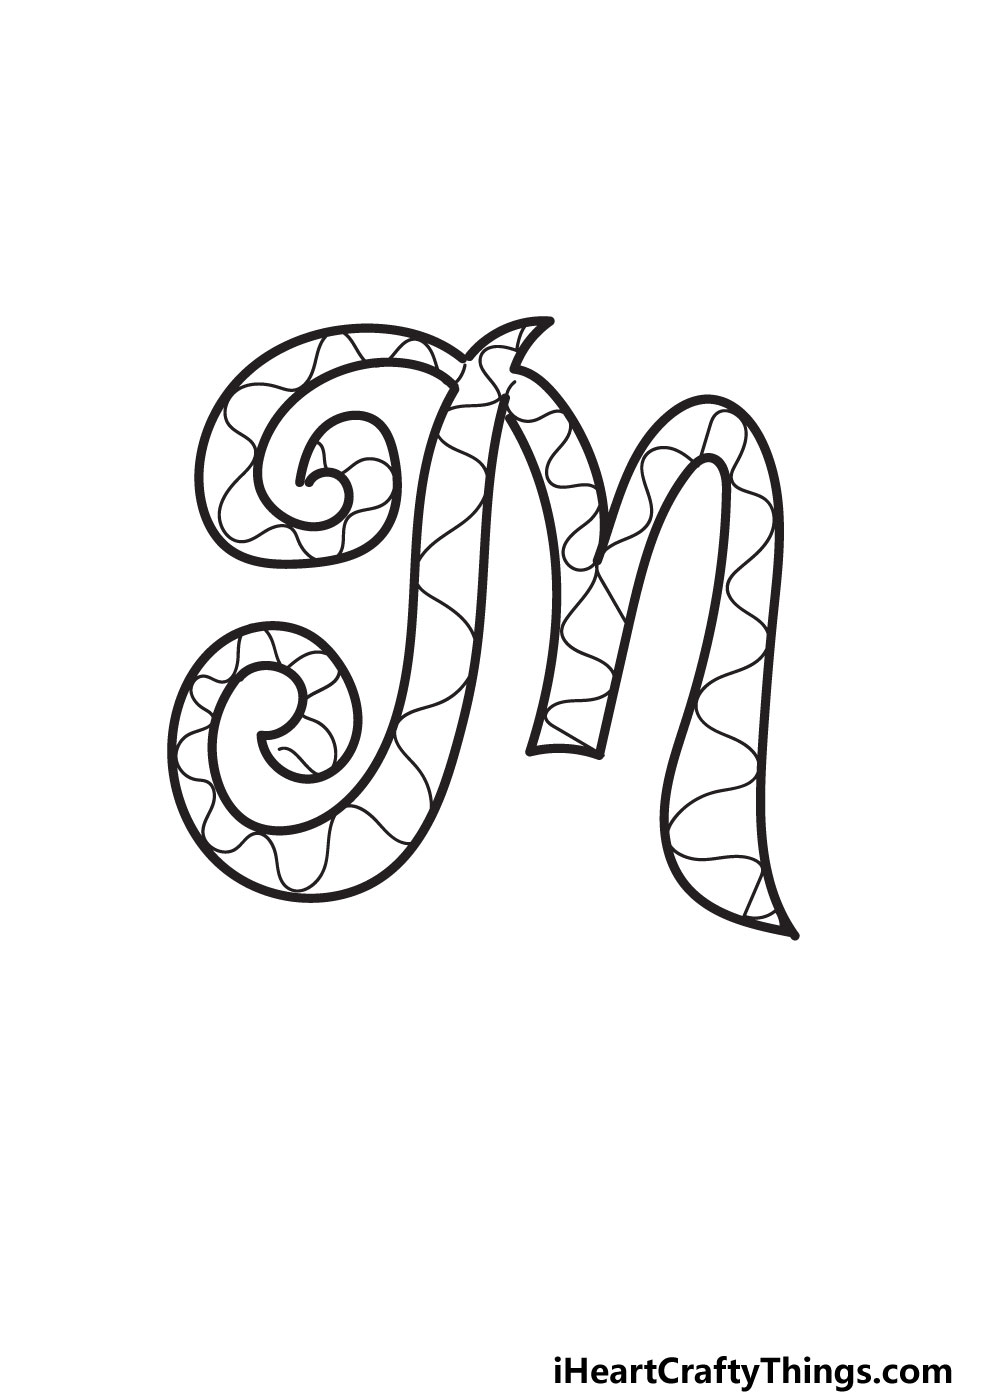
Speaking of those pencil lines, they can be erased now, as the outline is complete.
In our example, you will see the pattern we chose for the letter.
We used some wavy lines all throughout the interior of the letter to give it a more intricate look.

You could fill the letter with other patterns or texture details as well.
It can be difficult to decide with all these options!
We give you a base to work from by showing you some details we chose for our version.

Or, you could use them as inspiration for your own detail choices.
Its up to you, but for now we will stick to our designs.
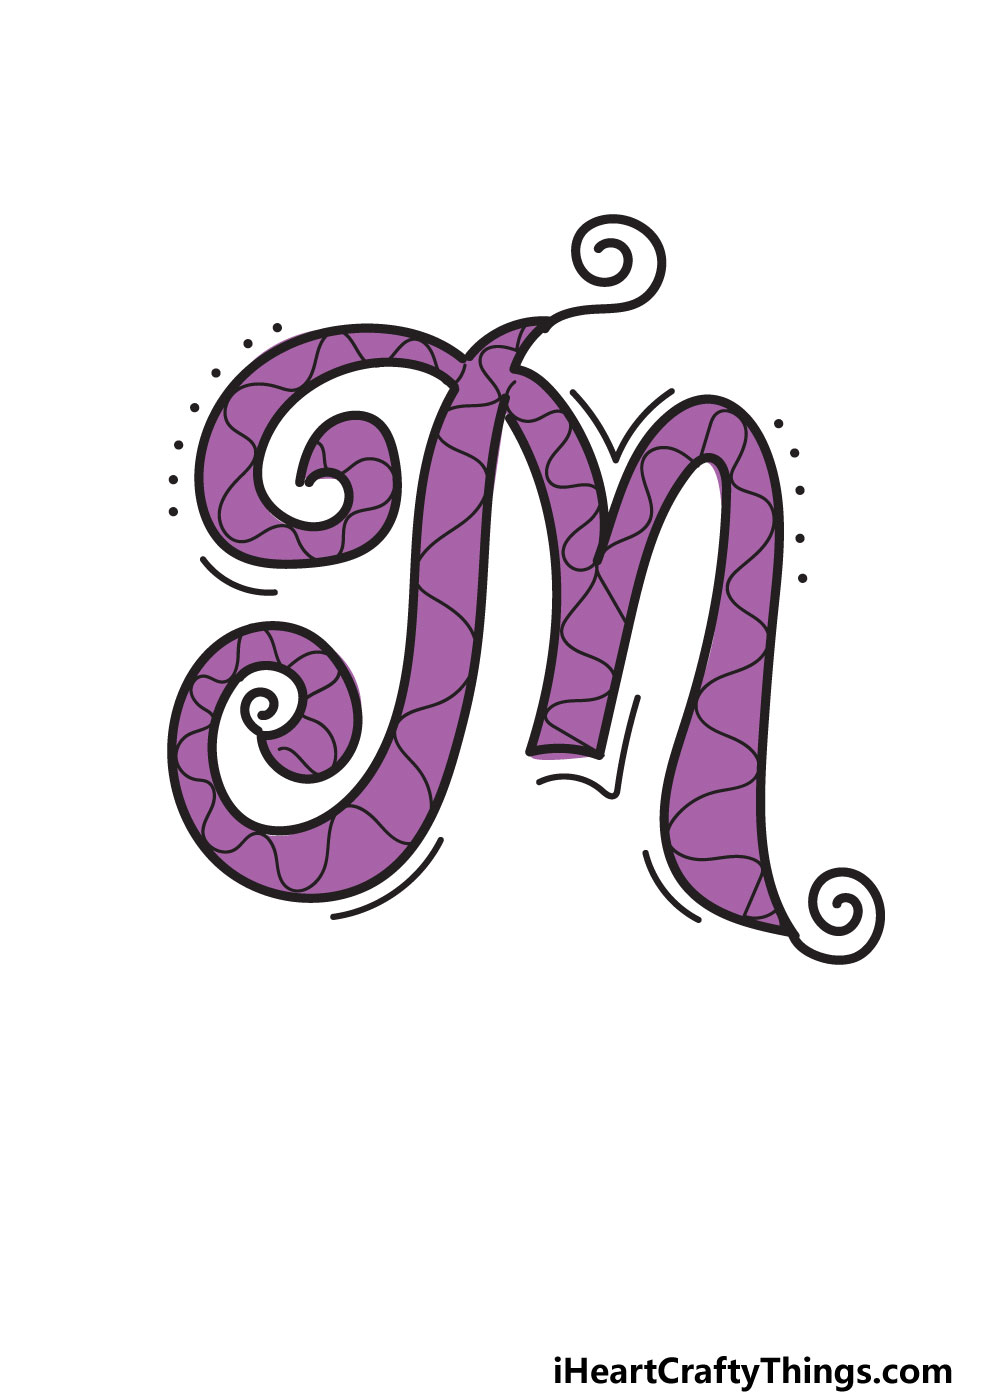
Next, we added some simple small dots along the upper edges of the letter.

Finally, we tried to create a sense of movement and vibrancy for the letter.
This was done by adding some lines around some of the outlines of the letter.
These are all examples of simple touches that can help to make this drawing come alive!

Can you think of any other little lines and shapes you could use to make this image more vibrant?
This is a step where you’re free to really show off your creativity!
We chose a rich purple color to give the letter a lovely soft look.

There are other ways to get creative with it, too.
For example, you could use a complementary color like orange to contrast it.
These are some ideas to try, but be sure to let your creativity flow!
My Final Tips To Make Your Fancy Letter M Drawing Even Better!
Before we close off this guide, we have a few more ideas for you to try!
Specifically, these will be based on creating a theme for your drawing to fill the background.
Its just one idea, but you could make a theme no matter what you choose!
What other themes could you create?
More From:How to draw
Printable Bubble Letters A Complete Guide!
