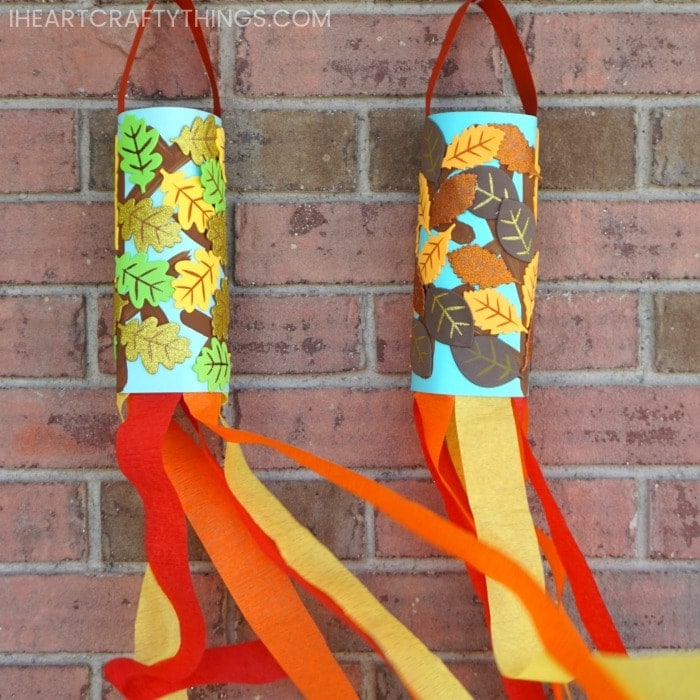
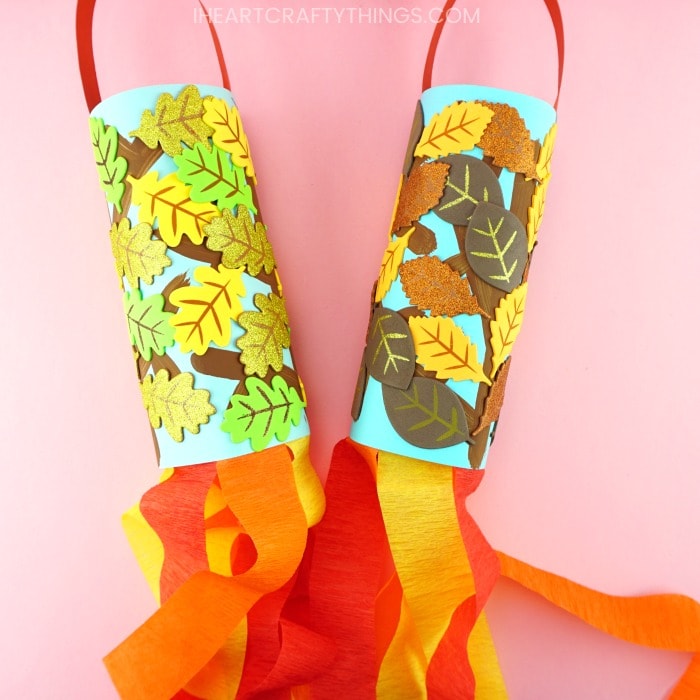
Celebrate the beautiful colors of the fall season with this simplefall windsock craft.
This post contains affiliate links to the products mentioned.
Read ourdisclosure policyfor more information.
Supplies Needed:
Tutorial:
1.
Draw branches on cardstock
Pour some brown paint onto a small paper plate.
Use a paintbrush to paint tree branches on your light blue cardstock.
Start by painting two branches centered on your cardstock.
Then paint branches and limbs coming out from each of the tree branches.
Allow the brown paint to dry completely.
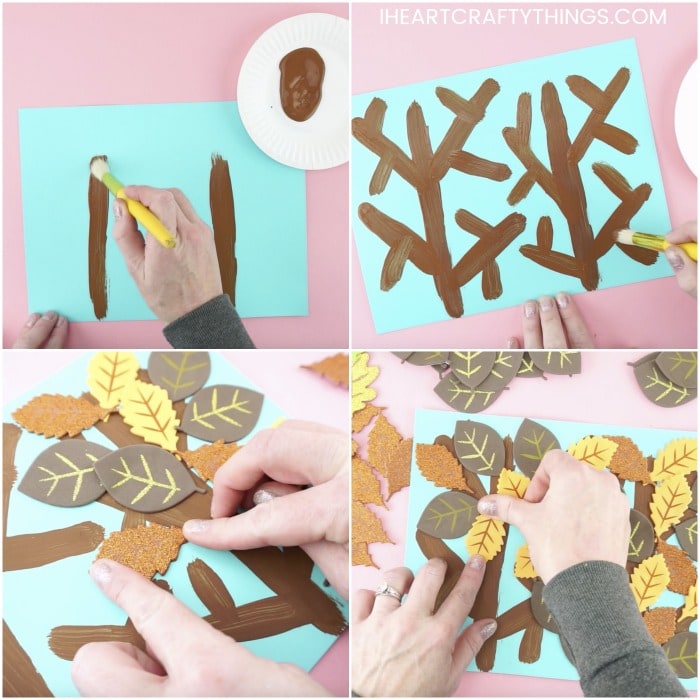
Peel the backing off a sticker and place it down onto your tree branches.
Continue adding leaf stickers
Continue adding leaf stickers around each of the tree branches on your light blue cardstock.
Cut crepe paper pieces
Cut six pieces of crepe paper about 24 inches in length.
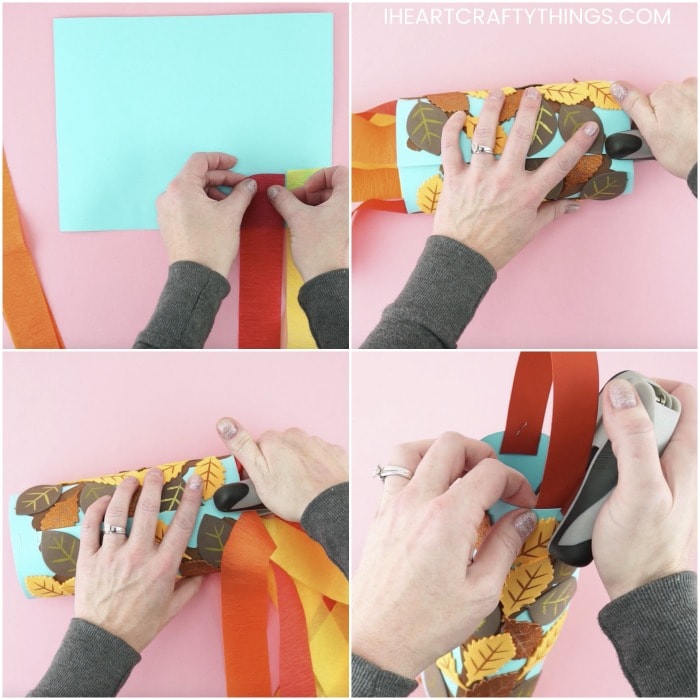
We used two red, yellow and orange pieces.
Glue those pieces to your artwork
Turn your fall tree artwork over.
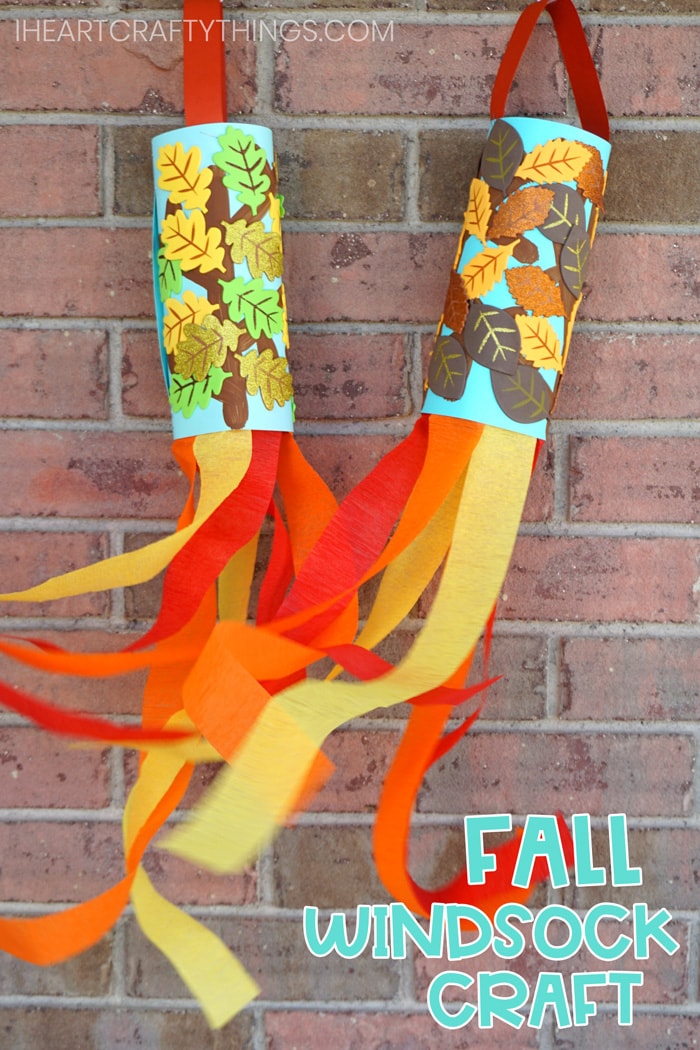
Connect artwork ends together
Bend your fall tree artwork, forming a circle and connecting the ends together.
Place two staples at the top and bottom of the windsock to join the ends together.
Make a handle from paper
Cut a length of red cardstock 1-inch by 11-inches.
Place the strip inside the top of the windsock and attach it with a staple.
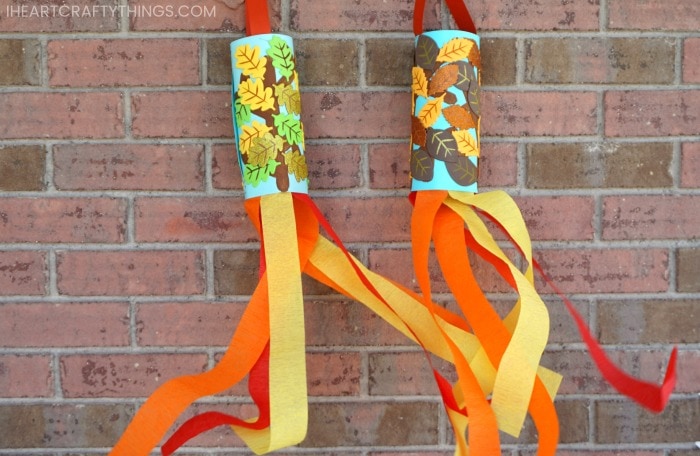
Then staple the opposite end of the red strip to the opposite end of the windsock.
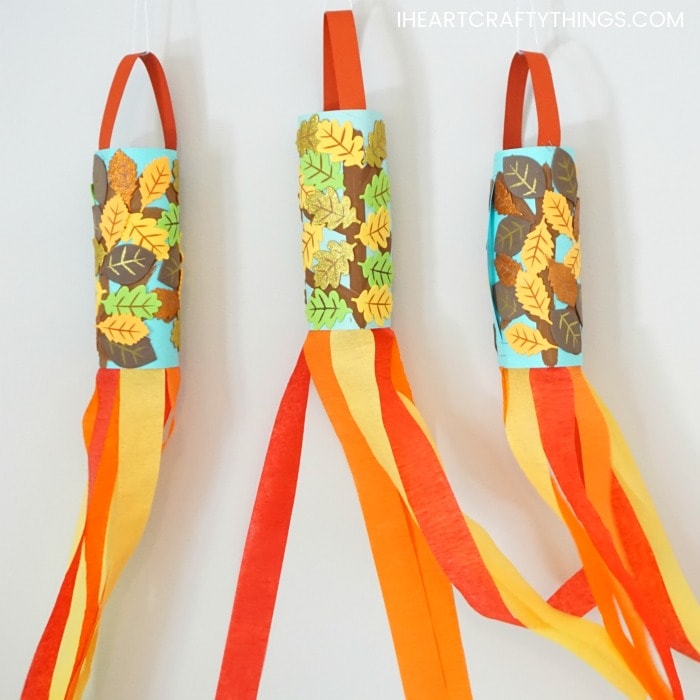
Hang your windsock outside and watch it dance around in the fall wind.
Or display the windsock indoors for some festive fall decor.
Watch the video below for a step by step guide on how to make this colorful windsock craft.