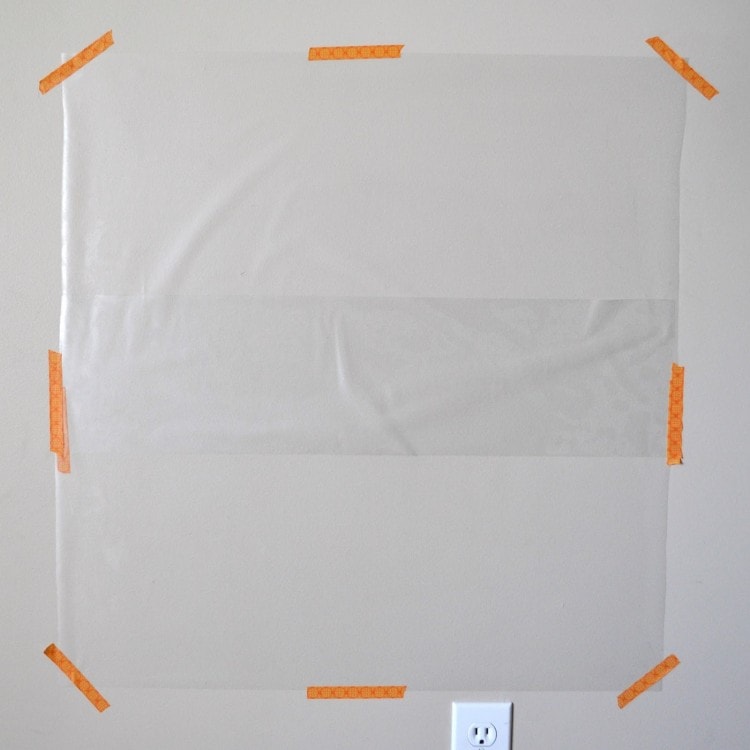
We have grown very fond of Contact Paper Sticky Wall Activities this past year.
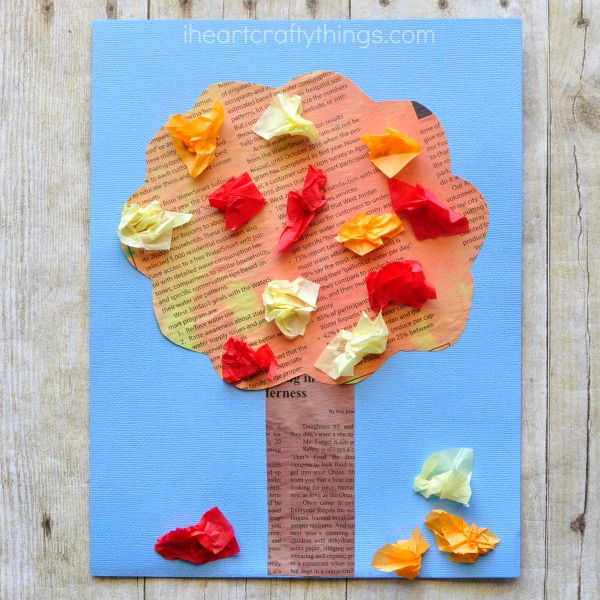
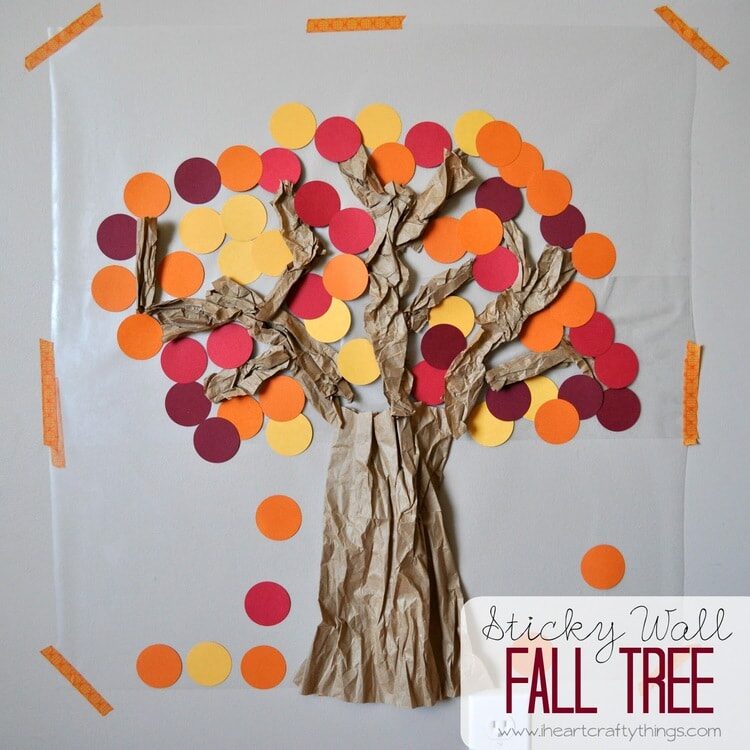
We recently created a beautifulFall Tree out of a Contact Paper Sticky Wall.
This post contains affiliate links, read ourDisclosure Policyfor more information.
Materials you will need:
Directions:
1.
Prepare all tree pieces
Get all of your tree pieces ready.
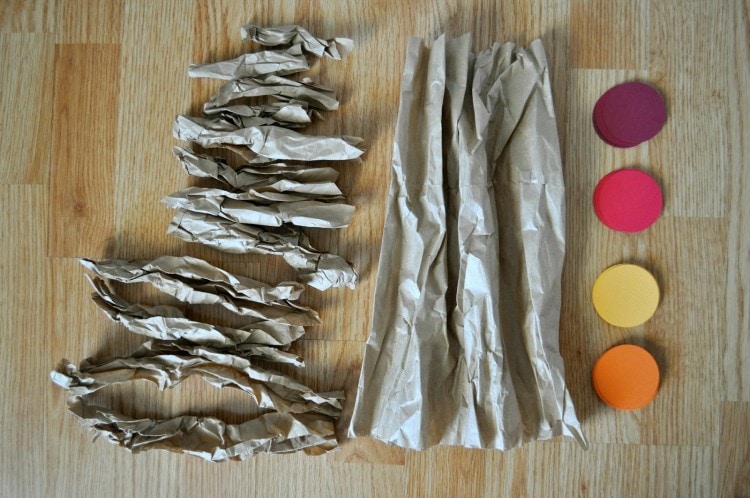
First I cut pieces for our tree.
I cut a large piece for a trunk and several small strips in varying lengths for the branches.
Crinkle all of them to give them more of a realistic look.
Cut out as many as you would like.
Kids love to help with this part!
We cut out around 60, but I think our tree could have used even more.
Start by putting your trunk on your sticky wall.
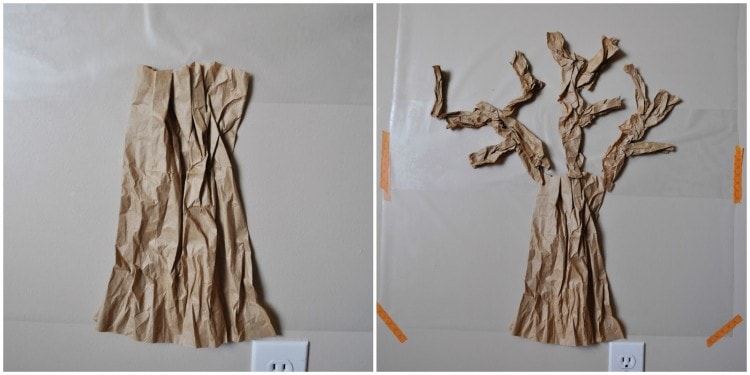
Then add all of your branches.
My daughter asked for some help with where to place the branches.
I let her guide the activity though and only assisted when she asked.
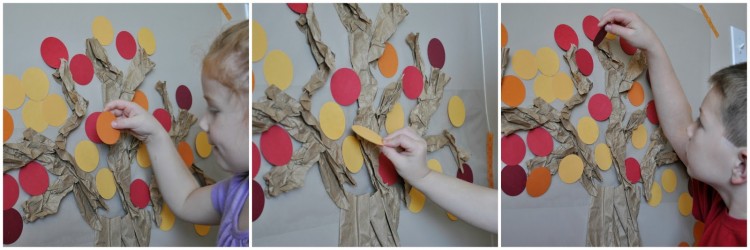
Add leaves
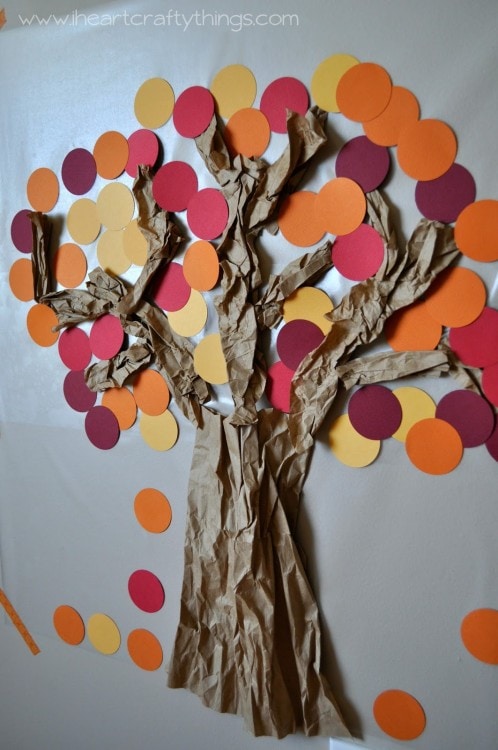
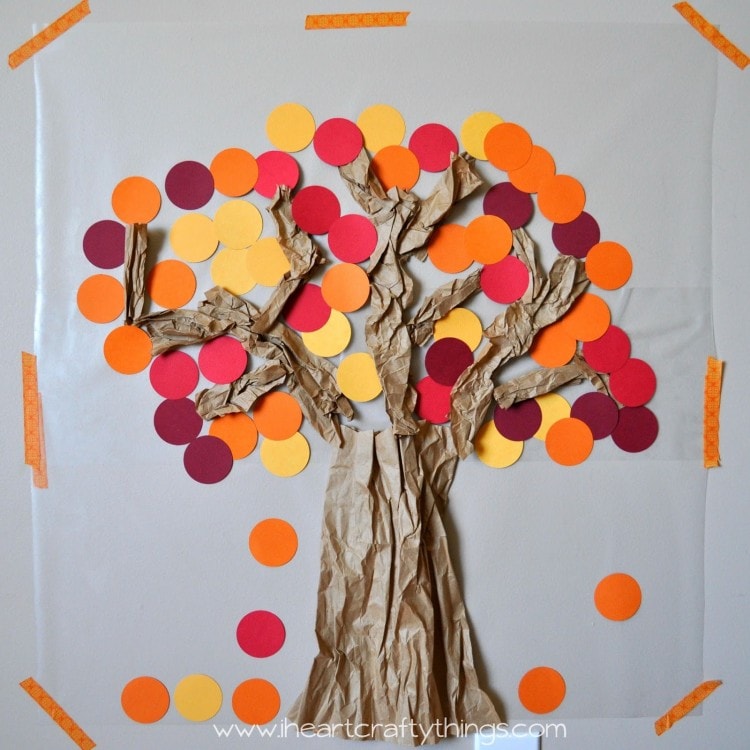
Add all of the leaves onto your tree branches to finish your tree.
We of course had some falling off the tree and on the ground.
Even big brother got in on the fun on this one.
Its pretty hard to resist!
The crinkled brown paper popping off of the contact paper really adds dimension to this tree.
I am love with its beautiful fall colors!
Note:We had a couple of our branches that had a little trouble staying on our tree.
It might have been the weight of the packaging paper we used.
Lunch sacks and tissue paper would be a great tree base material.