Are you gearing up to learn about some arctic animals this winter season?
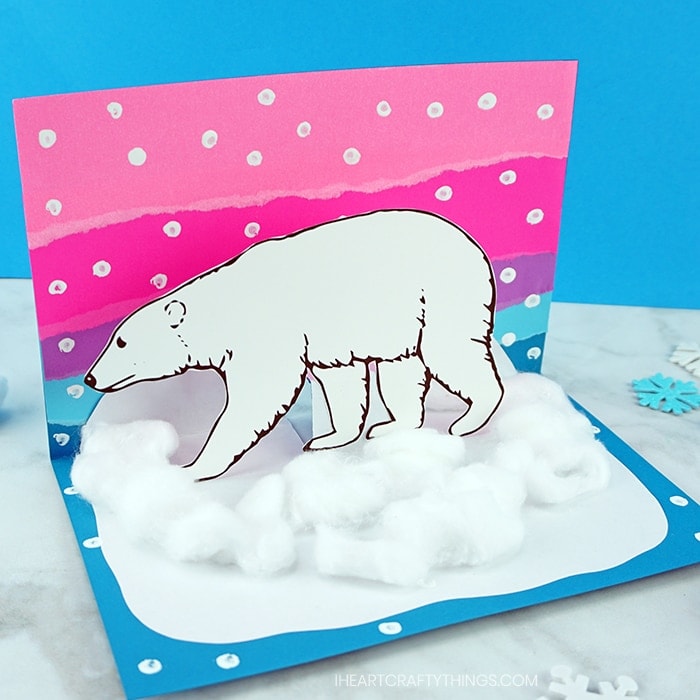
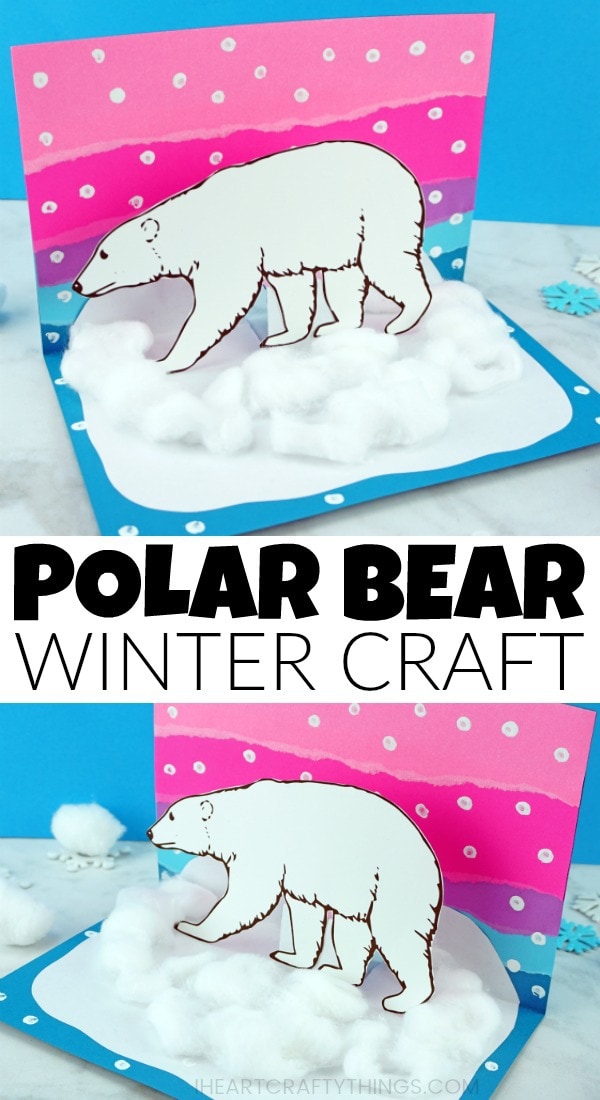
If so, you will love this awesome polar bear craft!
One of our favorite animals to learn about every year is the polar bear.
We also lovesnowy owlsand cutepenguins.
This post contains affiliate links to the products mentioned.
Supplies needed:
Instructions:
1.
Hold paper in half
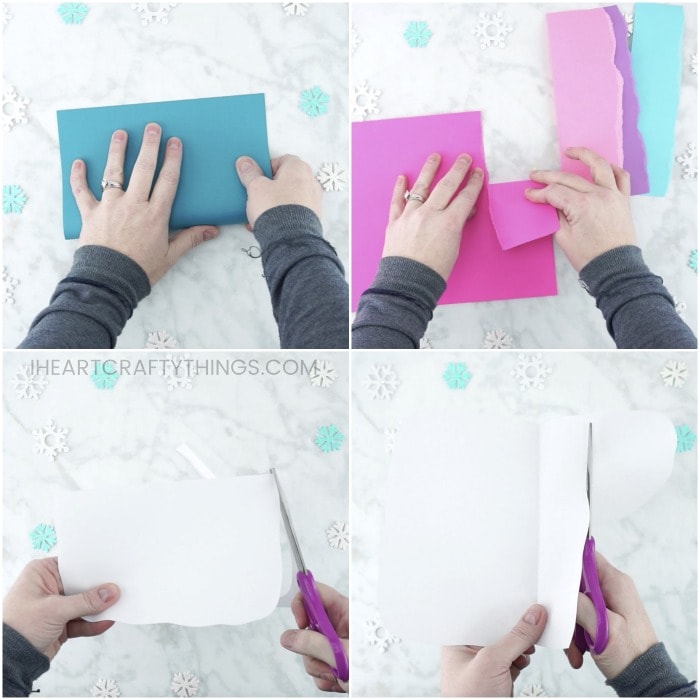
Begin by folding your dark blue cardstock in half.
Set it aside for a moment.
Tear strips out of colored paper
Gather your pink, purple and blue colored paper.
Tear a 2-inch strip off the top of each paper.
These colors will be used to create your winter sky.
Make a snow out of white paper
Fold your white paper in half.
Then use scissors to trim around the outside edges of your paper.
Glue all paper strips to the card
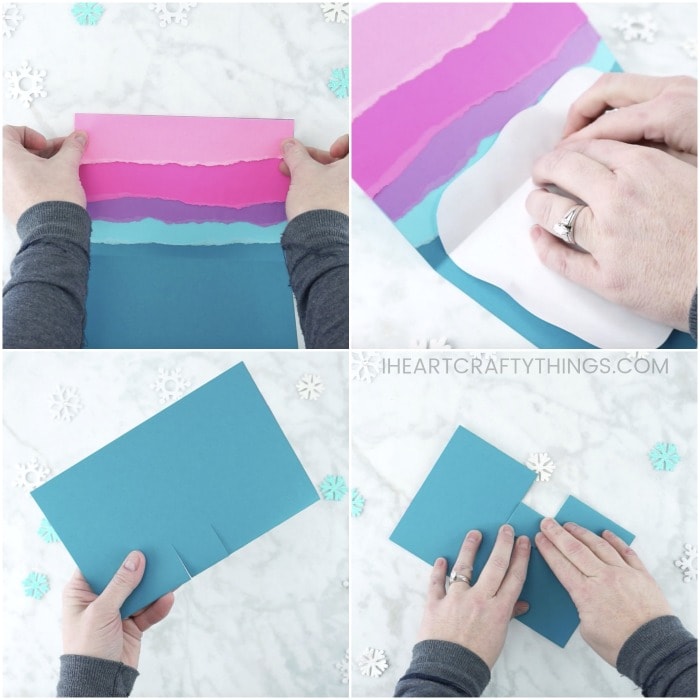
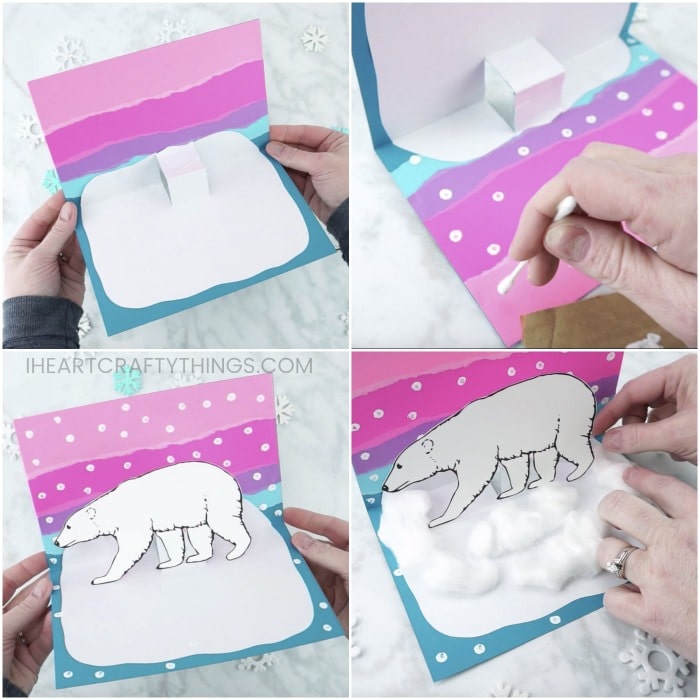
Open up your folded dark blue cardstock.
Add glue to it and layer your colored paper strips to make your winter sky background.
Now add glue on the back of your white paper.
Line the creases of the white paper and dark blue cardstock together and then glue them to each other.
Fold down the blue paper along the slits you cut.
Draw snowflakes
Add a small amount of white paint to a piece of cardboard or a paper plate.
Dip a Q-tip into the paint and press it onto the colorful sky background of your polar bear craft.
Continue dipping the Q-tip in paint and then all over the background to create snowflakes falling from the sky.
You may even like to add some on the bottom half of your craft.
Print & cut out bear template
Print out thepolar bear craft templateon white cardstock paper and cut it out.
Glue bear to the card
Add glue on the pop-out section of the folded cardstock.
Attach your polar bear to the glue.
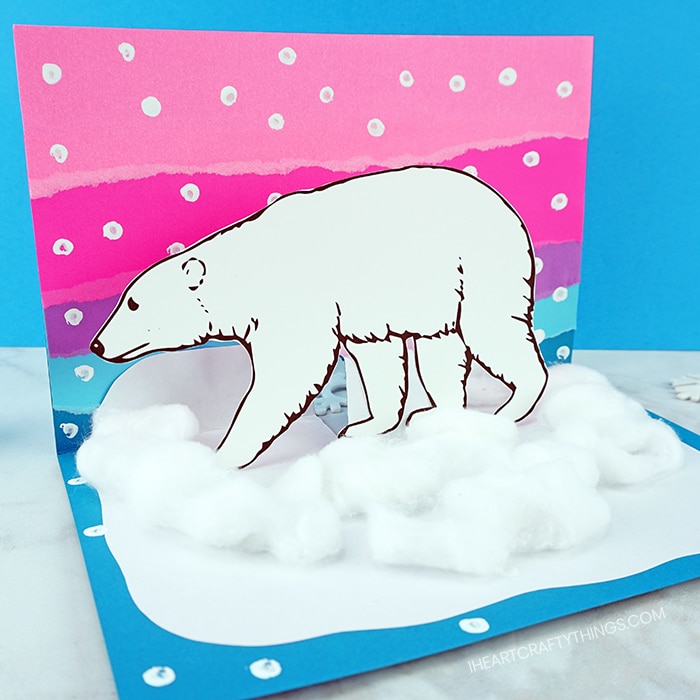
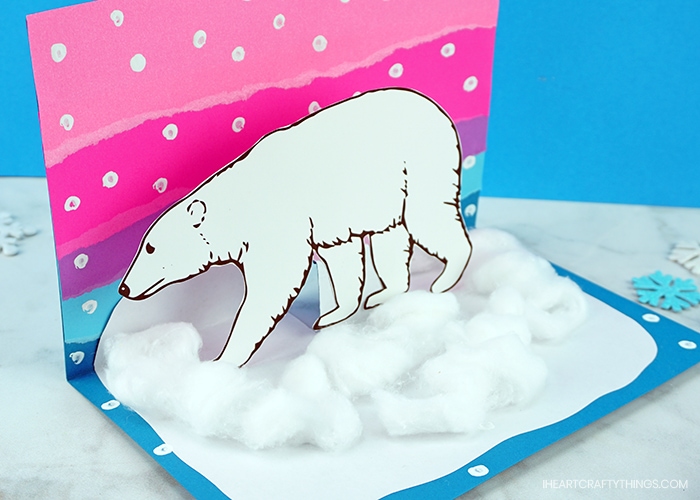
Your awesome polar bear craft idea is complete!
Cotton ball snow at the bottom of the craft adds extra texture and dimension to the polar bear too.